
Color grading is an essential step in creating professional and cinematic FPV drone videos. While LUTs can be convenient, they don’t always produce the desired results. In this tutorial, we’ll cover the basics you need to know for creating impressive cinematic FPV videos, including GoPro camera settings, color correction and color grading techniques.

To get the most out of color grading, start by investing in a high-quality action camera. GoPro, Insta360, and DJI are all excellent brands to consider: https://oscarliang.com/action-camera/
Choosing a Video Editor

In this color grading guide, we’ll be using DaVinci Resolve as our video editor of choice. It’s free, powerful, and has all the features FPV pilots need for editing their footage. I highly recommend it if you are new to video editing.
For a tutorial on getting started with basic editing in DaVinci Resolve, check out this article: https://oscarliang.com/how-to-use-davinci-resolve/
Optimizing GoPro Settings

To capture professional-quality footage, enable ProTune on your GoPro. This feature allows manual adjustments for settings like shutter speed, white balance, flat color profile, ISO, stabilization, and sharpness. Using a flat color profile helps retain details in shadows and highlights, offering more flexibility for balancing color and contrast during post-production.
For more information on the best GoPro settings for cinematic FPV, read this article: https://oscarliang.com/gopro-settings-fpv/
Optimizing DJI O3 Settings
If you use the DJI O3 camera instead of the GoPro for filming, here are my recommended settings for best video quality: https://oscarliang.com/dji-o3-air-unit-fpv-goggles-2/#O3-Air-Unit-Camera-Settings
Applying Stabilization
Before color grading, make sure your footage has been stabilized first, it will make it much more pleasant to look at. For GoPro, my choice of stablization tool is Reelsteady, but you can also use Gyroflow, the result is comparable so don’t stress yourself with the choice. For DJI O3, and many other action cameras with built-in gyro, you can just use Gyroflow.
Color Correction
Color correction aims to achieve clean and natural color representation in your footage. It involves fixing exposure, white balance, and saturation. Video editors like DaVinci Resolve offer tools such as Waveform, RGB Scope, and Vectorscope to help you correct these elements.
Here’s raw footage.
Adjust Exposure
The Waveform tool (bottom right of the screen) measures light intensity on a scale from 0 (pure black) to 1023 (pure white).

To adjust exposure, locate a frame in your video where you would consider the most important moment (what we call the hero shot), use this as your reference.
Find the Three Color Wheels in your video editor, which consist of Lift (adjusts shadows), Gamma (adjusts mid-tones), and Gain (adjusts highlights).

Rotate the scroll wheel under “Lift” and “Gain” (these are the dark and bright parts of your video), and align the black tones with 0 and the white tones with 1023 for optimal exposure. It’s okay to go beyond the limits (or within) as long as you are happy with how it looks.
Keep monitoring the Waveform diagram as you play the video to avoid overexposing or underexposing parts of the footage.

Contrast
After setting the highlights and shadows, you can fine-tune the contrast by increasing the Contrast value (Cont).
Optionally you can also slightly lowering the midtones using the Gamma scroll wheel – the amount of adjustment depends on your experience and personal taste.

White Balance
To adjust white balance, there are 3 methods (all located at the top left): Auto Balance, Color Picker and manually setting it.

You can give Auto Balance a try first because it’s the easiest, but it’s also the least reliable and I generally don’t use it.
To use the color picker tool, you need to select something white in the video as a reference. Again, it’s an easy method but it’s not always possible to find something white.
Alternatively, you can manually set the white balance by entering “Temp” and “Tint” values. A trick I sometimes use is by looking at the RGB Scope (Parade) and align the red, green, and blue intensity levels. If you reduce Temp, the whole scene will go blue, if you increase Temp the whole scene will go red. Tint will make the image look either more green or pink.
However, in our example, I was filming during golden hours, so I deliberately made the footage look more orange and warm by bumping up the temperature and tint. Auto Balance in this case would just make the image look a bit more neutral by reducing temp, which wouldn’t work against what I want to achieve here.
Saturation
For saturation adjustment, you can use the Vectorscope, which measures color information. As you increase saturation (Sat), the Vectorscope lines will expand. Avoid exceeding the limit, and aim for a natural look. In my experience, a saturation level of around 60 to 65 often works well for most of my GoPro and O3 footage recorded with a flat color profile.
I often have “Color Boost” set to 10 to make the colors pop a bit more.

Sharpness
If you recorded your GoPro videos with low sharpness, you might need to increase it during post-production. Values around 0.47 or 0.48 usually yield satisfactory results, with lower values resulting in sharper footage.

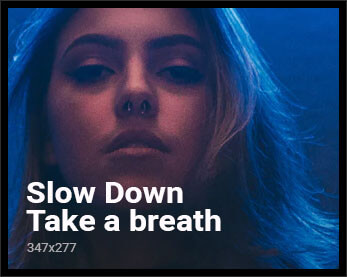
After Color correction, the footage looks like this now.
Color Grading
Color grading is a creative process that enhances the atmosphere and emotion of your video. By using the Three Color Wheels and Curves, you can create unique tones for shadows, mid-tones, and highlights and adjust saturation, intensity, and color in specific areas.
To begin color grading, add another node by right-clicking on the existing node, selecting Add Node, and choosing Add Serial.
Three Color Wheels
One easy method for color grading is using the Three Color Wheels. As mentioned earlier, each wheel corresponds to a specific tone: shadows, mid-tones, and highlights. For each tone, you can modify the intensity and color. Combining opposite colors in shadows and mid-tones can create a more interesting look.

Curves
My favourite way to color grade is by using the curves. Curves offer a powerful way to create unique looks by targeting single color ranges and adjusting saturation, intensity, and color.
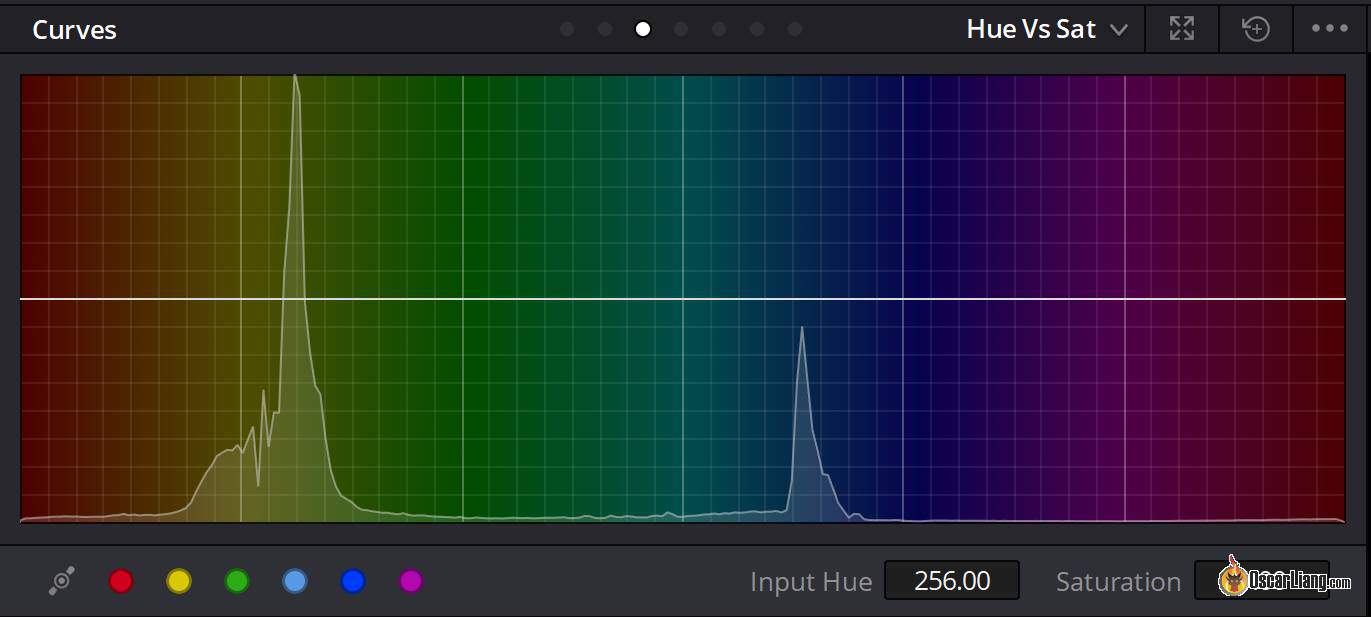
These are the three main Curves I often use:
- Hue vs Sat: Change the saturation of specific color areas (e.g., increase the sky’s saturation by selecting cyan/blue, or adjust the saturation of trees by selecting yellow/green). To modify saturation, drag the curve up or down.
- Hue vs Hue: Alter specific colors, to make that color look more green or purple.
- Hue vs Lum: Adjust the brightness of specific color areas to further enhance your footage.
For instance, you can use Curves to make green leaves look more vivid, or to remove color tones that you don’t like such as the red in brick walls. Be creative and experiment with different settings – there’s no right or wrong approach, as it ultimately comes down to personal taste. Enjoy the process of discovering what works best for your FPV drone videos, and create your own unique style!

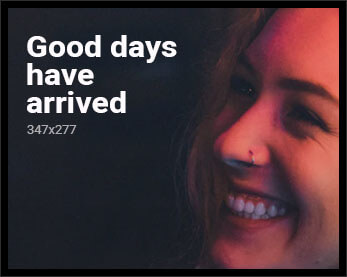
After color grading, the footage looks like this:
LUTs
LUTs, or Look-Up Tables, can be used together with color grading. Your footage may already look great after color grading, but using additional LUTs can help spice things up even more. It’s up to you whether you want to further enhance your footage with LUTs to create a distinctive look.
First, ensure proper color correction before applying LUTs as an overlay layer (or additional serial node in Davinci Resolve), and adjust the opacity to blend with the footage by going to to “Key” section, and lowering the “Gain” value. It’s simply a matter of choosing your favorite LUT and clicking to apply, so we won’t go into detail here.
For DJI O3 camera, I find the built-in LUT in Davinci Resolve called “DJI Phantom4 DLOG2Rec709” a pretty good choice. In fact I think most people would be happy to just apply this LUT without additional color grading.
Adding Grain
We want to avoid digital noisy grain by lowering ISO, but some grain is actually pleasing to look at. We can add such grain in our video by going to “Settings”, “Film Grain”, “35mm 400T”, and adjust grain size to your liking. The difference might be subtle but it can make your video look more like a professional film.
Upscaling For Youtube
Finally, if your priority is image quality, you should definitely render your video in 4K, even if it was recorded in a lower resolution. That’s because Youtube retains higher bitrate with higher resolution/frame rate videos. Generally I render my footage in 4K (3840×2160), 65Mbps bitrate.
See this article for more information about upscaling: https://oscarliang.com/upload-dji-fpv-footage-youtube/
Conclusion
Color grading is a crucial aspect of creating stunning and professional cinematic FPV videos. By properly correcting colors and utilizing color grading techniques, you can significantly enhance the visuals of your FPV footage. Regardless of your flying skill levels, understanding and applying these concepts will elevate the quality of your videos and help you stand out in the world of FPV filmmaking. So, go ahead and experiment with various color grading techniques and LUTs to discover your unique style and create breathtaking FPV drone videos.
Edit History
- May 2023 – Tutorial created.
- Apr 2024 – Updated.

