
With this new system of detecting obstacles, DJI included many of the highly sought-after features and functions of its larger prosumer drones. One of these features would be waypoints.
Fast forward to the 2023 release of the Mini 4 Pro and its new omnidirectional obstacle avoidance system, and flying waypoint missions has gotten even better.
In this article, I will cover what waypoint missions are, and how to set up and save waypoints on the DJI Mini 4 Pro.
If you are interested in flying waypoint missions, this step-by-step guide should help you get well on your way.
What are Waypoints?
When speaking of flying drones, waypoints are a function that allows the DJI Mini 4 Pro to automatically fly a pre-planned route while performing various camera actions.
These actions include automatically taking photographs and videos along the route of areas pre-designated by the drone operator.
The built-in DJI waypoint feature for consumer drones was previously only available for the Mavic 3 Series.
As DJI’s direct competitor, Autel has had waypoint modes on many of its consumer drones for several years. It’s a much-needed move for DJI to add waypoint missions to their lightweight series of drones like the Mini 4 Pro.
Prior to DJI adding waypoint functionality for their drones, the only way to get waypoints would be through 3rd party flight app developers.
This oftentimes took quite a while, as developers have to wait for DJI to release the SDK (software development kit) for the particular drone.
After this, the 3rd party company would need time to build in the support for said drone model.
Using 3rd party software could also be inconvenient for those owning either DJI RC’s or RC 2’s only. This is because 3rd party programs cannot run on these DJI all-in-one remote controllers.
This created another inconvenience as now the owners of the drones that run those remote controllers would need to purchase additional DJI RC-N1, RC-N2, or even DJI RC Pro remote controllers.
Of course, using quality 3rd party flight control software is not cheap. For example, Litchi is currently between $24 and $26 for either iOS or Android devices.
If you are using both, you would realistically spend over $40.
By comparison, the DJI Waypoint feature is free and included in the DJI Fly app for various makes of DJI drones and remote controllers.
» MORE: DJI Waypoints (Explained for Beginners)
Use Cases for Waypoints
With waypoints being an autonomous feature, any waypoint mission can be saved and reused over and over again, running with the exact same parameters each and every time, if needed.
Because of this feature, you can go to a saved waypoint location and run a previously saved mission over and over again, exactly the same every time.
With the ability for saved waypoints to be reused, they are perfect for:
- Construction progression photos and videos
- Before and after shots
- Seasonal progression photos and videos
- Day-to-night real estate videos
» MORE: Does DJI Air 2S Have Waypoints? (Explained)
How to Set Up and Run Waypoint Missions
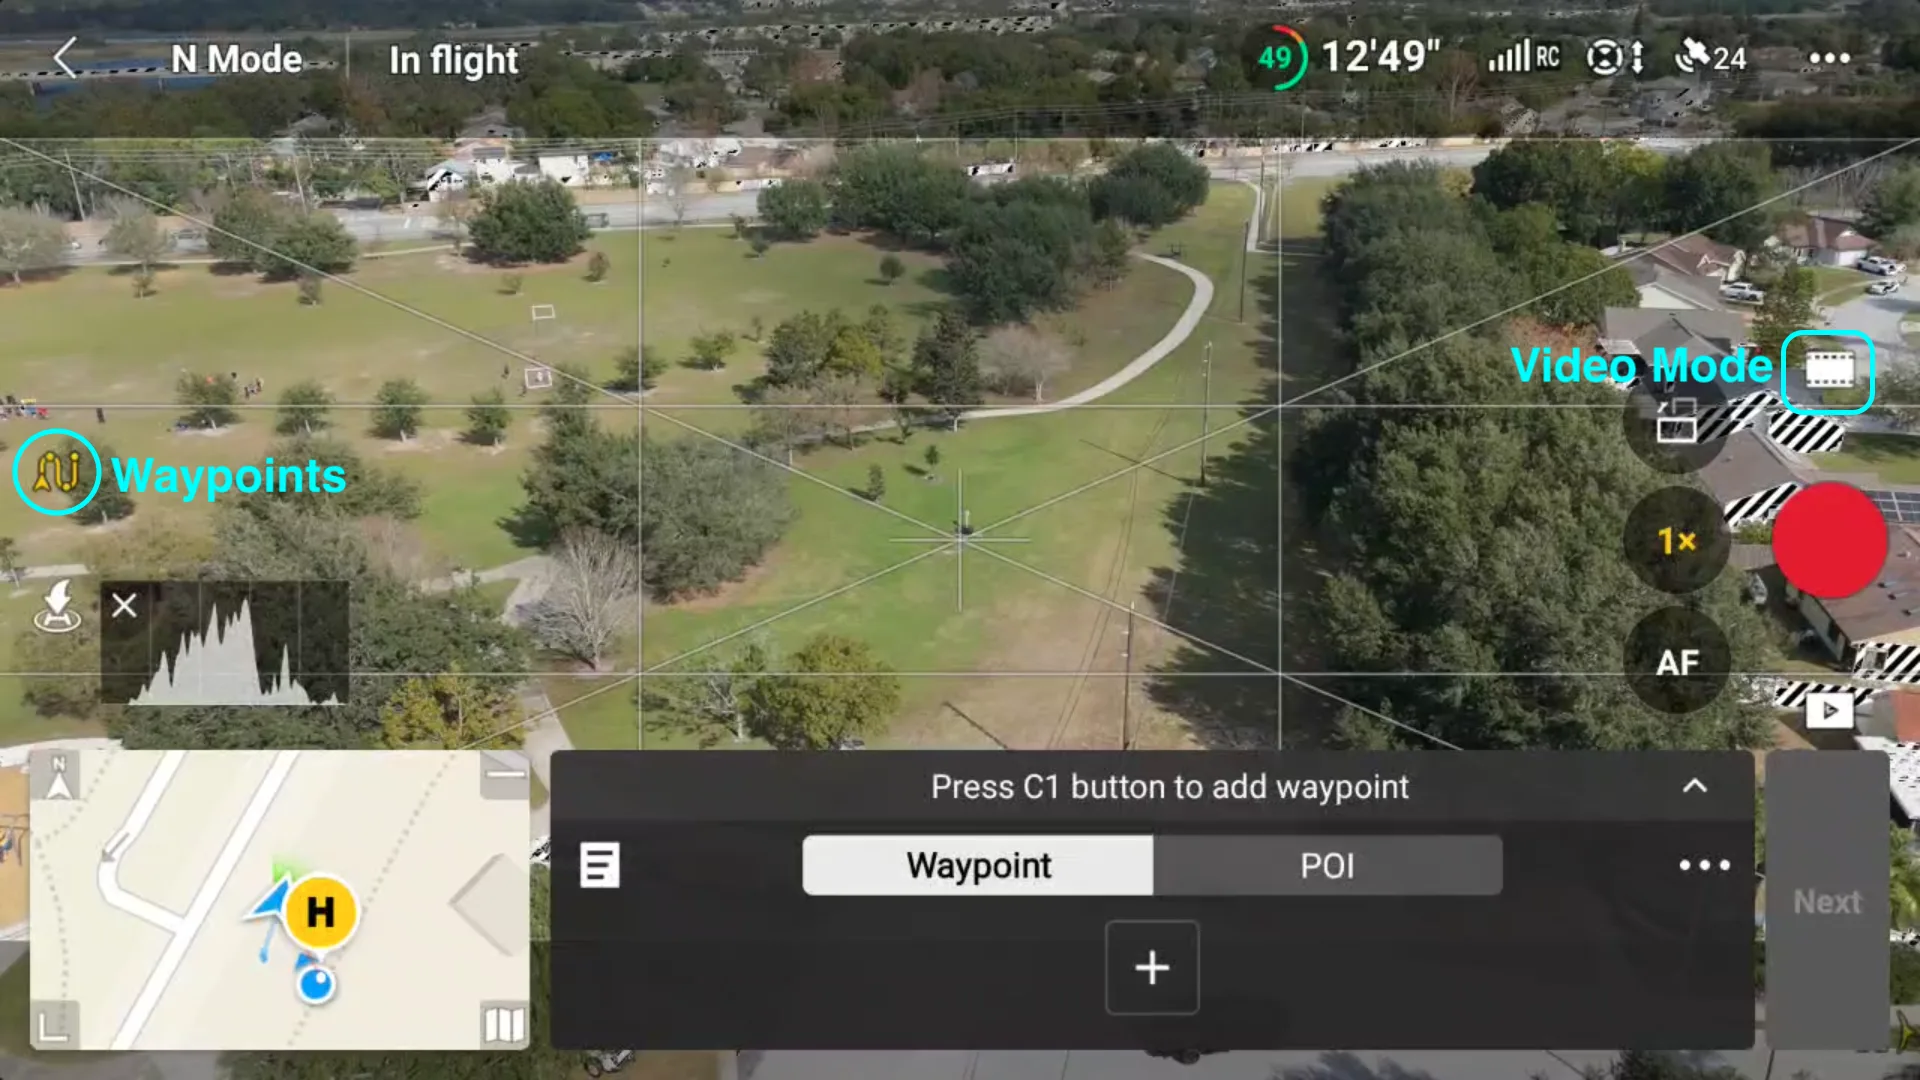
Note: Waypoint missions are only available when in video mode.
Basic waypoint setup:
Step 1: While in Video Mode, fly to the location where you’d like to start your waypoint and tap the Waypoints icon on the left of your screen.

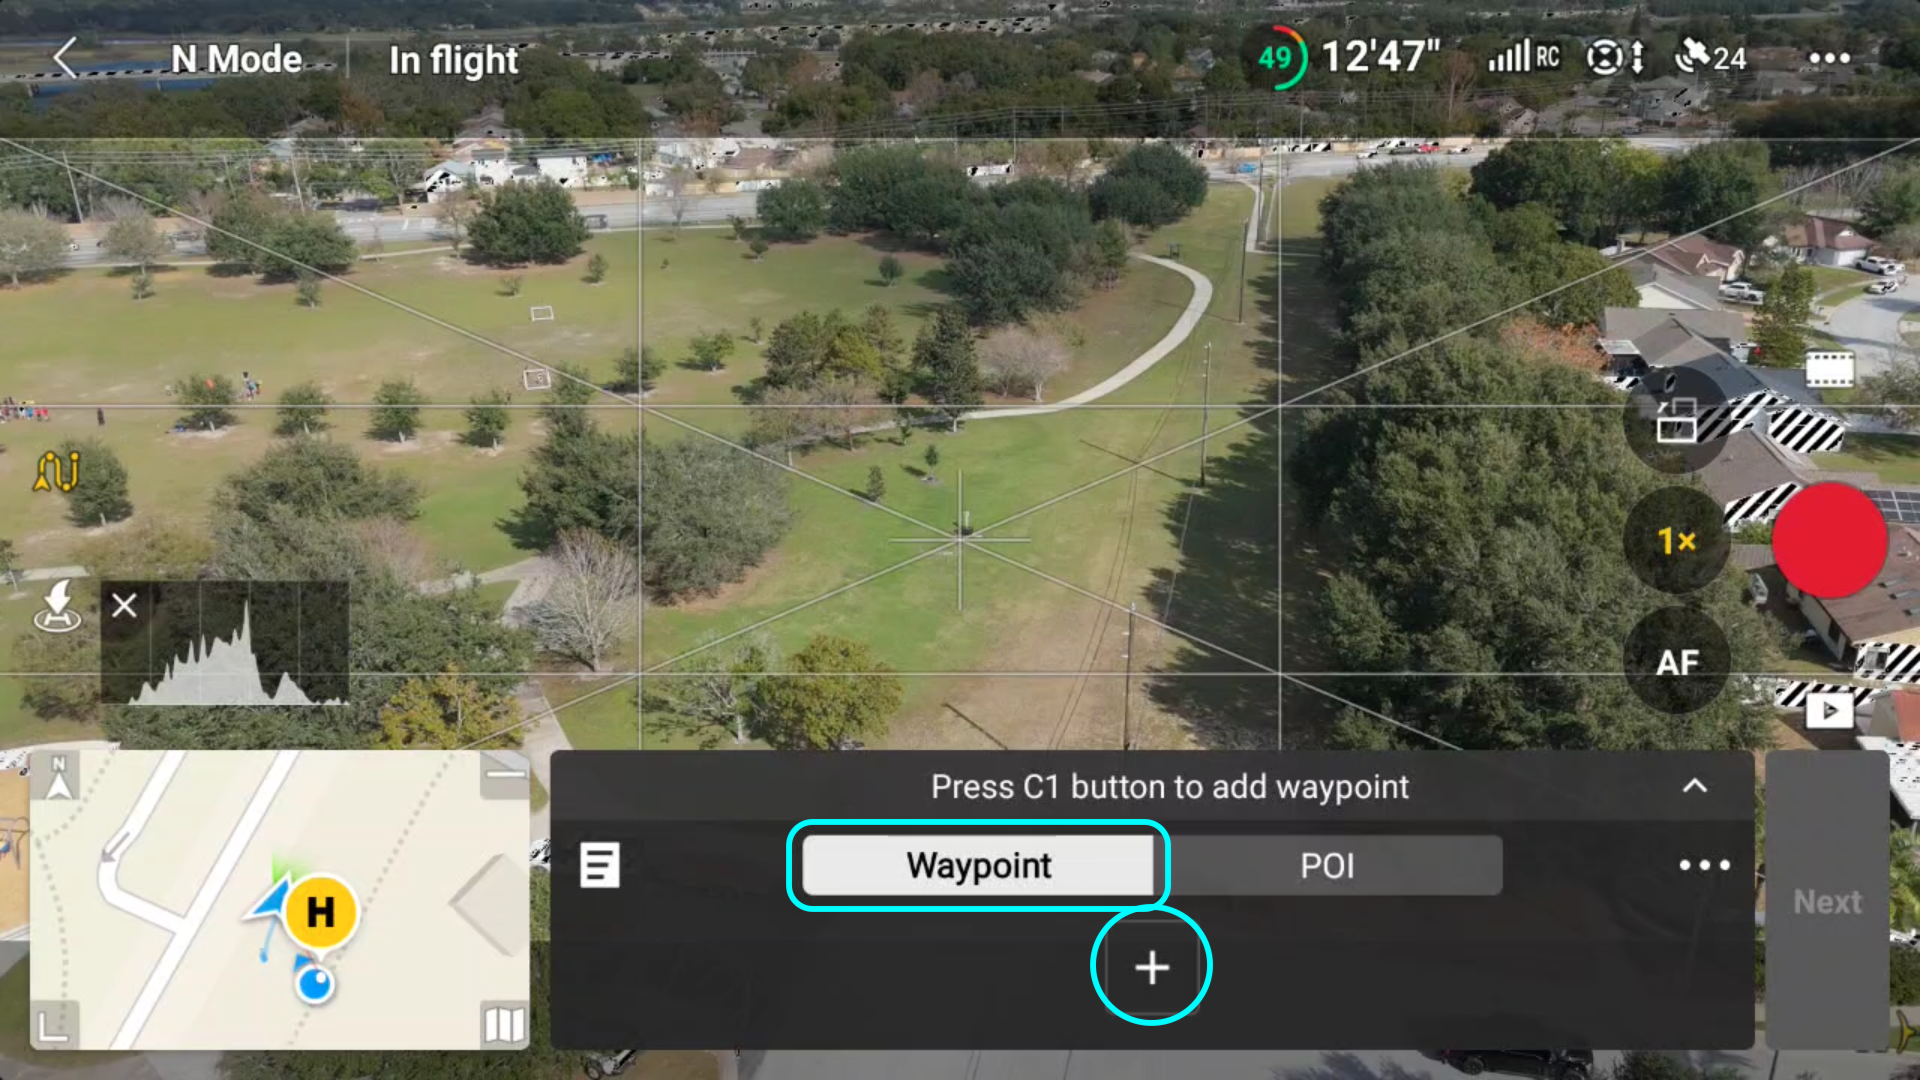
Step 2: Press either the C1 button or the + symbol to add a waypoint.

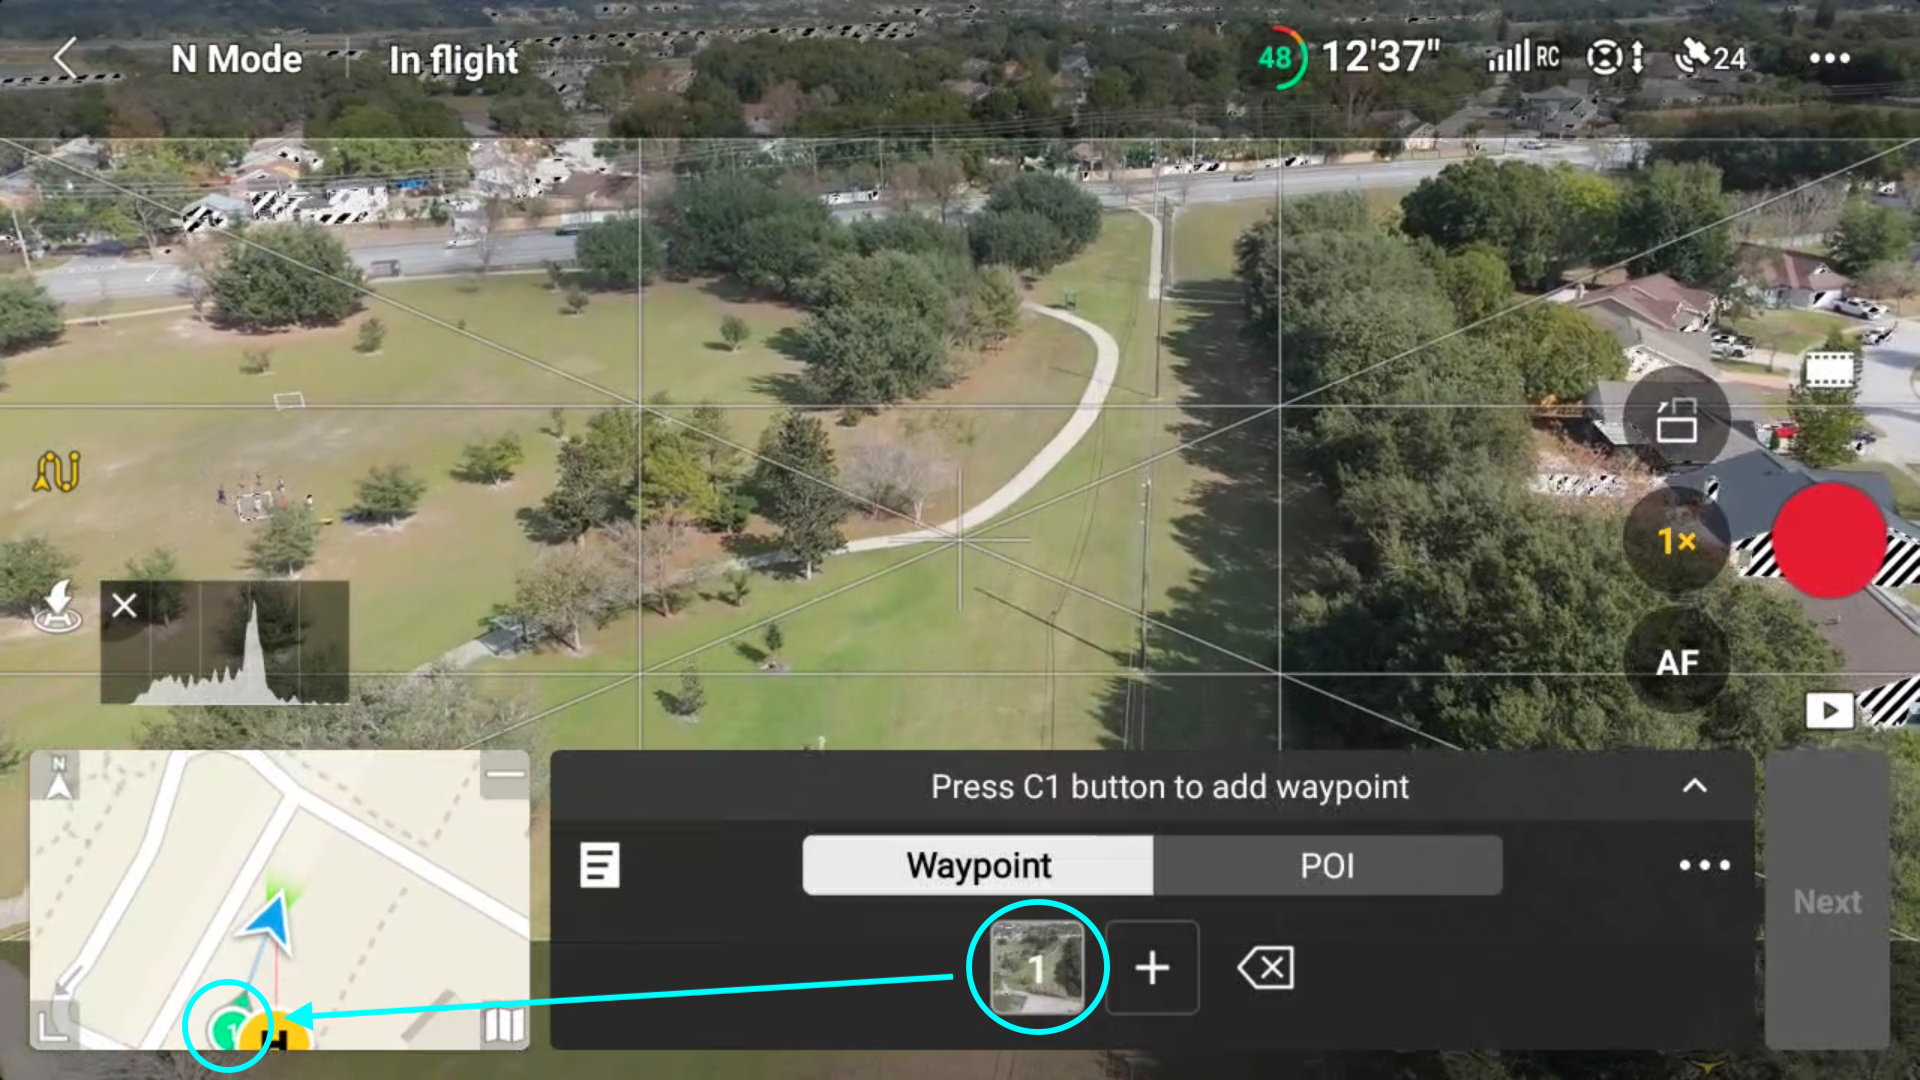
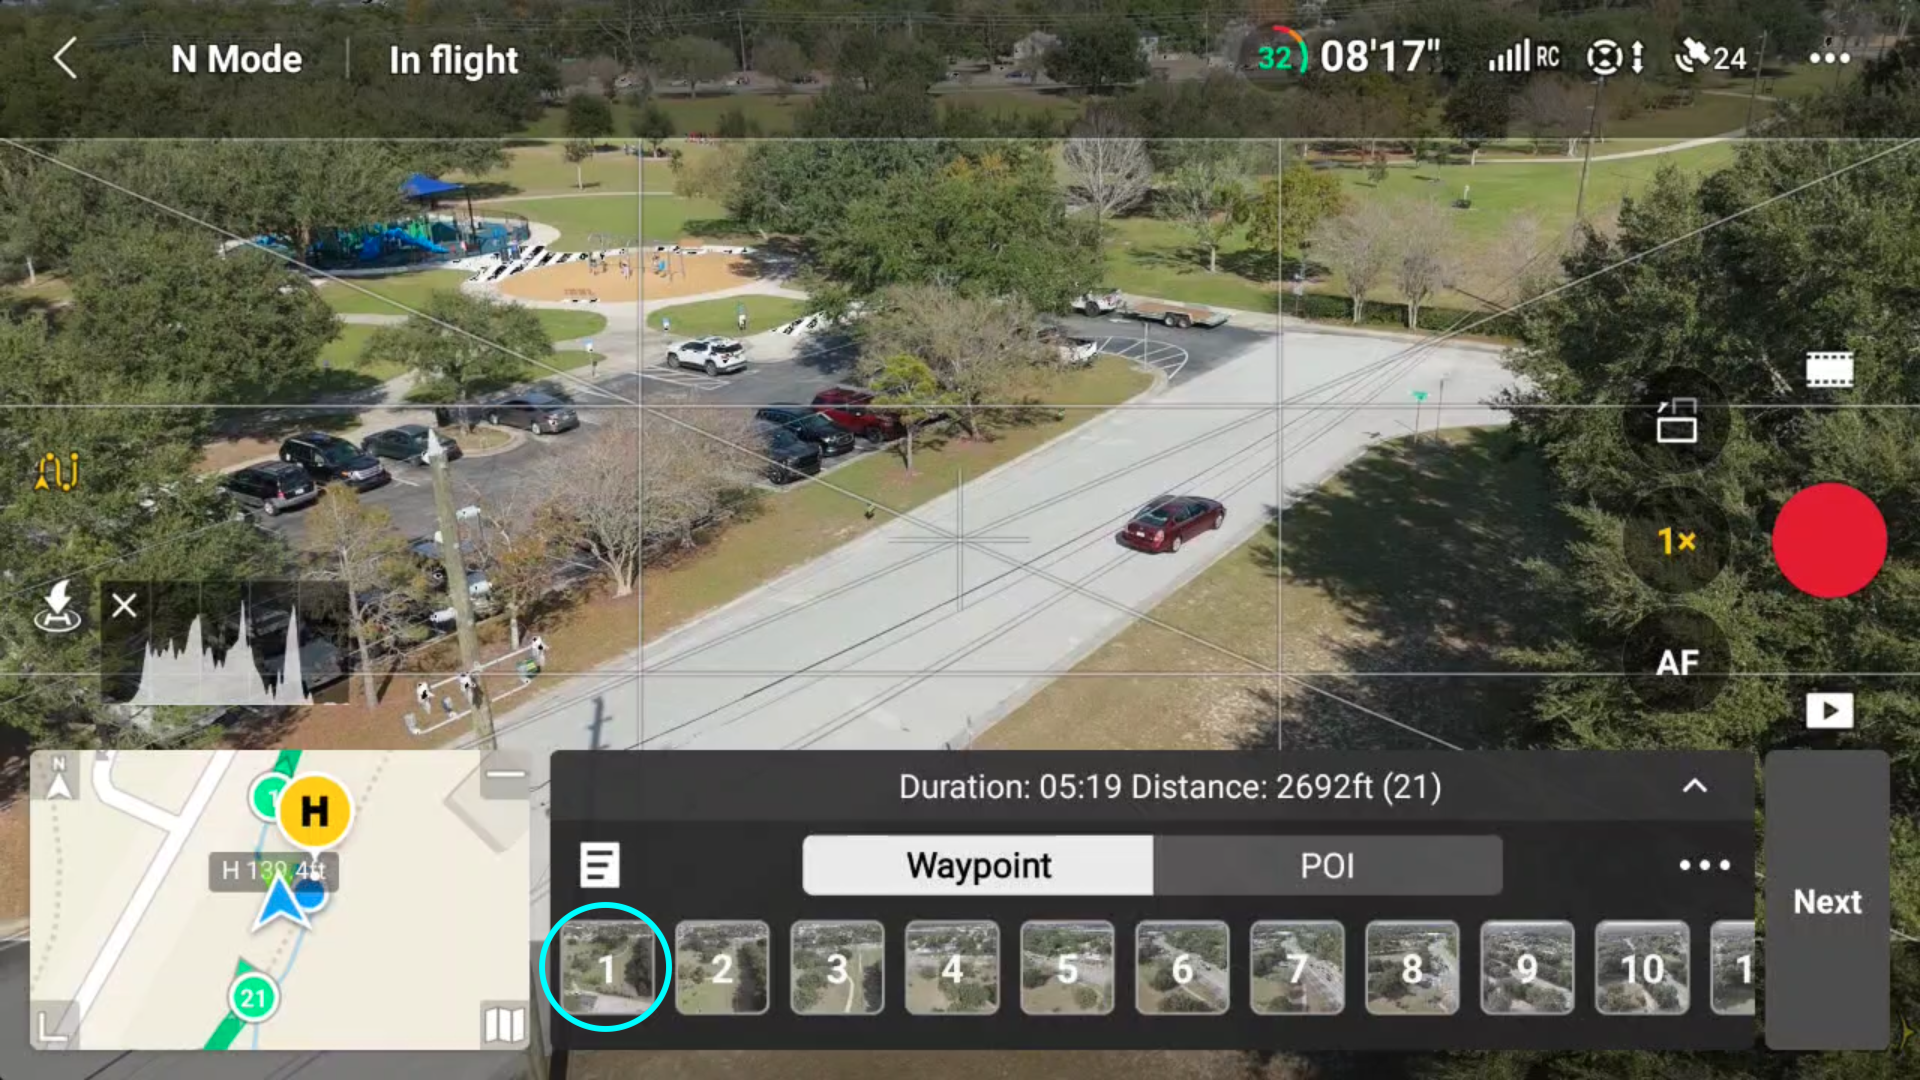
After adding your first waypoint, you will see it on the mini-map to the left, as well as on the waypoint list.
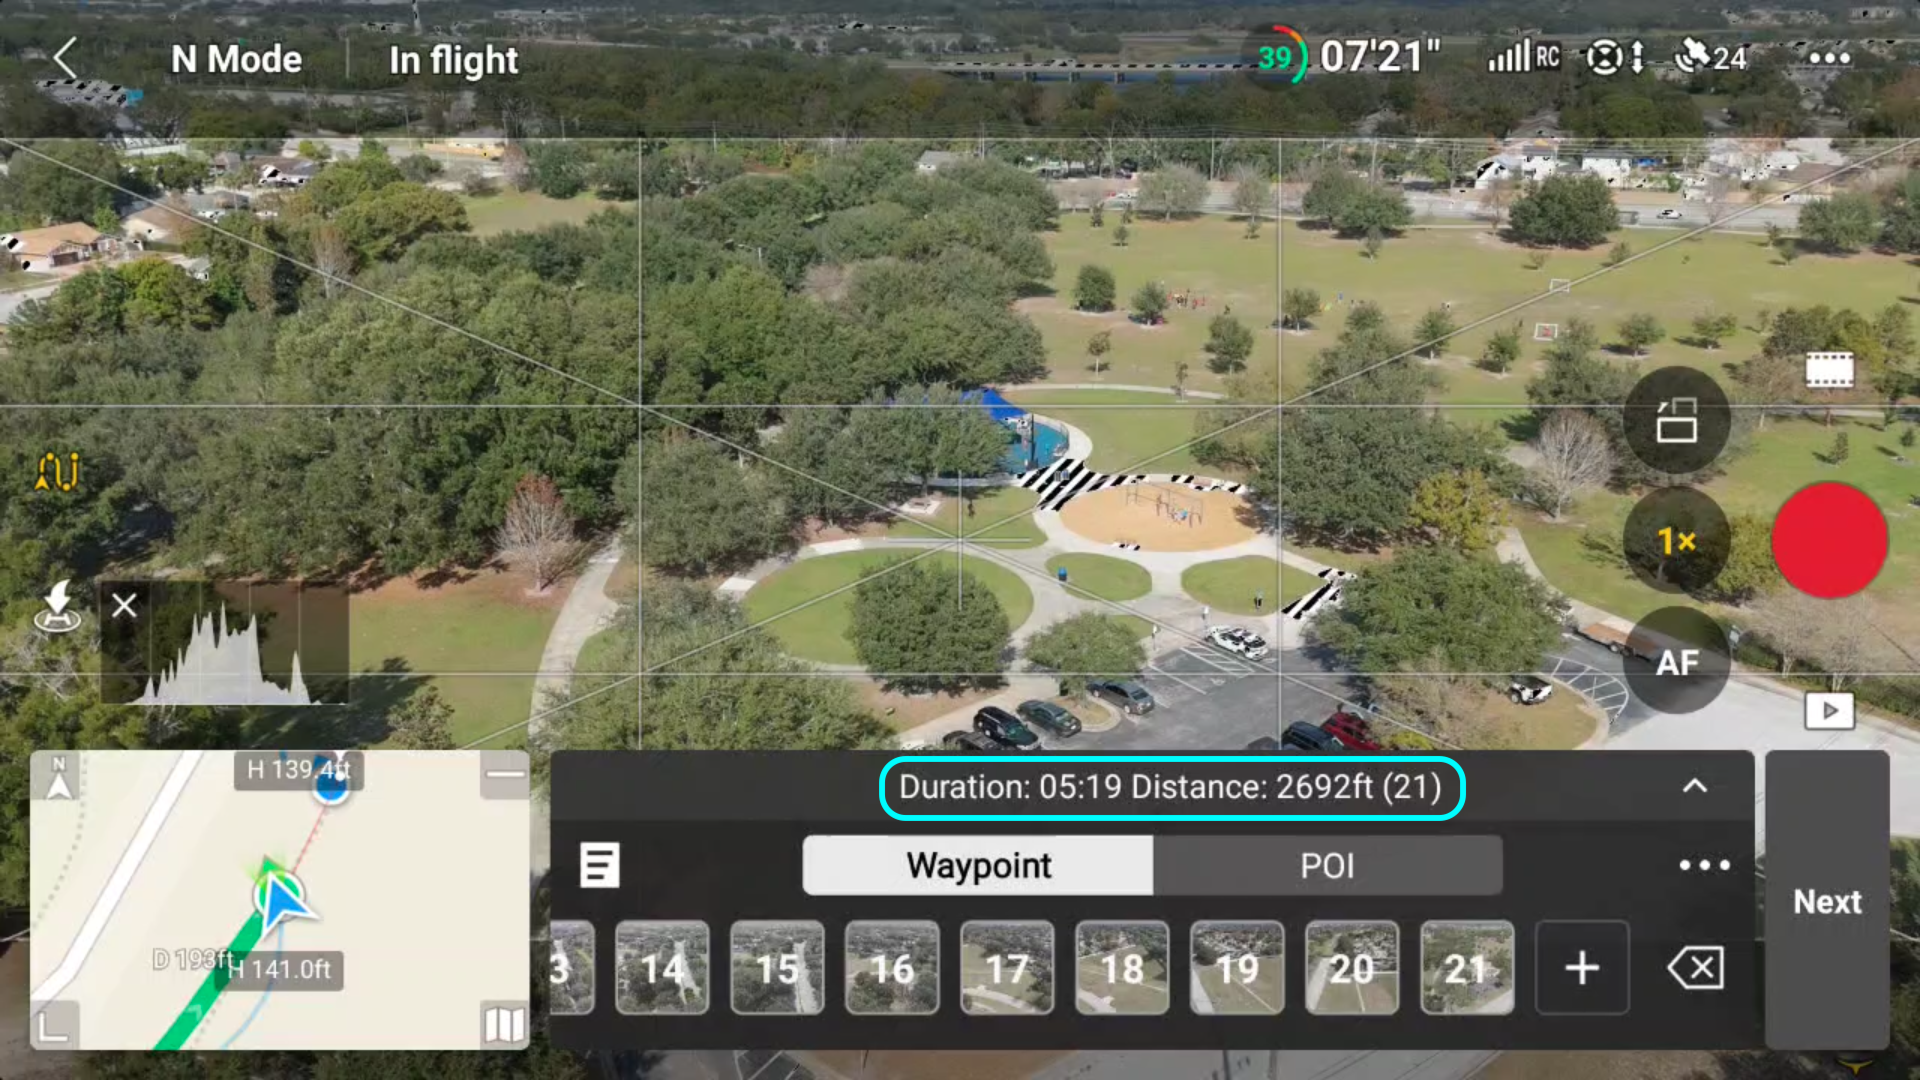
Step 3: Continue flying around the area, adding as many waypoints as you need. Face the direction you would like the drone oriented when flying (although this can be changed later, as we’ll see).

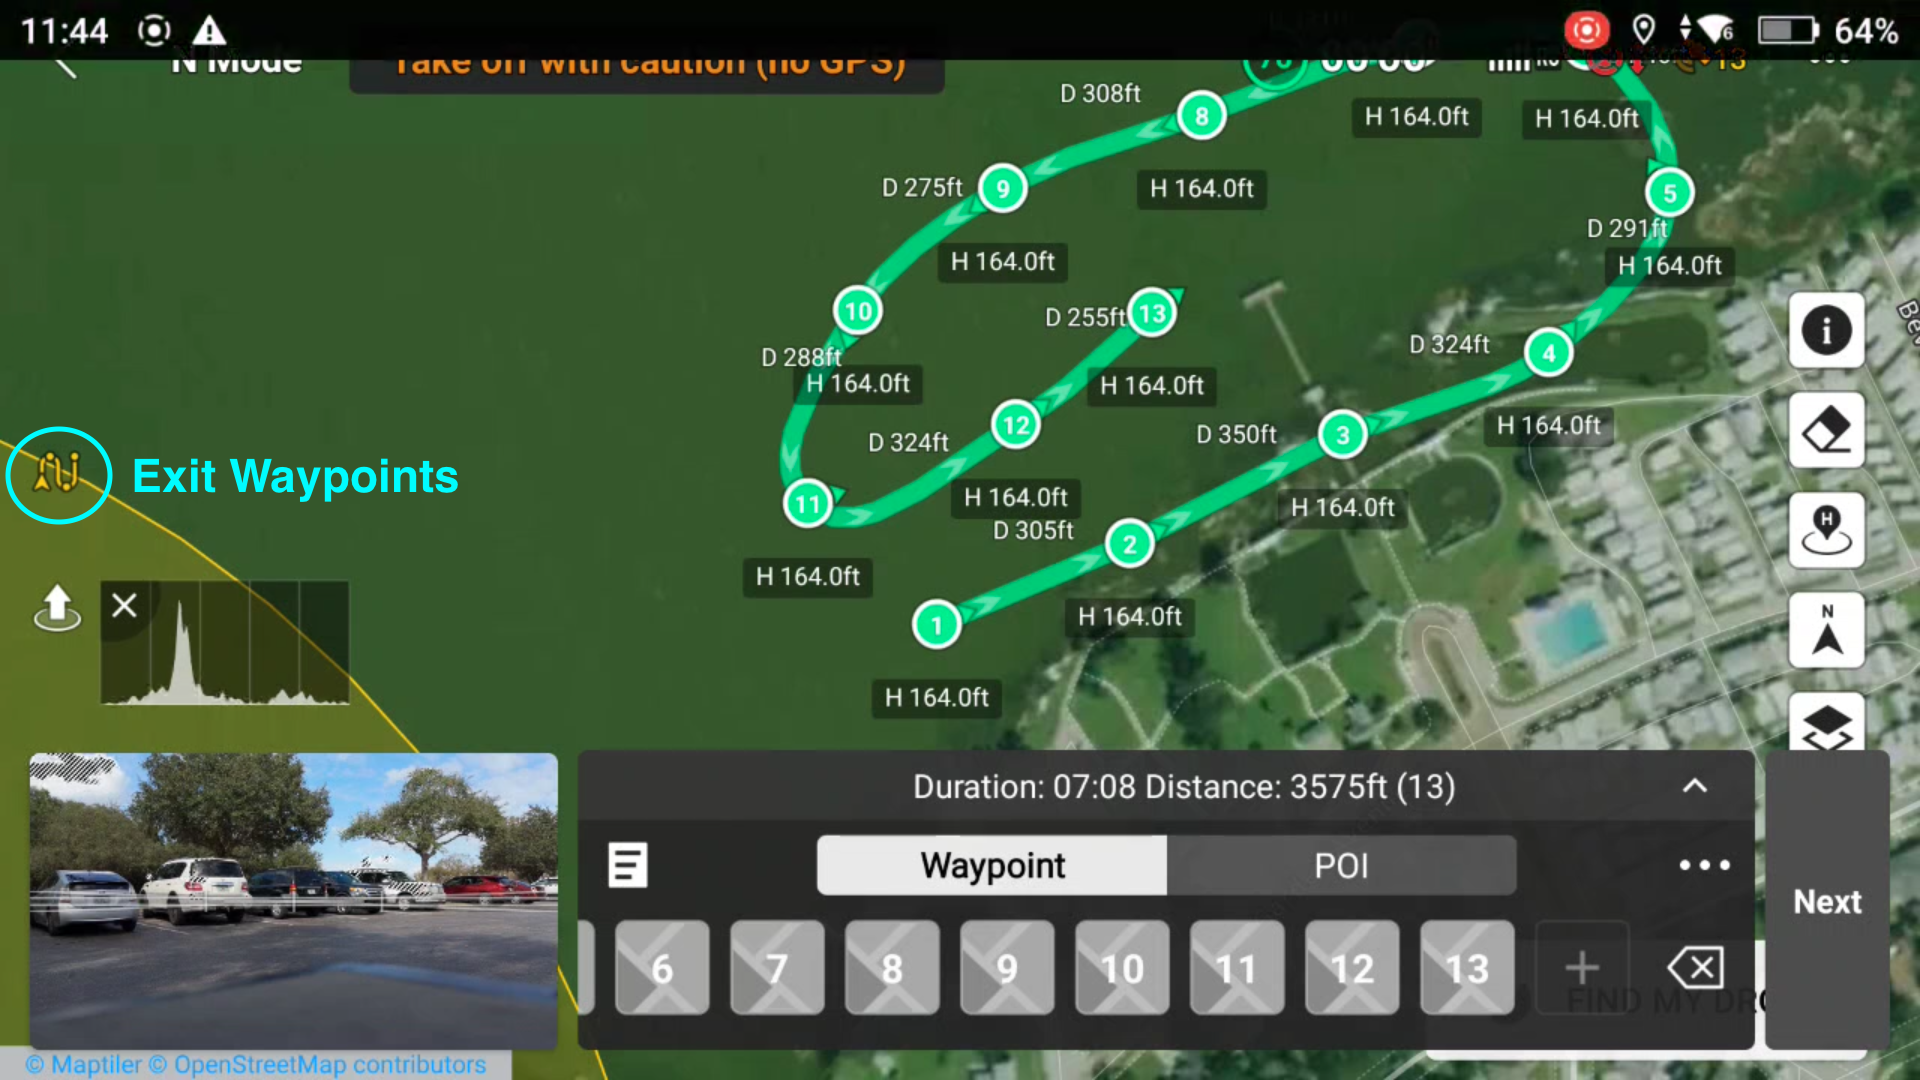
When you have finished all of your waypoints, you will see the final duration, distance, and waypoint count (in parentheses) of the mission.
» MORE: Does Mavic 3 Have Waypoints and How to Use It (Step-by-Step Guide)
Modifying the Waypoints in the Current Mission
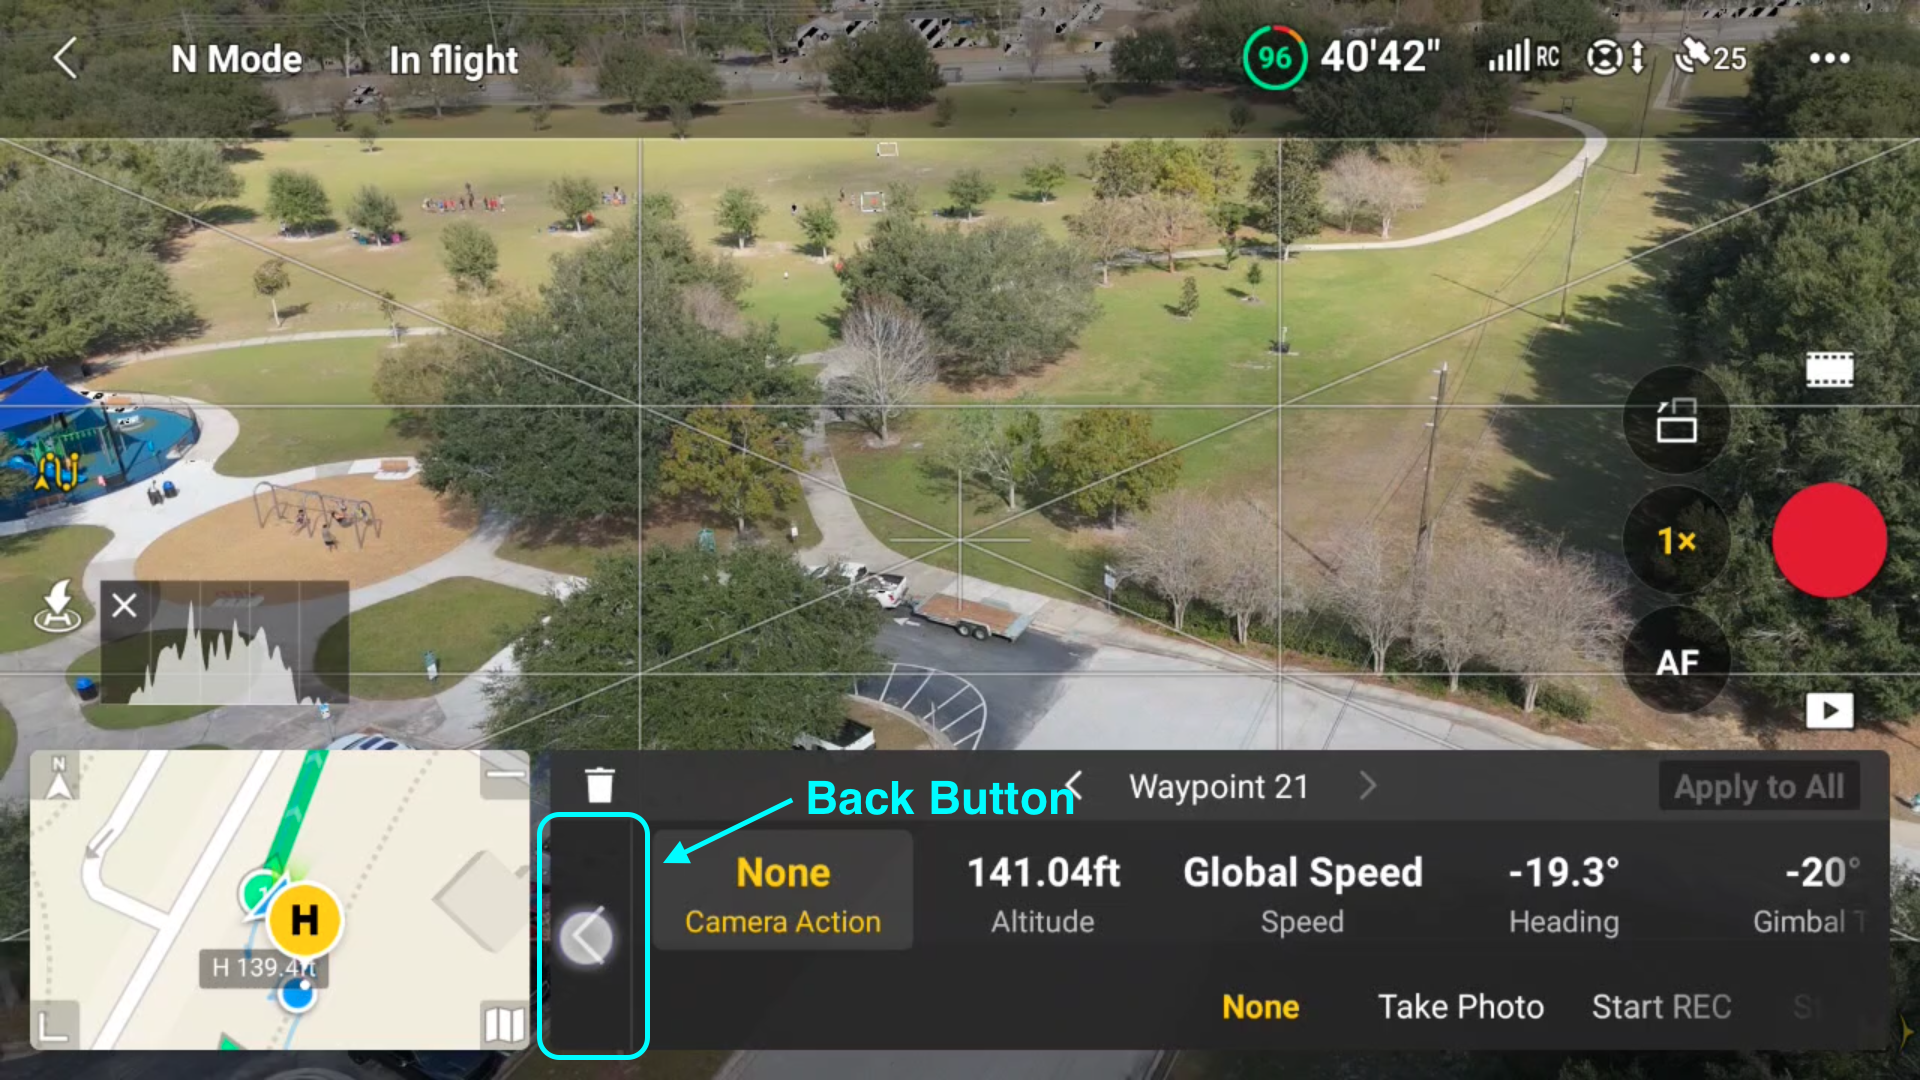
After the waypoint mission has been mapped out, there are many different options to customize each and every waypoint in the mission.
To modify a waypoint action, simply click on the waypoint number you’d like to modify and adjust the parameters, as seen below:

| Camera Action | Altitude | Speed | Heading | Gimbal Tilt | Zoom | Hover (Duration) |
|---|---|---|---|---|---|---|
| None | Slider adjusts | Global Settings | Slider adjusts | Custom, Slider adjusts |
1 – 3x | Slider adjusts |
| Take a Photo | 3 – 9x | |||||
| Start Recording | ||||||
| Stop Recording |
Additionally, all options can be modified at any time, after the mission has been saved, as we’ll soon discuss.
If you need to delete waypoints, simply select the desired waypoint. You’ll enter the modification screen for your chosen waypoint. From there, press the delete icon.

To view your current waypoints, tap the mini-map in the bottom left-hand corner. To go back to the live view/camera view, tap that area again.

» MORE: DJI Mini 3 Pro Waypoints (Explained for Beginners)
Running the Waypoint Mission
After all individual waypoint options have been adjusted to your liking there are a few steps involved with actually running the mission.
Before running the mission, there are global mission-based settings that can likewise be set. We’ll look at those as well.
Step 1: Press the back arrow on the waypoint modification screen. If you made no modifications to any of the waypoints, see Step 2.
Step 2: Press next on the right-hand side of the waypoint section.

Step 3: You can either press GO on this next screen or change the final overall flight settings first and then press go.
The flight settings are below the next picture.

Final Flight Settings:
| Global Speed | Camera | End of Flight | On Signal Lost | Start Point |
|---|---|---|---|---|
| Slider adjusts | 1 – 3x | Hover | RTH | Choose any Waypoint |
| 3 – 9x | RTH | Hover | ||
| Land | Land | |||
| Back to Start | Continue |
After pressing GO, wherever the drone is in the air, it will then proceed to the first waypoint, adjust the height, heading, and gimbal tilt, and then proceed to run the mission.
» MORE: DJI Air 3 Waypoints (All You Need to Know)
Saving the Waypoint Mission
Any waypoint mission can be saved upon completion.
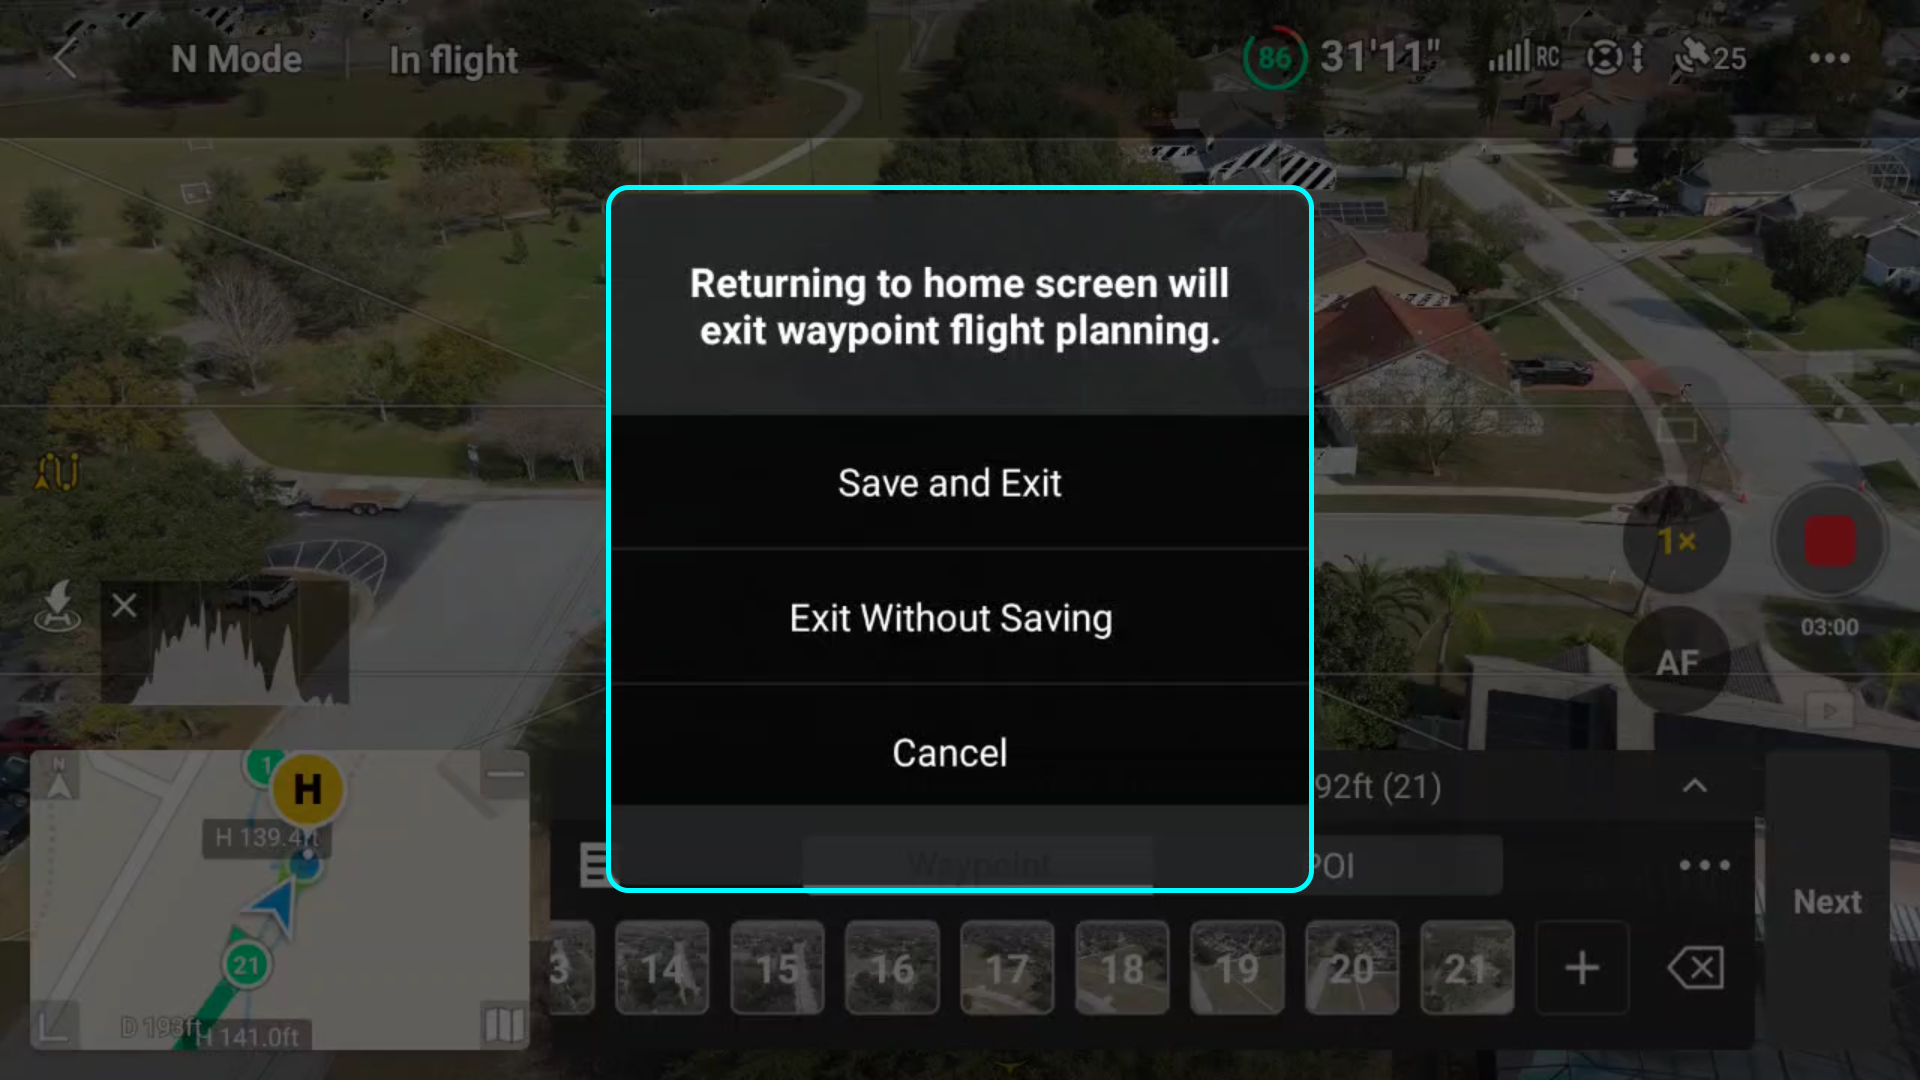
The automatic way of doing so would be by exiting the Waypoint function entirely.
At this point, upon exit, you will be prompted to either save the mission and exit or exit without saving.
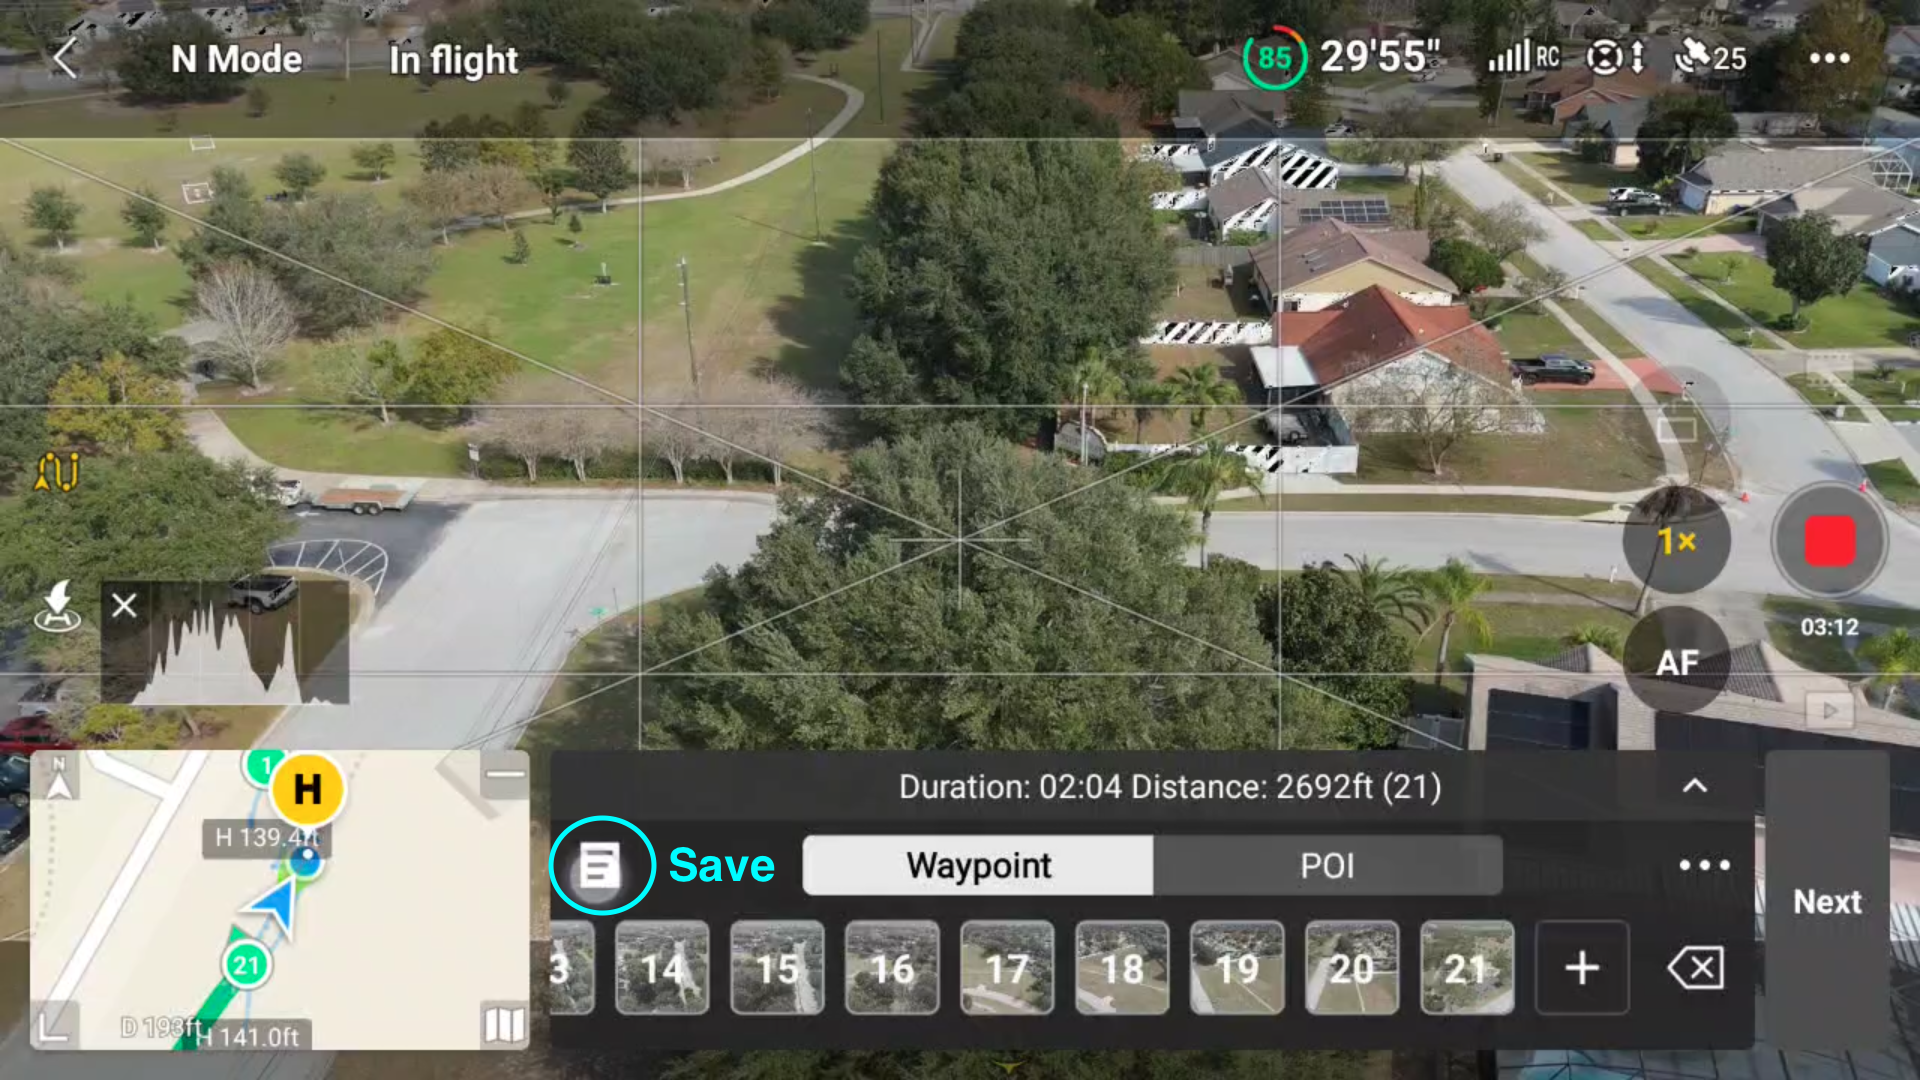
You can also manually save your waypoint mission.
To manually save your mission:
Step 1: Press the Save icon, which looks like a sheet of paper.

Step 2: You will be brought to the Waypoint History screen, with your current waypoint mission on the top. Press SAVE.
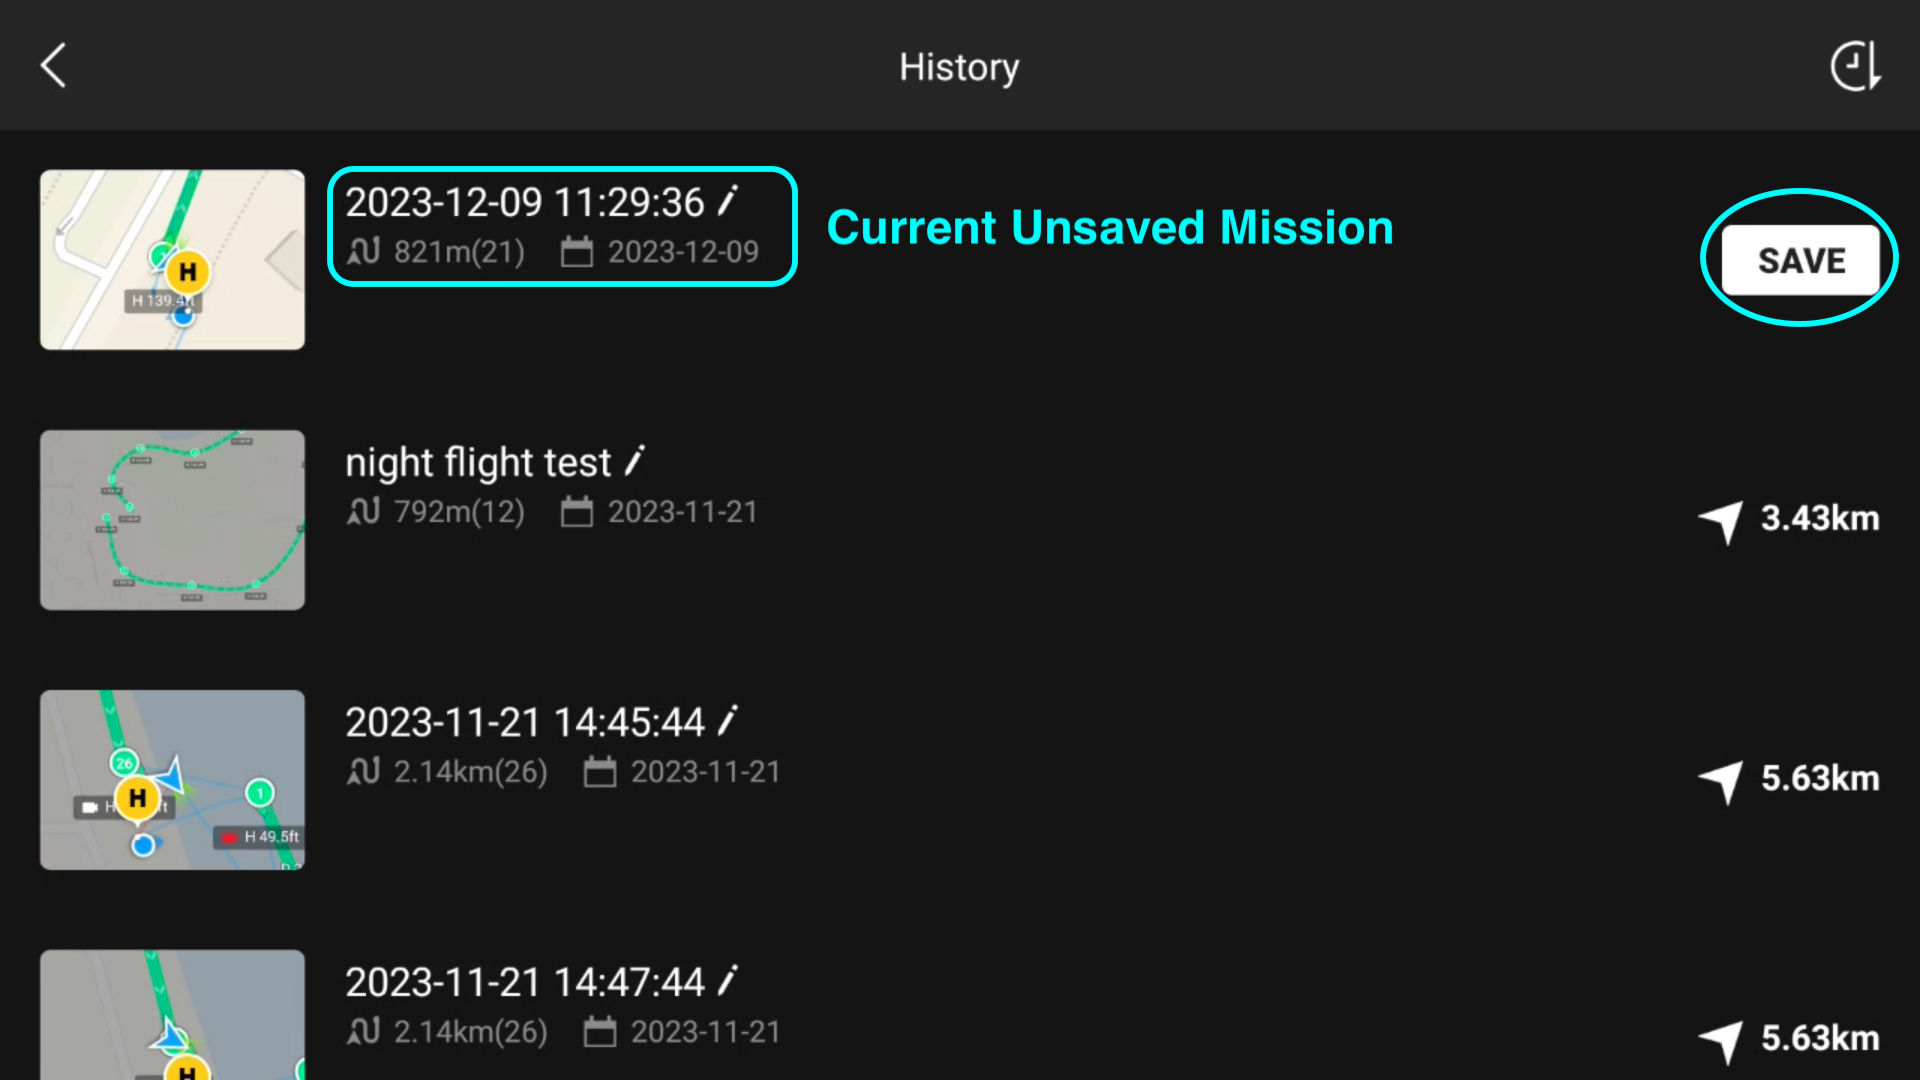
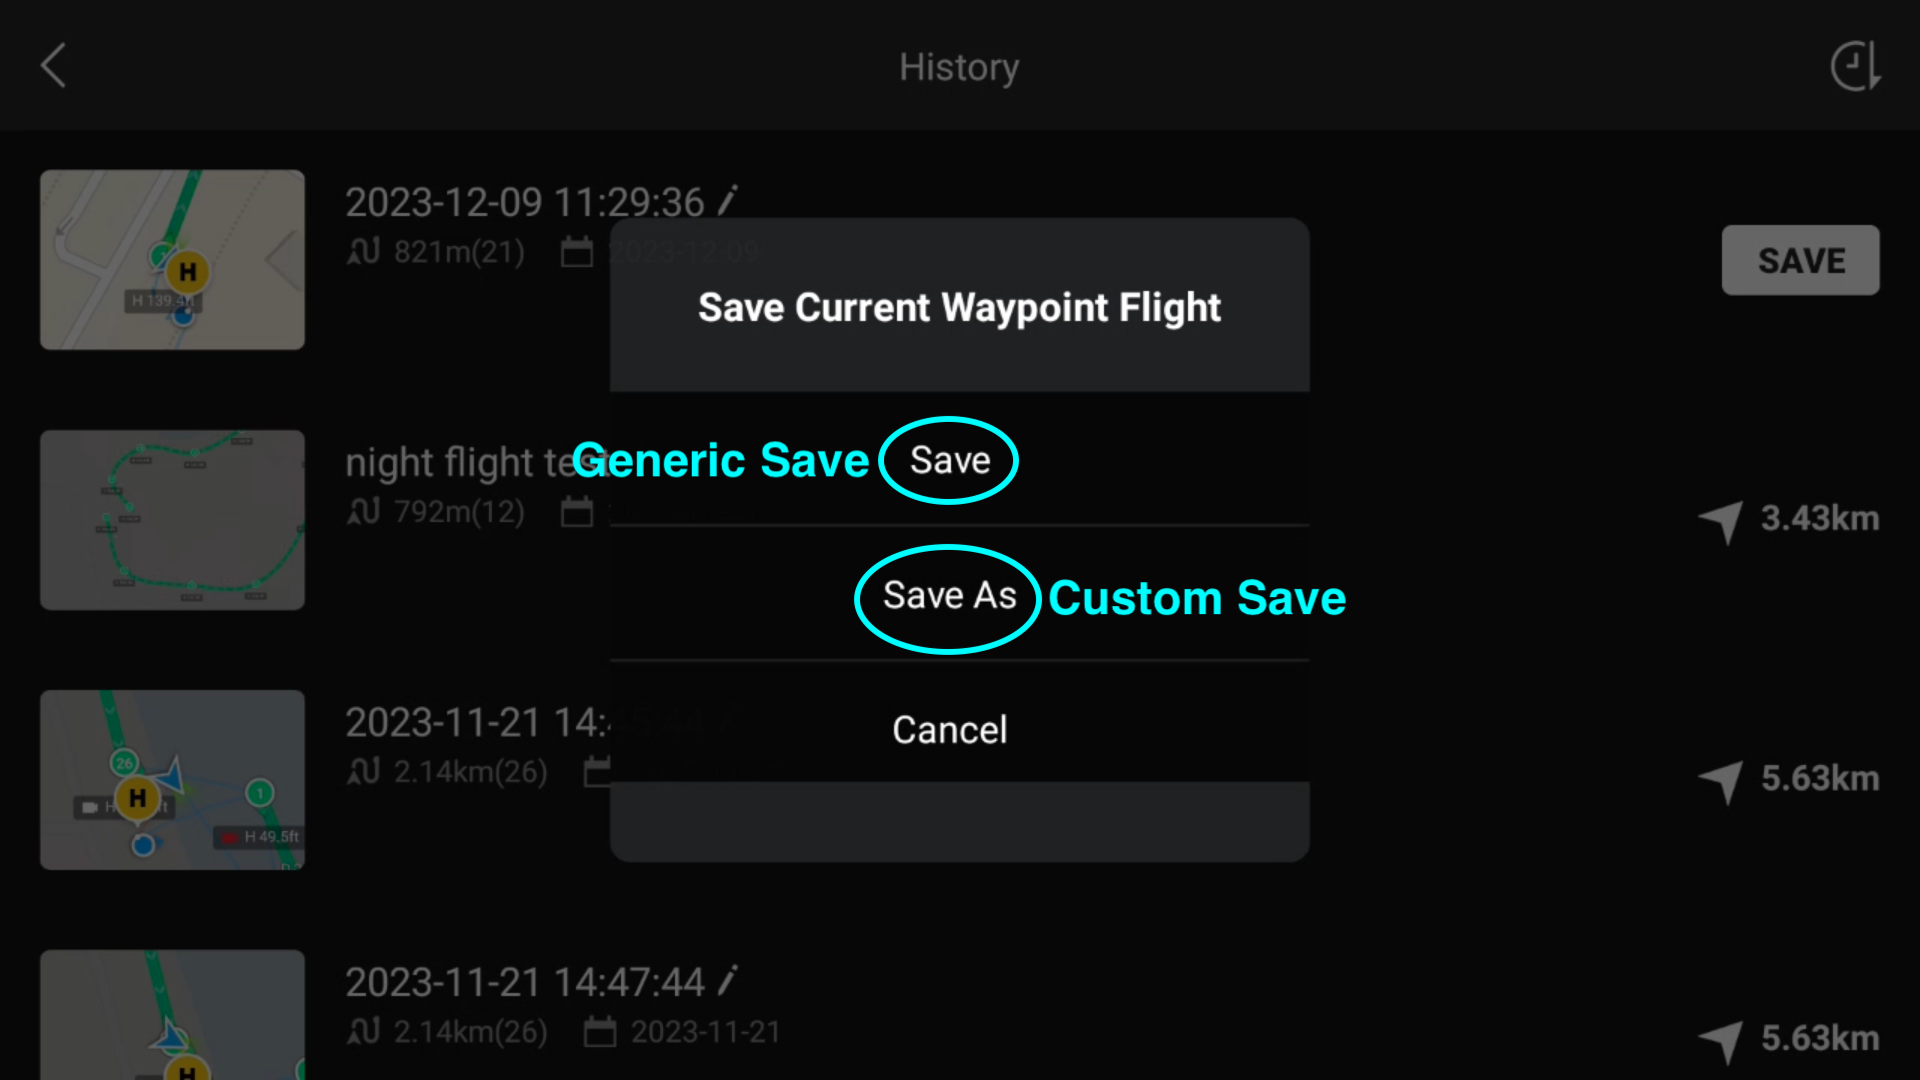
Step 3: Choose between either Save, which will save the mission as a generic file name, or Save As, which will allow you to save the mission as something recognizable.
Your newly saved waypoint mission will now show up with the date the mission was saved.
» MORE: DJI Mini 4 Pro – How to Use Active Track 360 (With Video)
Creating Remote Waypoint Missions
One of the great things about the waypoint mission planner is that you do not have to be at the location where you would like to fly to create waypoints.
For this article, I created a mission miles from where I subsequently ran the waypoints for this article.
I created the mission early in the day, then drove 30 minutes to the location where the mission would run later in the day and ran the mission.
This could prove to be very useful for those who need to plan client or commercial missions prior to getting on location.
Additionally, with the ability to modify waypoints in the mission planner, any height and action adjustments can be made once on location and surveying the mission site.
To remotely create a waypoint mission:
Step 1: While both the Mini 4 Pro and remote controller are on, tap on the area map in the lower left-hand corner of the screen. Then expand the area map in the camera view screen.
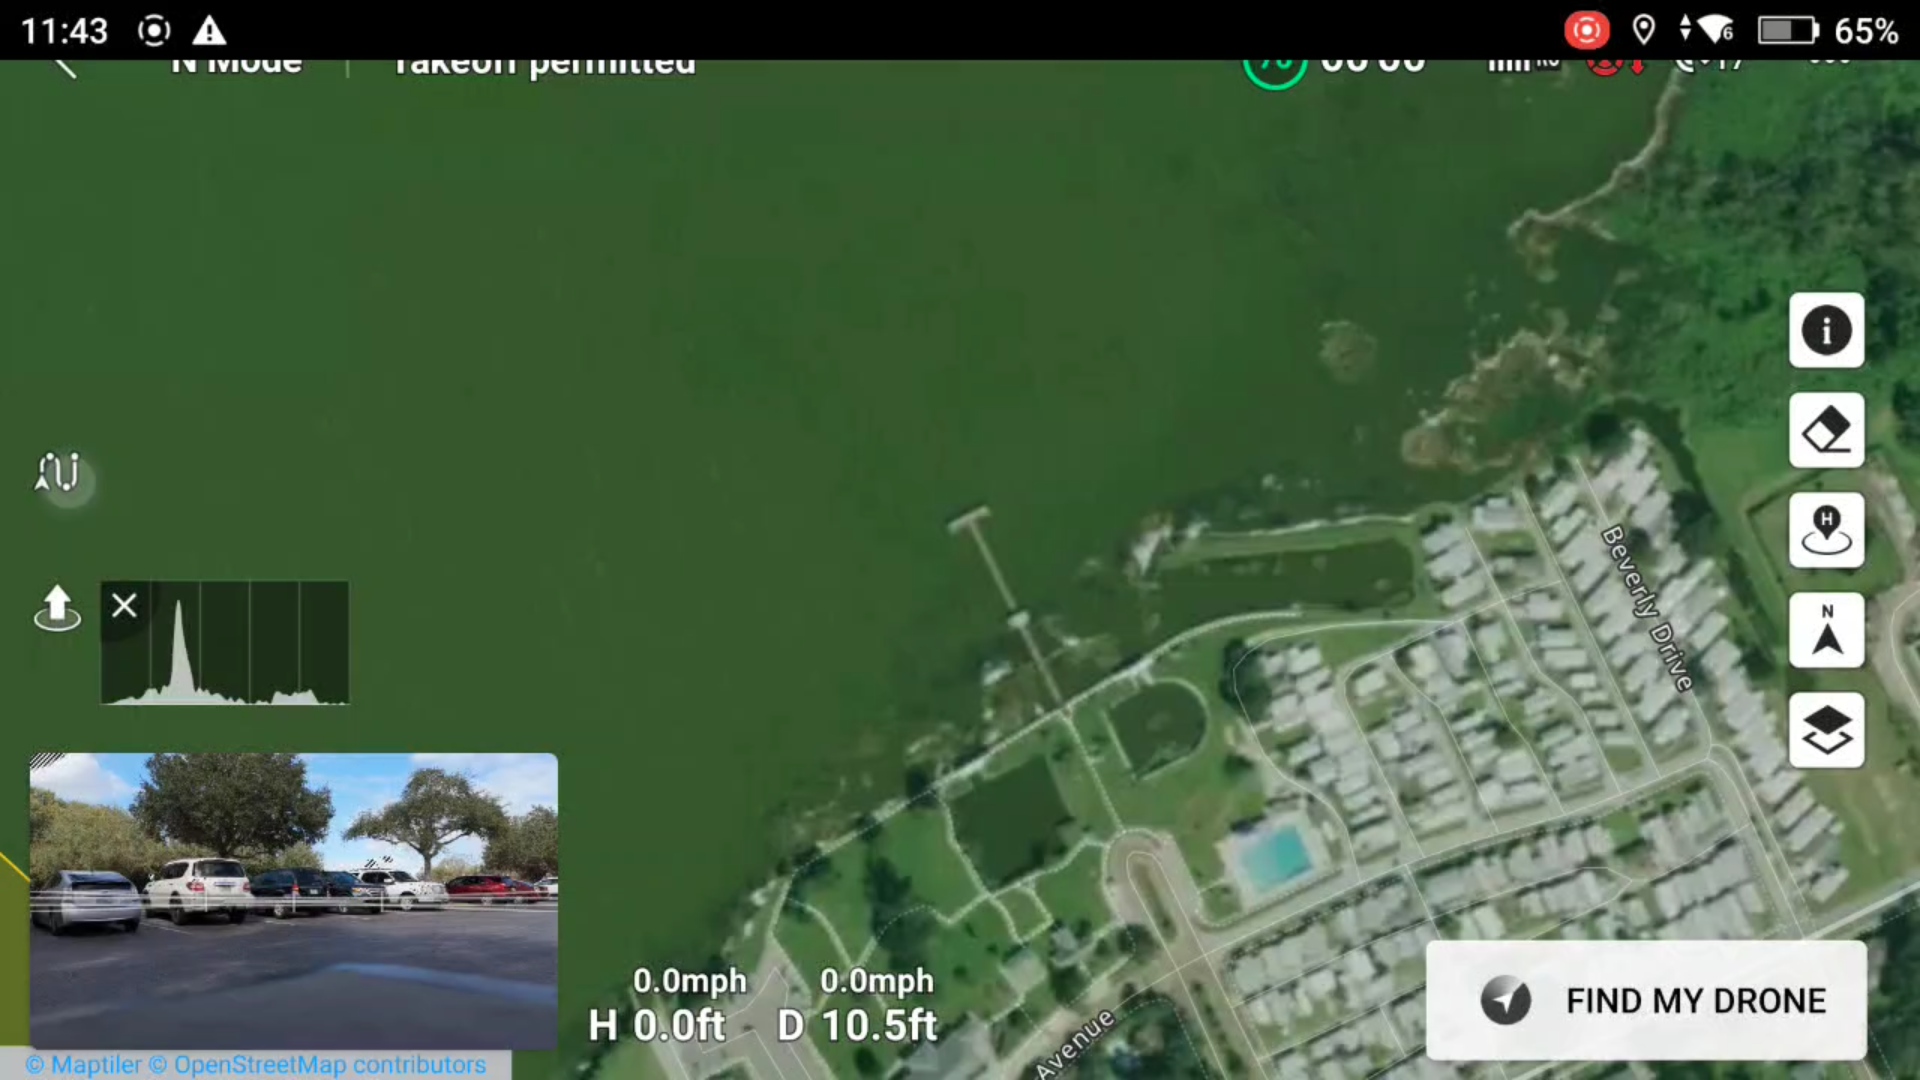
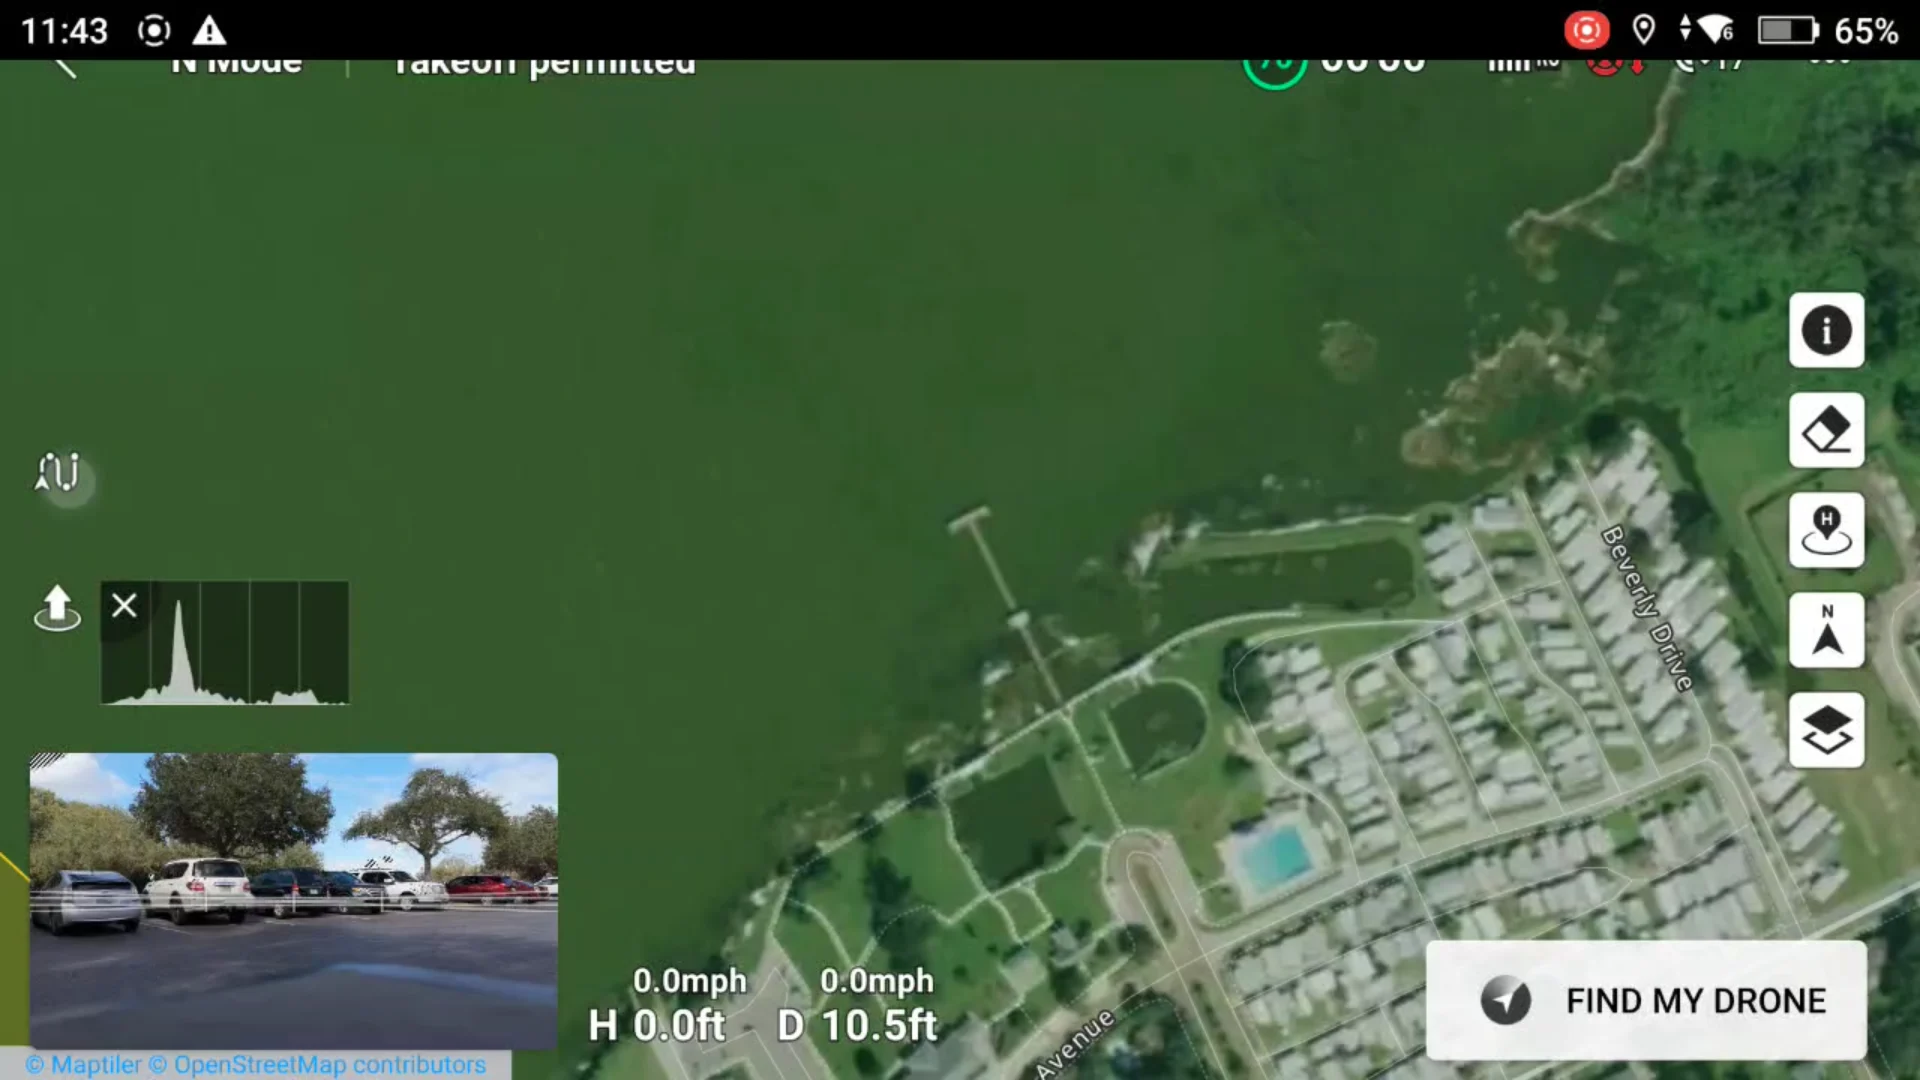
Step 2: Open the waypoint mode by pressing the waypoint icon.

Step 3: Locate the area on the map you would like to place your first waypoint. Tap the area with your finger to set the waypoint. Continue to do this for all the waypoints needed.

Step 4: Save the waypoint mission by tapping on the save icon.

Step 5: Either Save the mission or do a Save As and name the mission something custom.

Step 6: Exit the waypoint mission planner.
As a brief reminder, these are the major things to know before setting waypoints remotely:
- The Mini 4 Pro and remote controller must be powered on and connected to the internet. This is needed for the waypoints to use the map feature.
- Instead of using the C1 button or + symbol, tap the screen at the designated waypoint location to add the waypoint.
- Any waypoints can be modified at any time after the mission is saved. Even remotely.


