
Flying FPV at night can be the answer to the cold winter with the days growing shorter. Getting bored of flying tiny whoop indoor? Let’s find out which camera is best for low light and night flying 🙂

There are so many great FPV camera options today, it’s hard to decide which one to get. I’ve tested a lot of cameras, and I’ve found the following options have the best performance in low light and night:
Here is a comparison video between these cameras. I tested them at night in two locations of different brightness level.
Hands down, the Night Eagle is the clear winner! It would be your best bet if you want to fly in the dark. But it only does black and white, so it might be less enjoyable to use in the day.
The Micro Eagle performed slightly better than the Owl 2 Pro in my opinion, except the Owl has less digital noise. But the Eagle has much better image in the day than the Owl, making it a much better “All Around” camera. So the Micro Eagle would be my 2nd choice here. (Edit, I think the Owl 2 has been discontinued…)
I really like the Falkor’s image quality in day light, probably one of the best. But I simply wouldn’t use it for low light or night flying. Especially when I found out it has a bug with “Auto Day/Night” mode. At certain brightness level it would repeatedly switch between color and B/W, causing the screen to flicker. So it’s best to set it to either color or black & white. Another cool tip I can give you is to set DNR from 0 to 1, it helps reduce digital noise in low light. I don’t notice any difference setting it any higher.
These low light cameras do a pretty good job in taking advantage of every bit of light available. The low light performance is measured by a parameter called “LUX”. The lower it is, the better low light performance. Nowadays you can get an FPV camera with as low as 0.00001 LUX in black and white mode.
| I compiled the specifications of all FPV cameras for mini quad in this spreadsheet so you can compare them more closely. |
Here is an example of how well these camera can perform at night. This is how dark the play ground is.

Low light environment captured from a phone camera
And through our low light capable FPV cameras, we could see a lot better without additional light sources.

Low light environment captured from low light capable FPV camera
However, unless you are lucky enough to have a clear sky and a full moon, or some street lights nearby, your camera might still struggle a bit to give you a clear image.
The less light you have, the worse the processed image will be. In very dark environment, your image can look noisy and blurry, which is hard to discern anything in the footage you see and fly with that.
Fear not! We might have a solution.
We can improve visibility in dark environment by adding a flashlight to the quadcopter. But yea, that will take away the stealthiness flying at night. Not only will your multirotor look like a UFO but you will also “blind” anyone that gets in front of your quad – including yourself if you are flying LOS.
My preferred option is to use IR LED’s (Infra-red). Due to the interesting nature of IR light, which is invisible to human eyes but digital cameras, it will work like a flashlight without anyone noticing it!
The best option I found so far is these 48 IR LED boards for around £8 (US$12) each. The only modification I had to do was to solder a female balance plug connector to the LED board, so I could connect it directly to a 3S battery.

I simply mounted the LED board on a Gopro mount, and installed it on top of my quad. Works quite well because I can also adjust the angle.
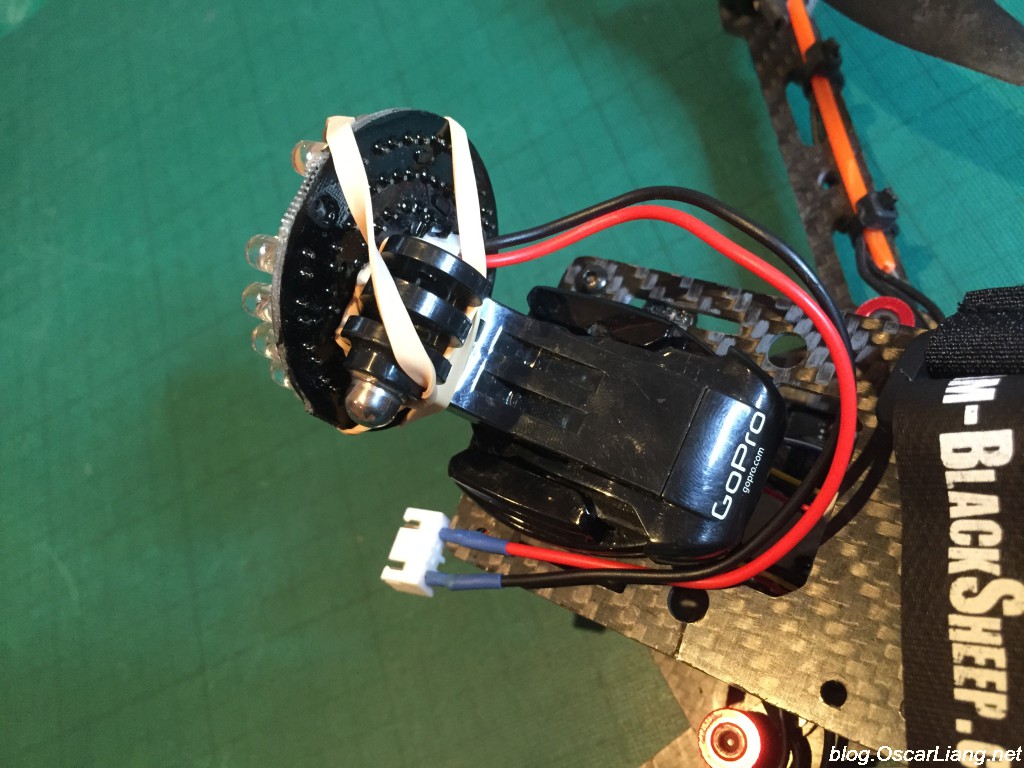
If you don’t have a GoPro mount, try this idea – shared with us by Konrad Stepanajtys. He basically mounted the LED panel on a cardboard box, which then goes on top of the quad. It’s like mounting a GoPro on your quad 🙂

Remember to keep the LED away from the camera lens to avoid glare.

It’s not as bright as a normal torch, which is not actually a bad thing. At least you WON’T get a big white spot aiming at the centre of wherever you are looking at. Instead a soft, even, big glow in front of you. This is the result:

Flying at night is much more challenging than flying during the day due to the low visibility. Choosing your location is therefore very important, any light source would help tremendously, for example, lampposts.
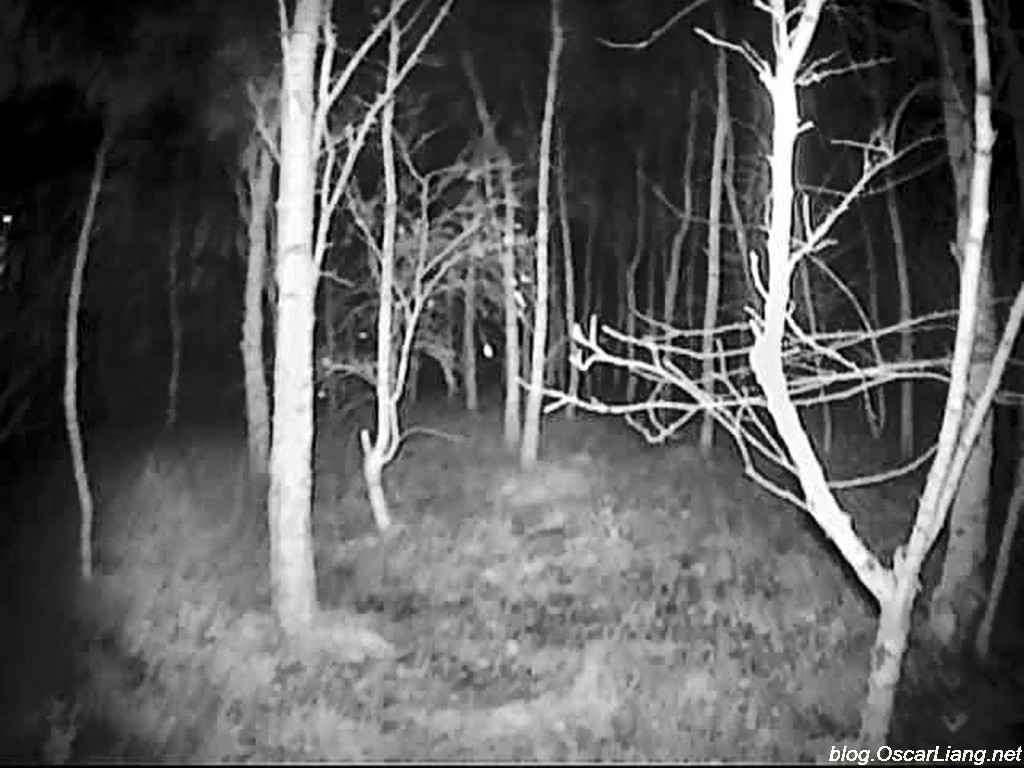
Another option is to mount a torch on your quad. Slowly exploring all the small gaps between trees and hidden paths in the woods at night can truly be wonderful and terrifying at the same time 😀
To avoid losing a quad in the middle of nowhere, make sure to attach a buzzer with built-in battery.
- Check local regulations if you are actually allowed to do night FPV flying
- On your FPV Camera, change the Day/Night setting to auto or just black and white. You will be able to see a lot better at night with less digital noise
- Consider adding a tracker to your quad – easier to find when crashed in the dark
- Night flight – you will be super cold! Dress warm
If you are using the “DIY IR torch”:
- Your FPV camera must NOT have IR filter in order to detect IR light better
- Don’t get the IR LED too close to your camera, you will get reflection (glare) in the lens and you won’t be able to see anything
- Always check the voltage required by the IR LED panel. Mine uses 12v and I can connect it directly to the same 3s lipo battery I use for the quad via the balance port
Edit History
- Dec 2015 – Article created by SeekNDFPV
- Dec 2017 – Article rewritten, and updated Night FPV camera options
- Nov 2018 – Added Night FPV camera comparison


