With its dual 1/1.3-inch cameras, the DJI Air 3 takes excellent videos. The Air 3’s 70 mm tele camera is the same one found in the Mavic 3 Pro and performs equally as well in the video department.
Like the ever-popular follow-me modes, Live Streaming is likewise a sought-after feature of modern drones. DJI continues to add support for live streaming in all of its newest drones, from which the Air 3 fully benefits.
In this article and the included YouTube video, we will go over, step by step, how to set up the DJI Fly App for the Air 3 to Live Stream via YouTube and the necessary YouTube settings.
Live Streaming Use Cases
As a drone operator, you might wonder why you would want to stream a flight over YouTube, or any other Social Media outlet for that matter.
Content Creators
Live streaming drone flights is an excellent tool for Content Creators who focus on drone-related content, since today’s audiences, via YouTube, Instagram, Facebook, etc., often prefer live videos over videos that have been pre-recorded.
A content creator going this route raises the chances of their live videos ranking higher in searches than prerecorded videos, thus reaching more people.
Also, having a regularly scheduled, drone-related live stream helps build follower loyalty as the content creator can connect with the audience more and build anticipation for regular releases.
» MORE: DJI Air 3 Review – Is This the Drone for You?
Service Professionals
Others who benefit from live-streaming drone flights are those who use drones for professional services. These individuals include those who shoot large commercial real estate and document large construction projects.
In both of these industries, live streaming has proven useful for showing off-site clients live and on-demand footage of certain pieces of property and areas of interest.
Often, these are properties that remote clients might not be able to visit themselves or wait for footage to be compiled and sent electronically for later viewing.
» MORE: How to Become a Professional Drone Pilot
How to Live Stream on YouTube (DJI RC 2/DJI RC-N2)
New to the DJI RC 2 remote controller, and a highly requested feature, is the ability to Live Stream.
Previously, with the Mini 3 series, the only possible way to Livestream would be using a DJI RC-N1 with a smartphone attached. For those owners who only owned the DJI RC, there was the added inconvenience of purchasing a stand-alone DJI RC-N1 remote controller for live streaming.
To stream via YouTube, aside from the Air 3, there are three things needed:
- DJI RC 2 or DJI RC-N2 Remote Controller – If using the DJI RC 2, you will need to either use your cellphone hotspot or be connected to WiFi
- The DJI Fly app
- A YouTube account
For this tutorial, we will be using the DJI RC 2 remote controller, as that is the more popular choice when buying Air 3 combos.
Note: If you are live streaming via YouTube for the first time, upon starting the initial process of streaming, there will be a 24-hour verification and initialization period. Once the timeframe has expired, you should be able to Live Stream.
» MORE: Mavic 3 Livestream – How to Guide (Explained for Beginners)
The YouTube Stream Settings
The first thing that needs to be done for those streaming for the first time on the DJI Fly app is to copy the YouTube stream key and stream URL.
As long as these settings are not changed in your YouTube account at a later time, the stream key and URL that are housed in the DJI Fly app will be correct.
STEP 1: Open YouTube on your PC, Mac, or electronic device. Make sure you are logged into the YouTube account you’d like to stream through.
In the upper right of the screen, press the Create icon, then select Go Live.
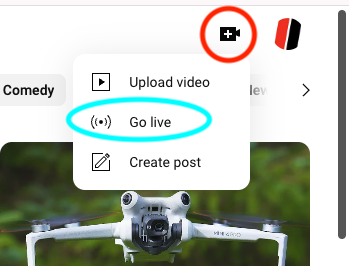
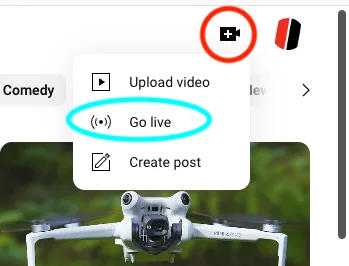
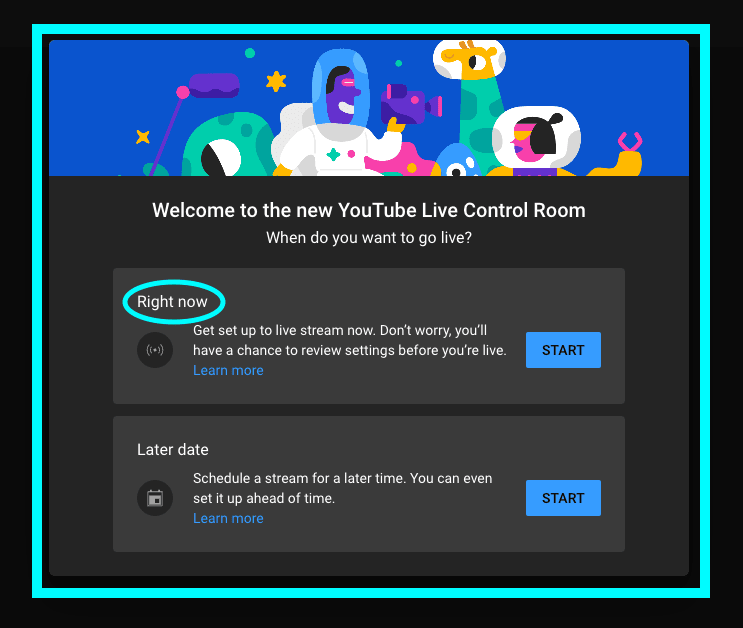
STEP 2: For first-time streamers, you’ll see a “YouTube Live Control Room” screen. Here you are presented with two options asking when you’d like to go live: Either Stream Right Now or Stream at a Later Date.
Choose “Right Now” by tapping START, to get the Stream Settings.

STEP 3: At the “Pick the type of stream to begin” screen, choose Streaming Software, and press GO.
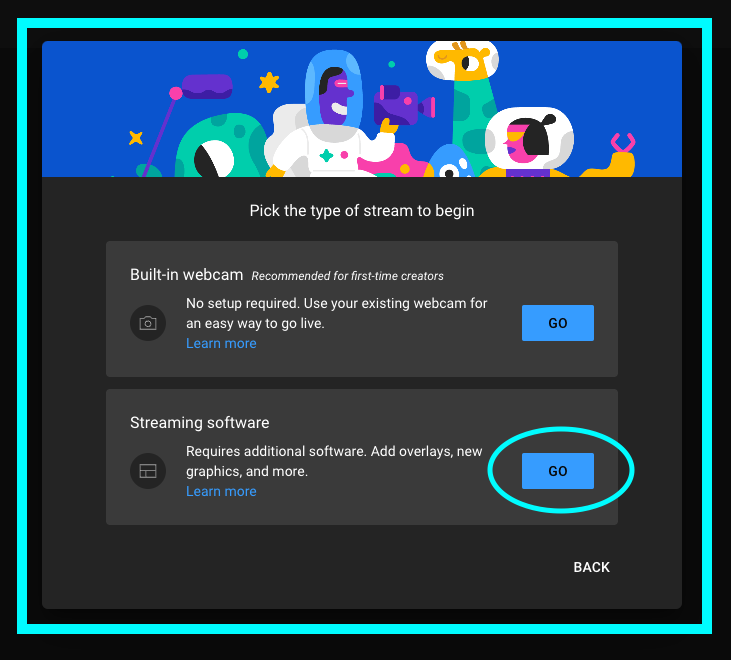
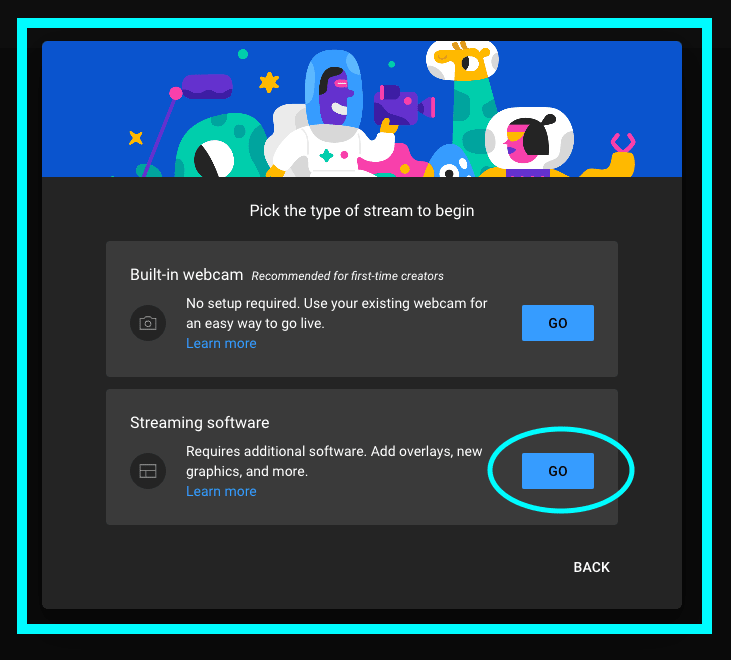
Note: The Streaming Software option enables you to use DJI Fly as the streaming software.
STEP 4 Alternate: If your Channel is monetized, you can set your Monetization options now.

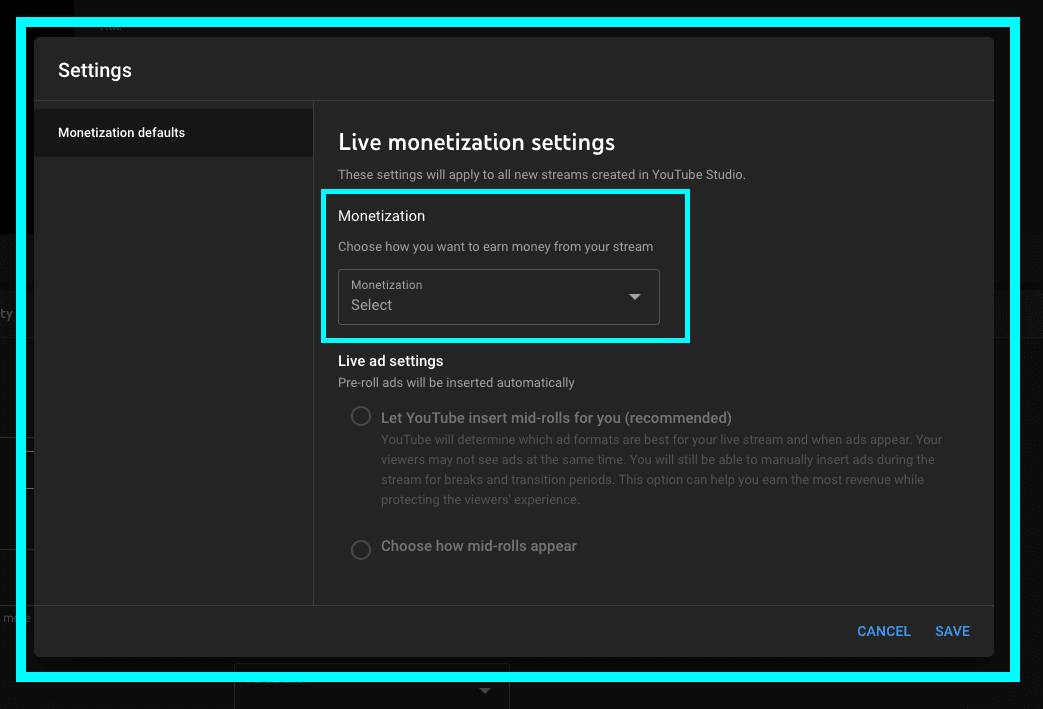
STEP 4: After accepting and saving the options, you should now be in the Stream Setup Stream Settings tab.
Note: If for some reason, the YouTube Live Control Room” screen does not load or appear you will likewise be brought to the Stream Setup main screen.

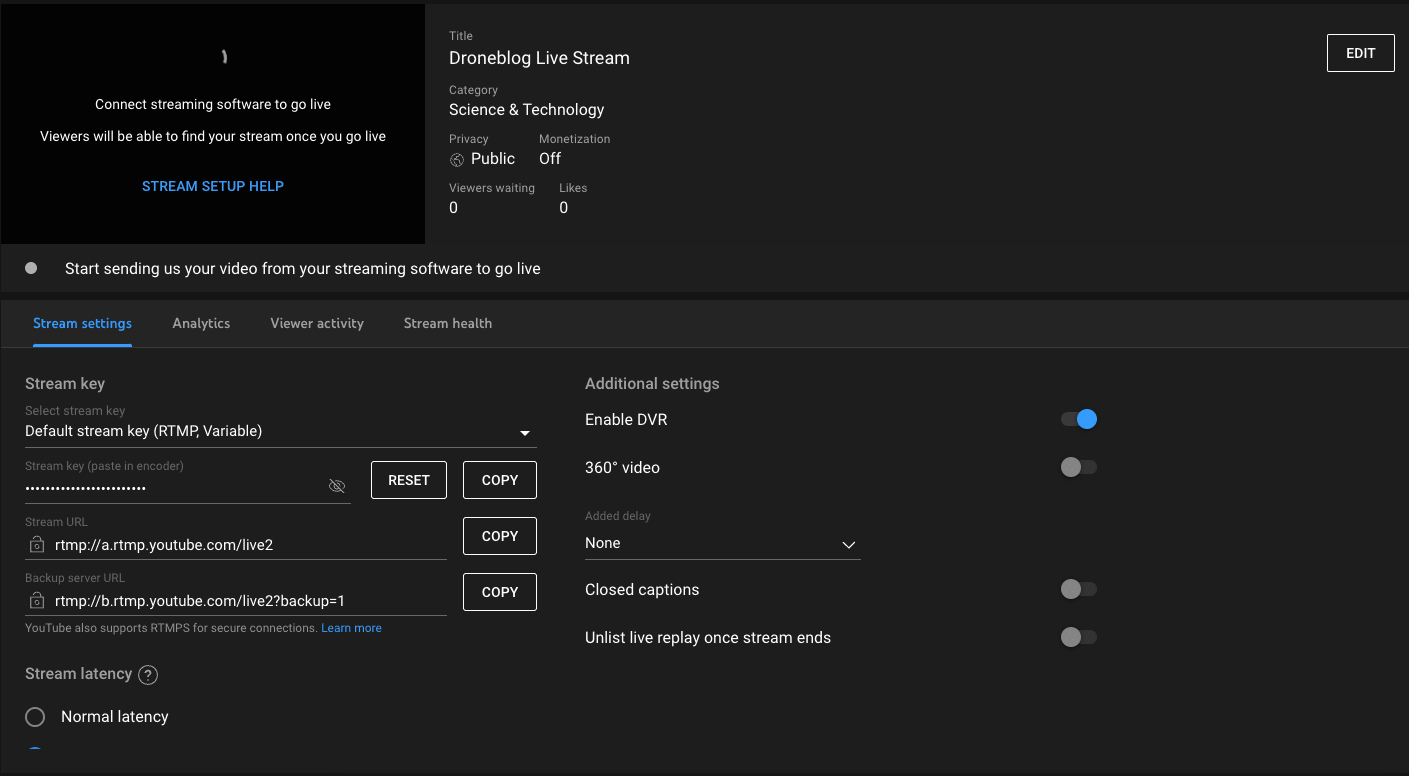
Write down or copy to notepad or Apple notes the following two pieces of information to add to the DJI Fly app. Alternatively, you can input this information into the DJI Fly app while YouTube is open:
- Stream Key – Press the “eye” to Show the Stream Key
- Stream URL – The RTMP address required for the RTMP protocol
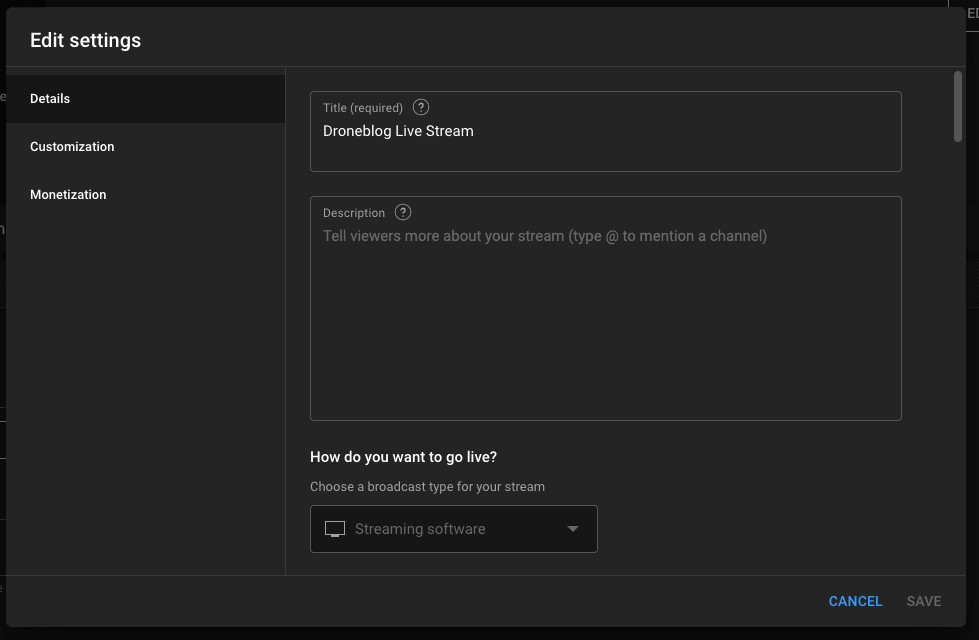
After you have this information, feel free to edit your streaming details and information, partially shown below.

» MORE: Do I Need a Drone License to Post Drone Videos on YouTube?
Input the YouTube Stream Settings in DJI Fly
STEP 1: Open the DJI Fly app and go to the settings screen. Tap on the Transmission tab and select Live Streaming Platforms.


STEP 2: Select RTMP. This is the protocol used to livestream.


STEP 3: Input the RMTP Address (Stream URL) copied from the YouTube settings earlier, along with the Stream Key immediately after.
Example: rtmp://a.rtmp.youtube.com/live2/xxxx-xxxx-xxxx-xxxx-xxxx
Step 4: Set your Resolution and Bit rate.
If using the DJI RC 2, there is only one streaming resolution available: 720p. This is because, per DJI, the DJI RC 2 does not have the required processing power to stream in 1080p. You can, however, choose either 5mbs or 3mbs Bitrates, depending on your wifi connection.
If using the DJI RC-N2 with a fast internet connection, feel free to use the 1080p and 2Mbps options. If you are experiencing slow internet, using the 720p and 1 Mbps options is best.
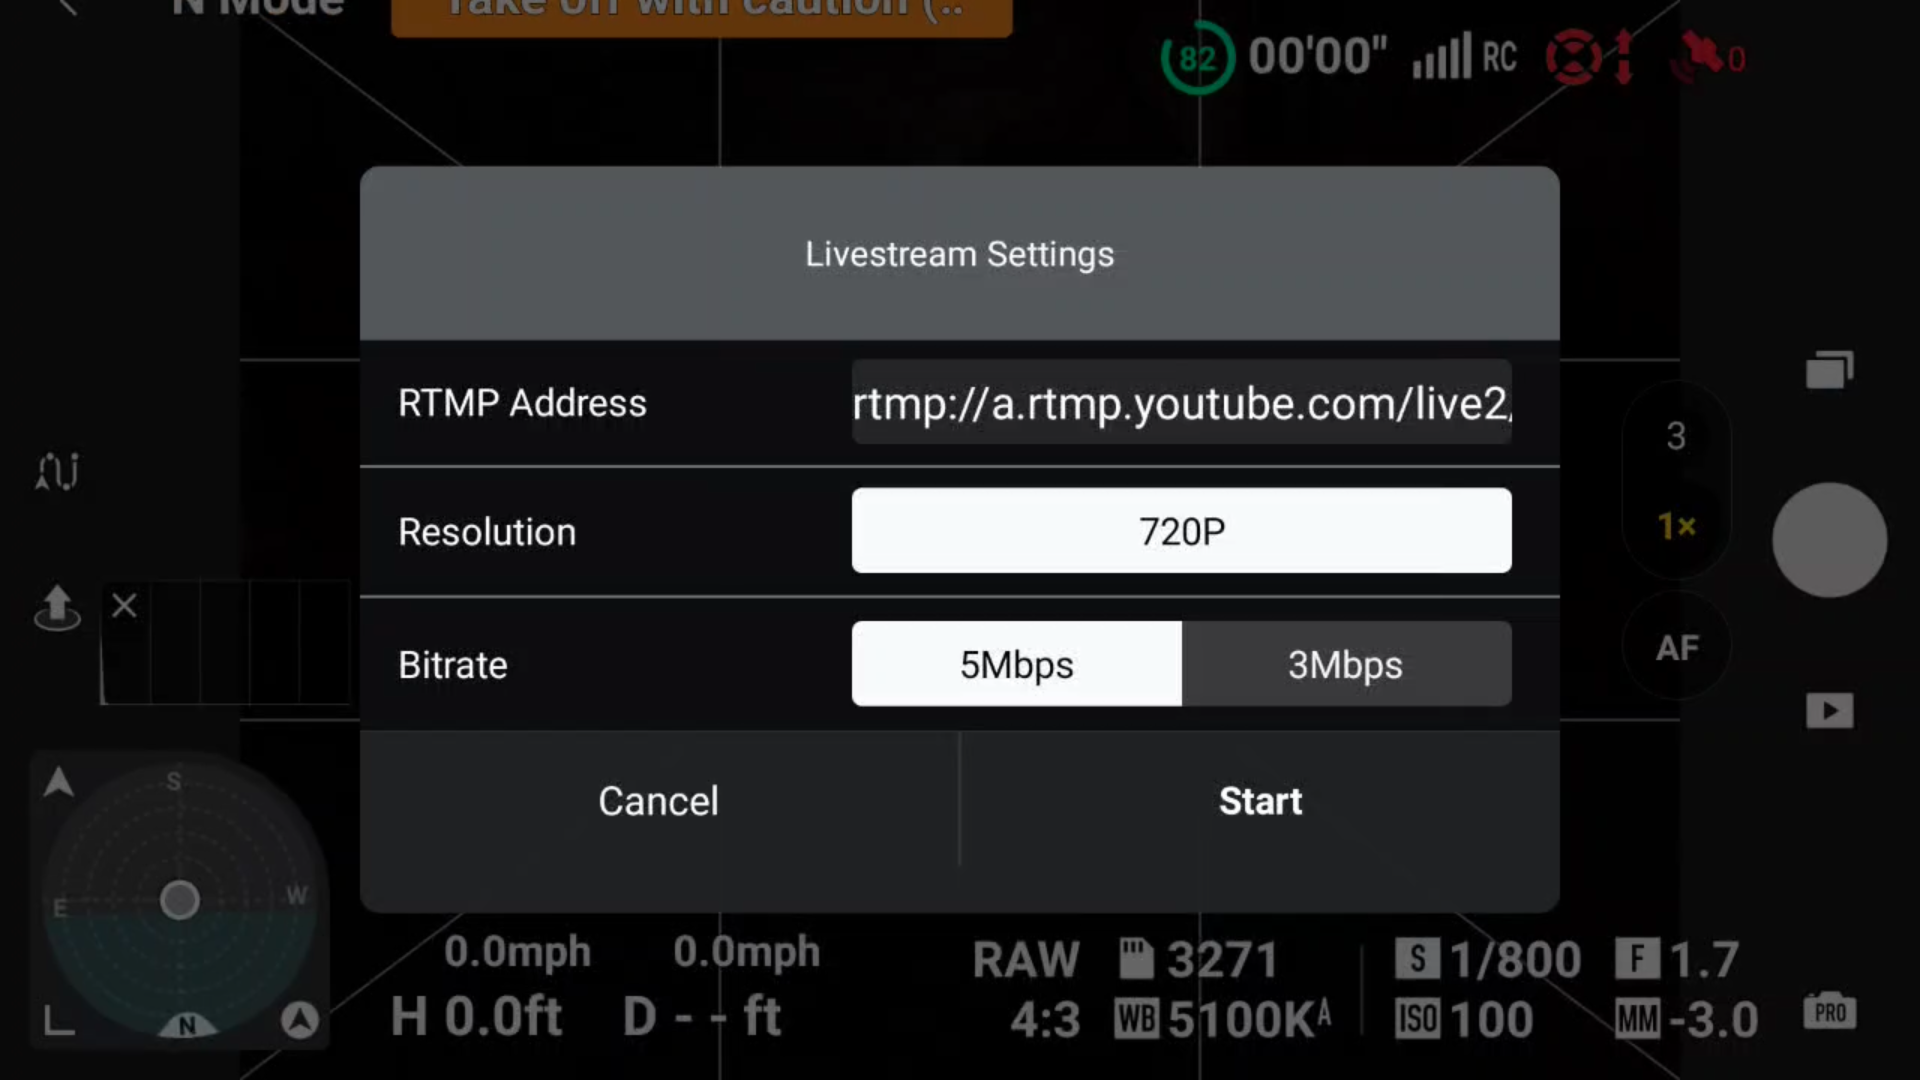

STEP 5: After the Resolution and Bitrate options have been set, press START.
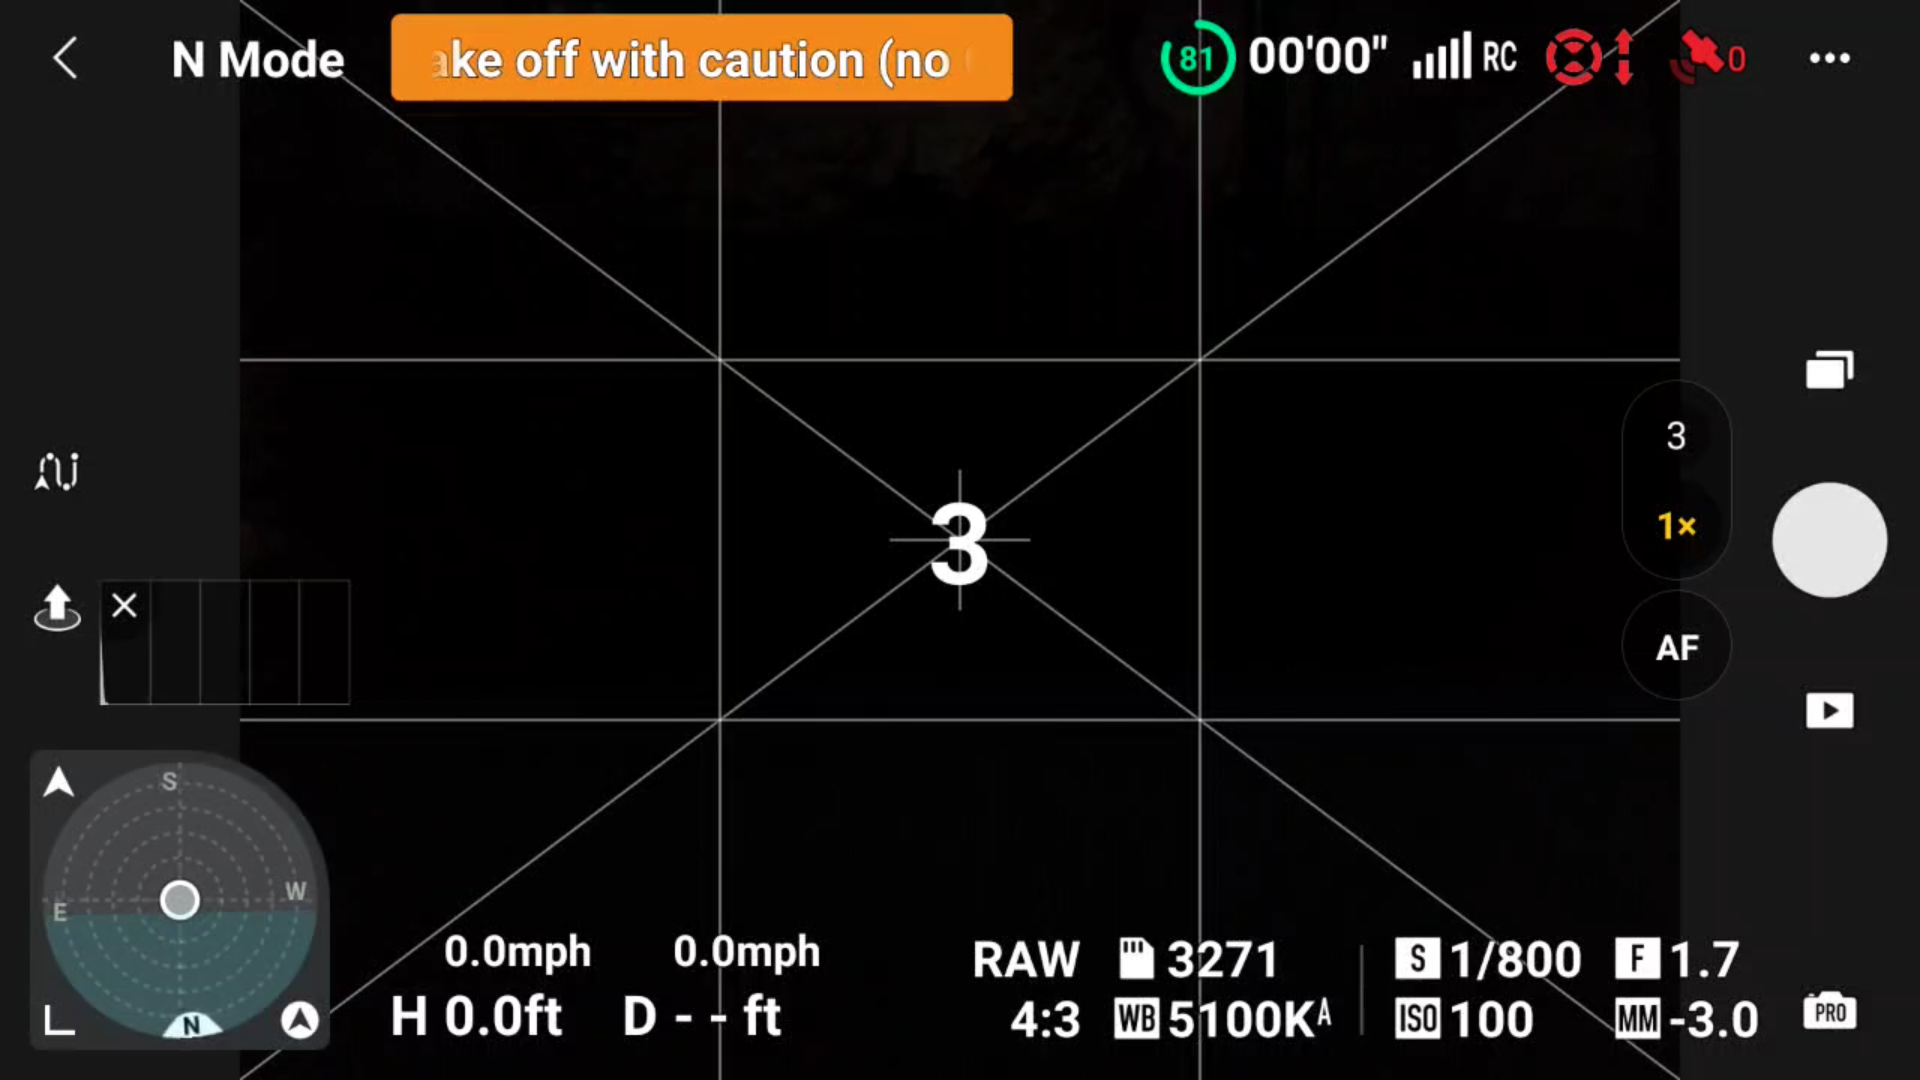
Your live stream will count down, letting you know it will start in 3 seconds.

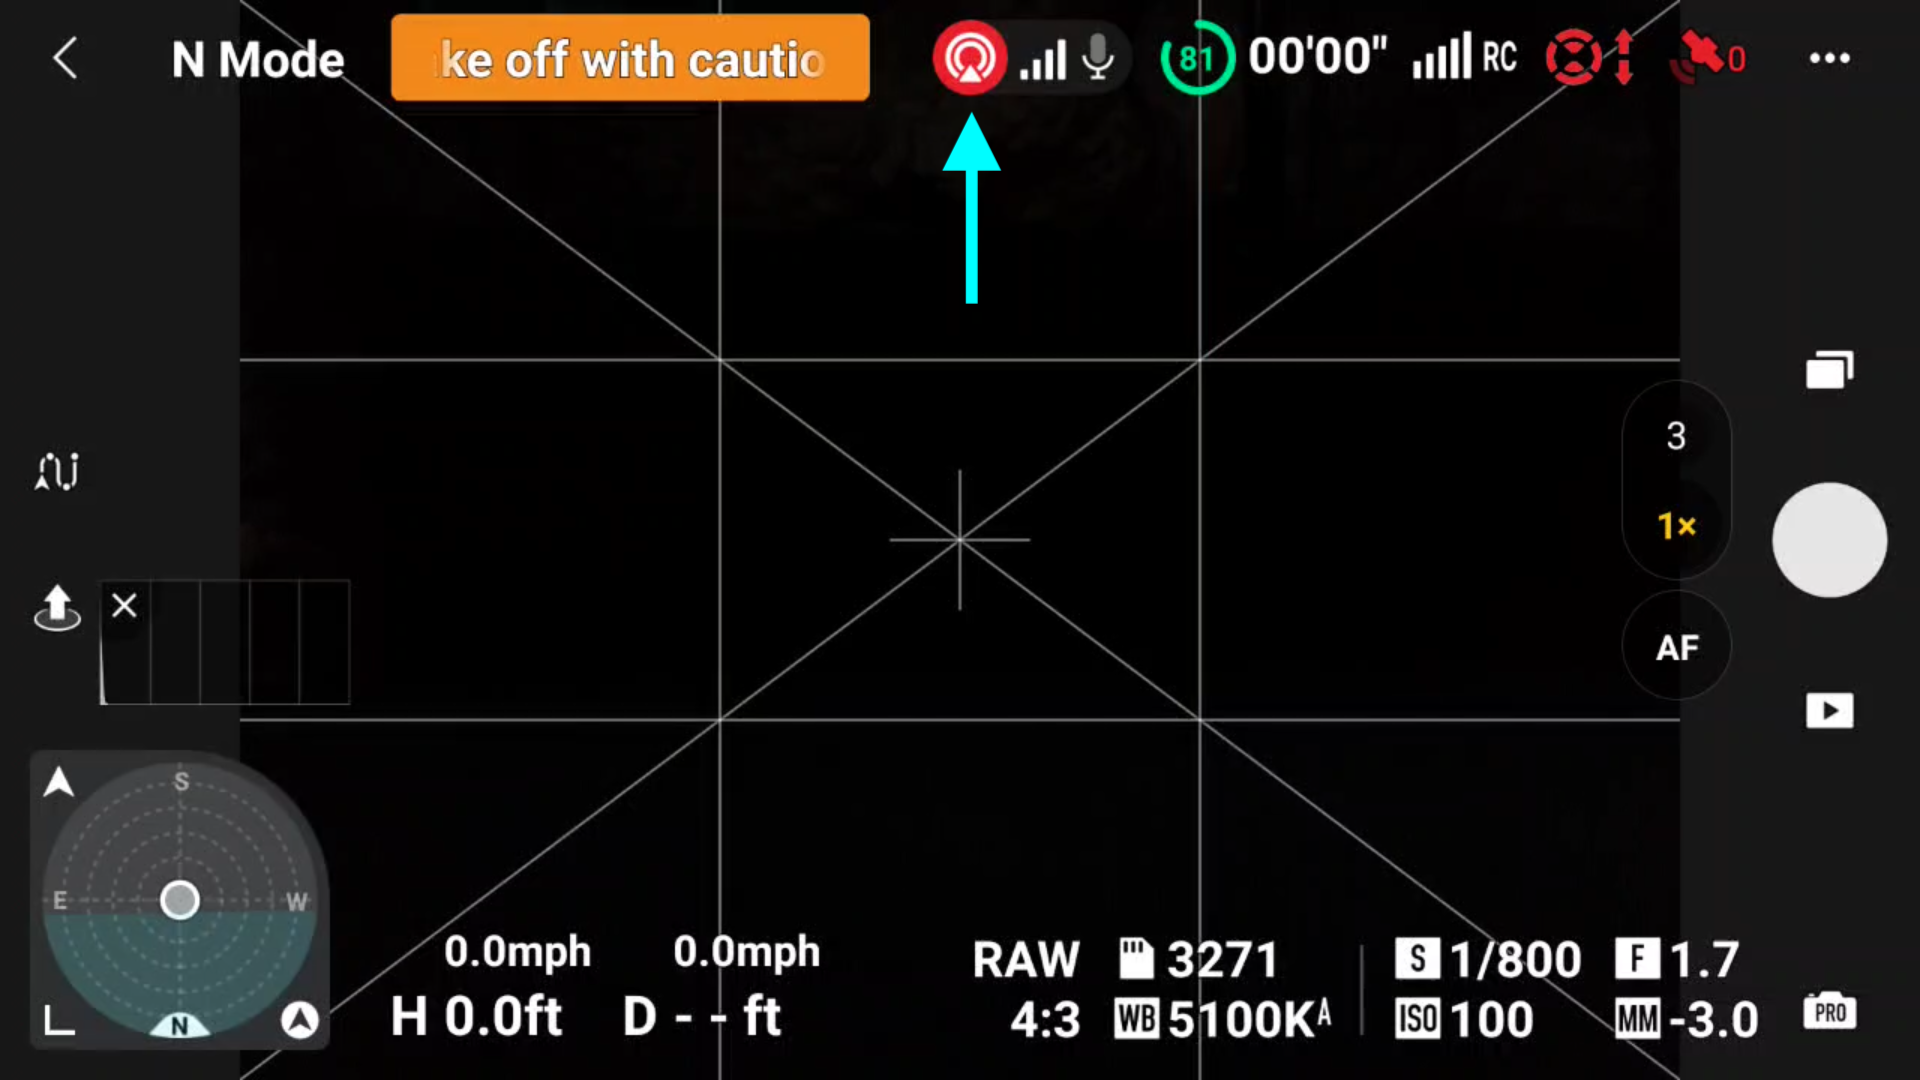
To verify that the live stream has started and is in progress, there is a notification at the top of the DJI Fly screen confirming the status.

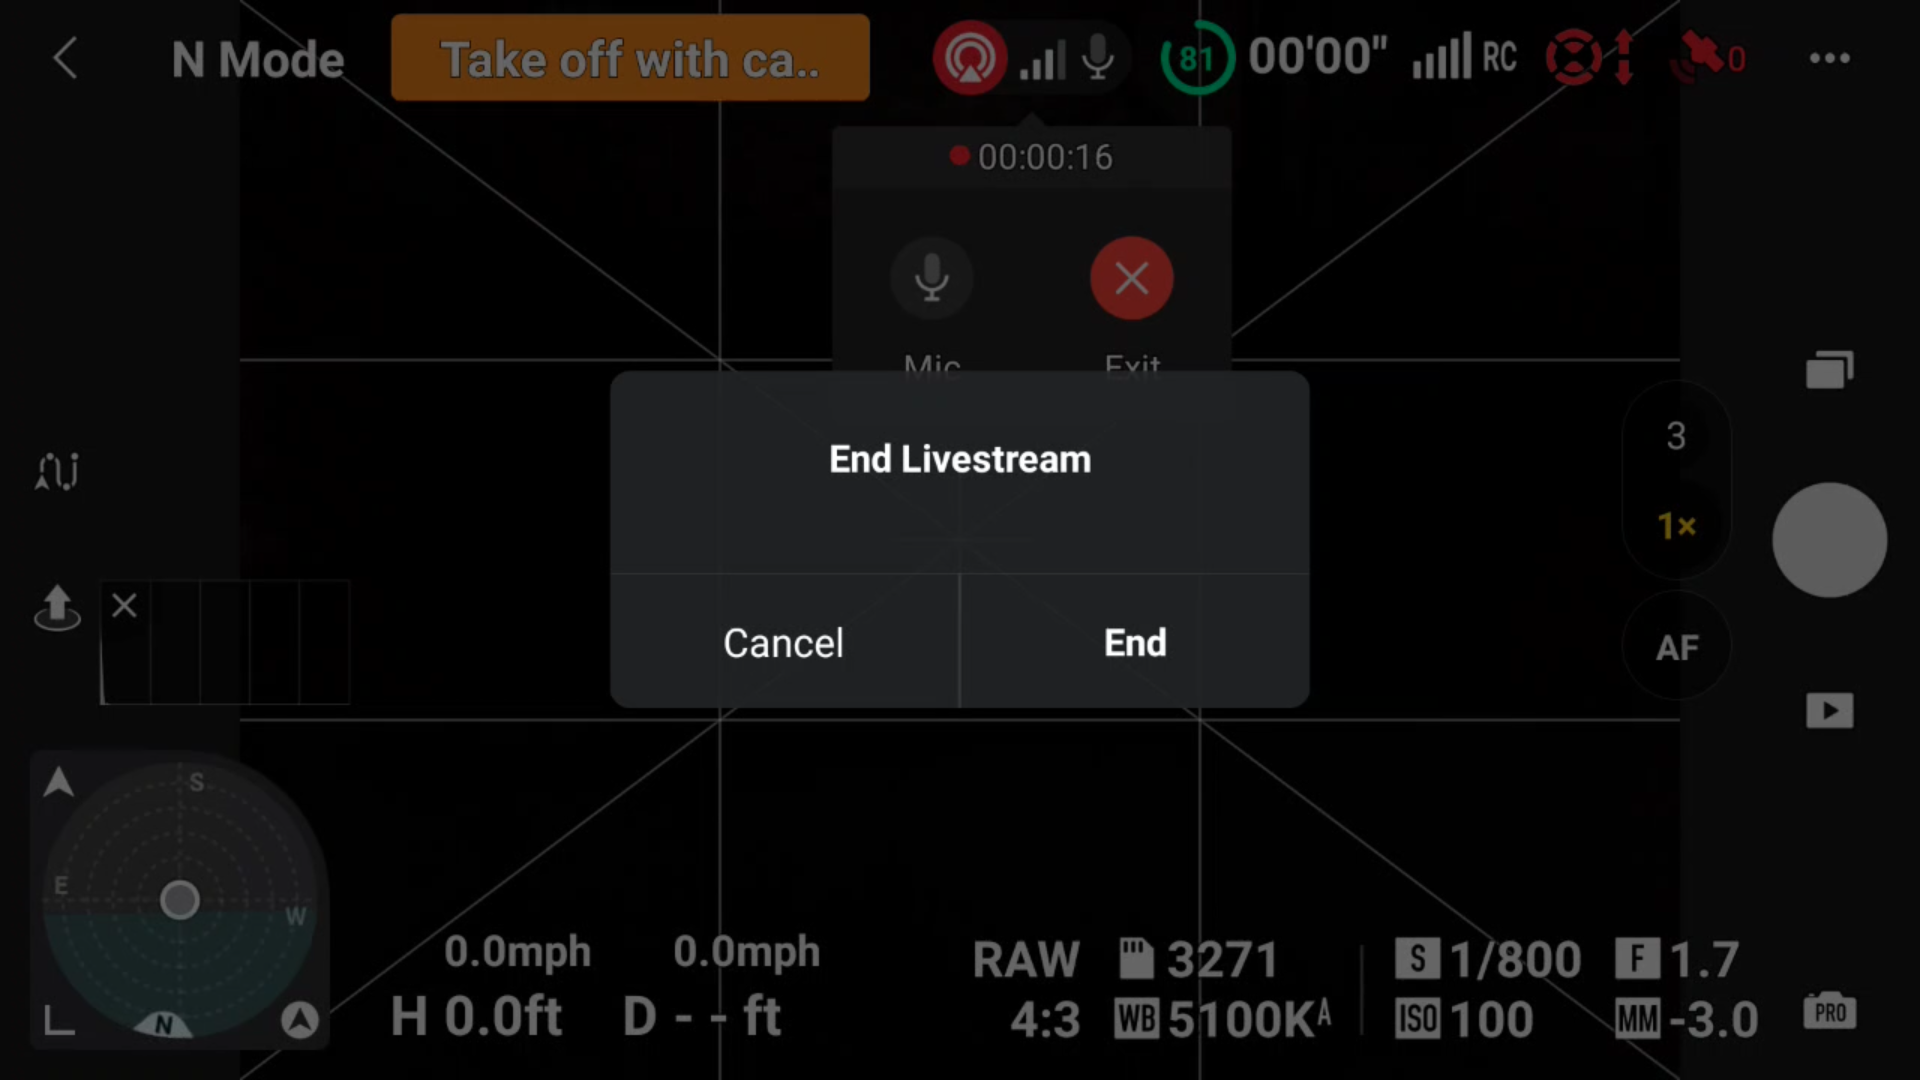
TO STOP THE LIVE STREAM: Tap the notification and hit Exit.
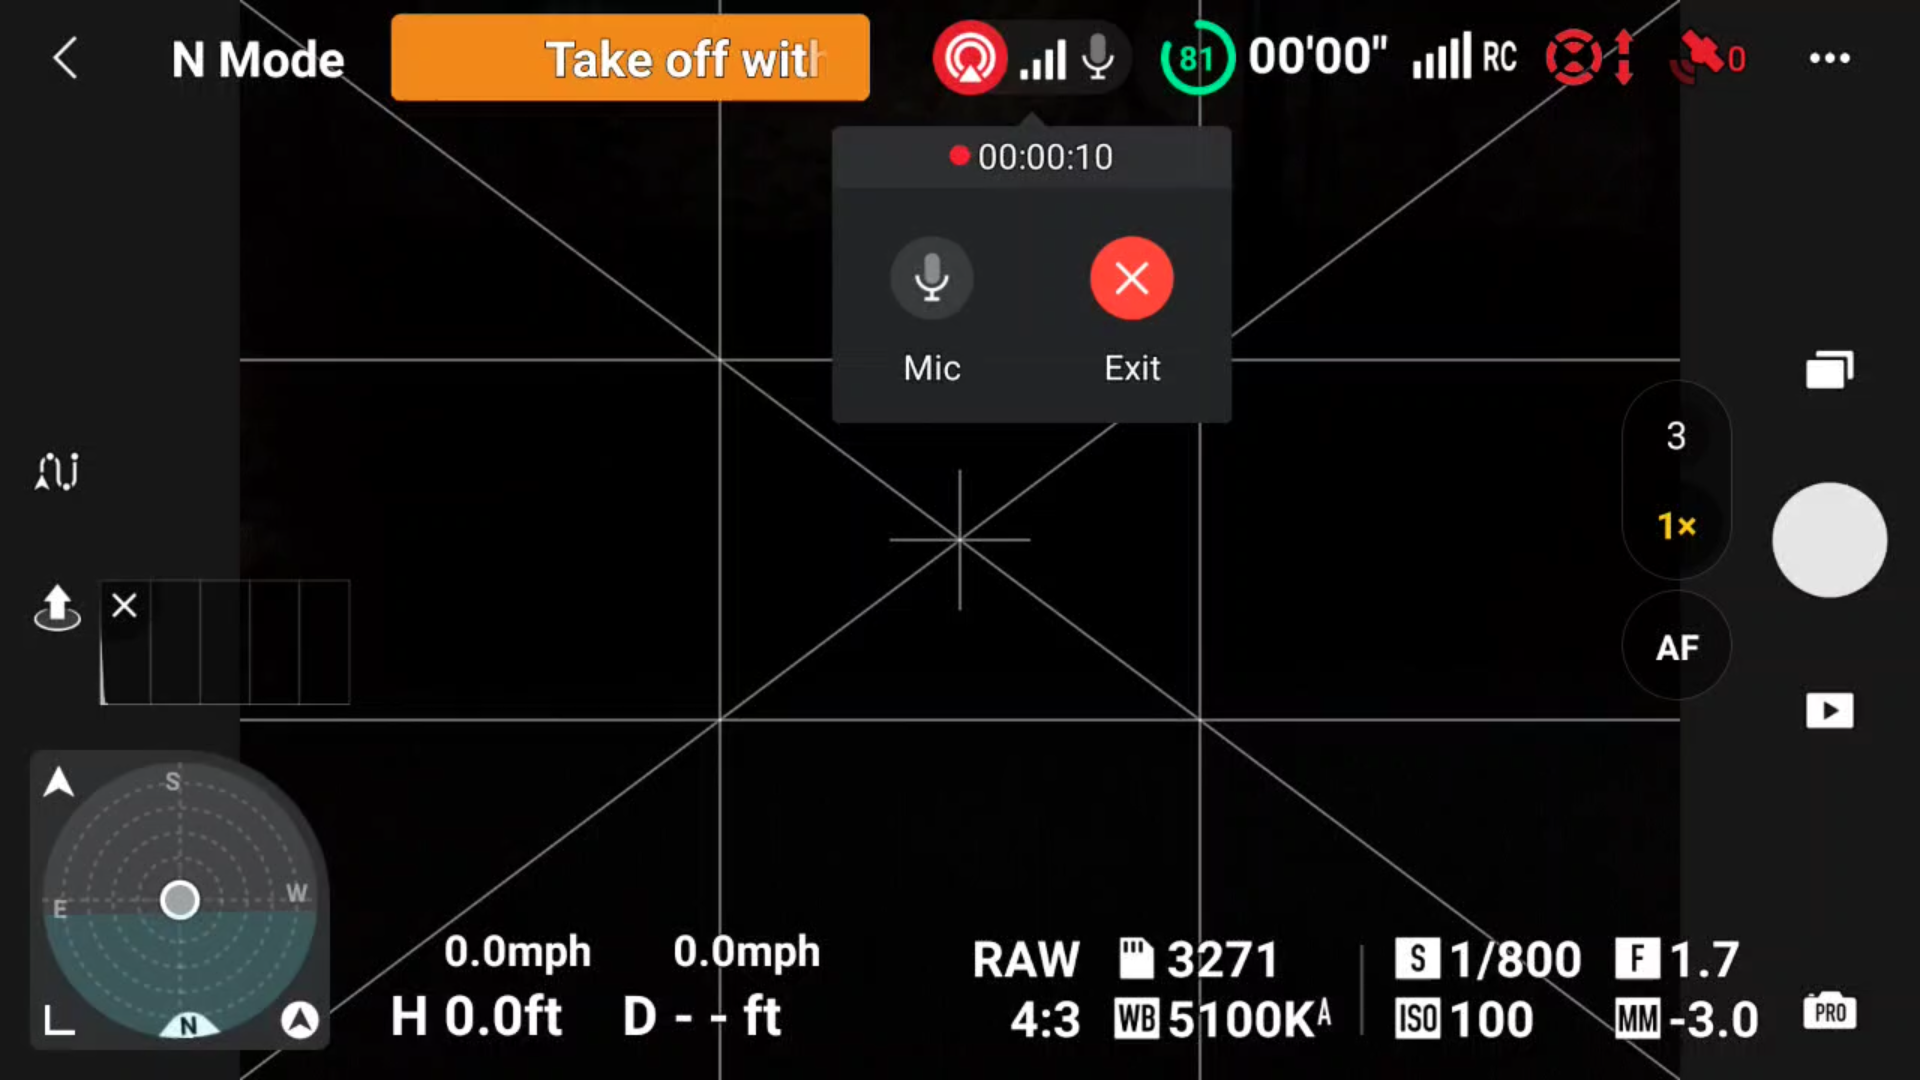

You’ll be given a confirmation to end the Livestream.

» MORE: Can You Fly DJI Air 3 at Night (Explained)
Troubleshooting
Although setting up and using Livestreaming via YouTube on the DJI RC 2 is pretty straightforward, there are a couple of areas live-streamers may have questions about.
Error Messages and Choppy Streaming
For those using the Air 3 with the DJI RC 2 to live stream (not the RC-N2 and smartphone combination), there have been many reports that RC 2 live streaming suffers from extreme lag and what appears to be lost frames.
Additionally, when this occurs there is a message saying: “Error – Your encoder sends data faster than real-time. You should limit live video uploads to approximately 1 second of video per second.”
The current workaround for this, as detailed by DJI support reps, is to attach a USB-C microphone to the DJI RC 2’s USB-C slot on the bottom of the controller. Many find the DJI Mic and DJI Mic 2 easily attach to and work seamlessly with the DJI RC 2.
For those who use one of the various lines of Rode Go mics, like me, a simple male-to-male USB-C adaptor connecting the Rode receiver to the DJI RC 2 will also work.
» MORE: DJI App Not Working? (Ultimate Troubleshooting Guide)
Facebook, Instagram, and TikTok
Streaming to Facebook, Instagram, and TikTok is currently not available on the DJI RC 2.
DJI Live Streaming, as of now, works only with the RTMP protocol, which YouTube utilizes. Facebook, Instagram, and TikTok use the more hacker-resistant and secure RTMPS streaming protocol. Yes, the S in RTMPS signifies “secure.”
DJI has yet to announce if there will be any updates to the streaming protocols the Air 3 can use to Livestream. Currently, YouTube streaming is the only native option using the DJI RC 2.


