
The DJI Mini 4 Pro, with its dual stacked 1/1.3″ CMOS image sensor, takes excellent photos, whether in optimal conditions or even in low light.
On the video front, the camera captures impressive 4k 100fps, 10-bit footage. Footage that is almost as impressive as that seen on the more expensive Mavic 3 series.
How can all of this content be downloaded?
This comprehensive guide, with screenshots, and YouTube video will walk through downloading photos and videos if using:
- A Windows PC
- A Mac
- A cell phone or smart device
- The DJI Quick Transfer feature
Downloading Photos & Videos
There are various ways to access the content on the DJI Mini 4 Pro.
One method is the direct connect method, which can be done by directly connecting the Mini 4 Pro to a PC or Mac using the included USB-C cable.
The second method is using an SD card reader. To do so, simply:
- Remove the SD card from the Mini 4 Pro
- Insert the card into the reader
- Plug the reader into a computer
Afterward, you can then view and edit the information directly from within a directory on your PC or Mac.
This is a convenient way to transfer/download files, as the Mini 4 Pro does not need to be physically present or connected to a computer to do so.
If you decide to go this route, the steps below can be followed after the PC or Mac has recognized the SD card.
Our Pick

SD Card Reader, Beikell Dual Connector USB-C
USB 3.0 Memory Card Reader Adapter – Supports SD/Micro SD/MMC/SDXC/SDHC/Micro SDHC Compatible with MacBook Pro, MacBook Air, Galaxy S21, S22
We earn a commission if you make a purchase, at no additional cost to you.
01/29/2024 02:32 pm GMT
» MORE: How to Pair the DJI Mini 4 Pro (With Pictures & Video)
Downloading/Transferring files to Windows PC
Direct Connect Method
STEP 1: Connect the Mini 4 Pro USB to USB-C cable to your PC, plugging the USB side into an empty USB slot on your PC.
STEP 2: While the Mini 4 Pro is off, plug the USB-C end into the Mini 4 Pro.
STEP 3: Your PC should automatically recognize the Mini 4 Pro storage.
Note: Unlike previous DJI drones, there is no need to power on the Mini 4 Pro, as when it connects to the PC via USB-C, the internal storage, and SD card are accessible.
Skip to STEP 4 in the SD Card Reader section below to go directly to working within Windows/File Explorer.
» MORE: How to Download from DJI Air 3 (Step-By-Step Guide with Photos, Screenshots & Video)
SD Card Reader Method
STEP 1: Eject the SD card from the Mini 4 Pro.

STEP 2: Insert the Micro SD card into the corresponding SD card slot on the reader.
STEP 3: Insert the SD card reader into your PC.


STEP 4: Windows/File Explorer may automatically launch. If it does not, open your Windows/File Explorer by right-clicking on the Windows icon on the bottom of your PC and choosing File Explorer.
STEP 5: After opening your File Explorer, you should see your Mini 4 Pro’s SD card. I previously named mine Mini4Pro to easily distinguish it from the dozens of other cards I insert and use on my PC regularly.


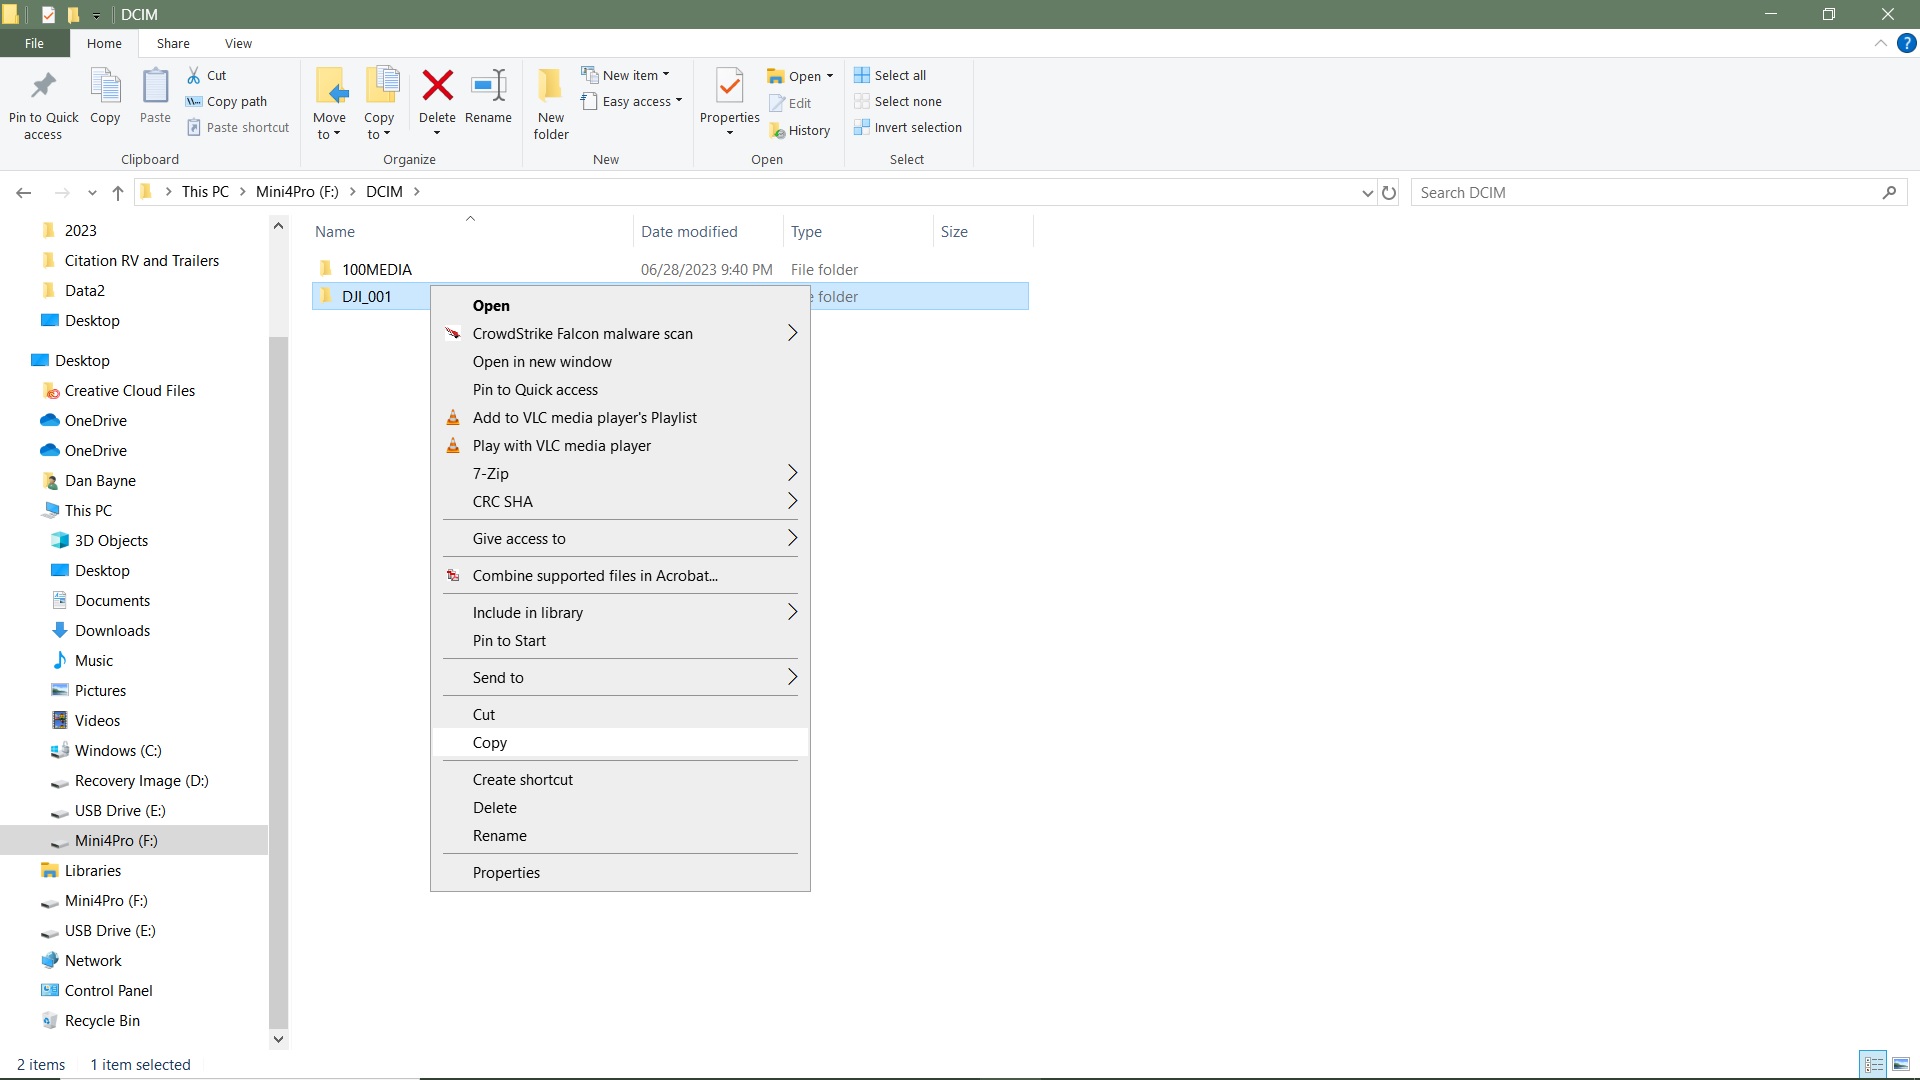
STEP 6: After clicking on your Mini 4 Pro‘s SD card, you will see the contents of the SD card.
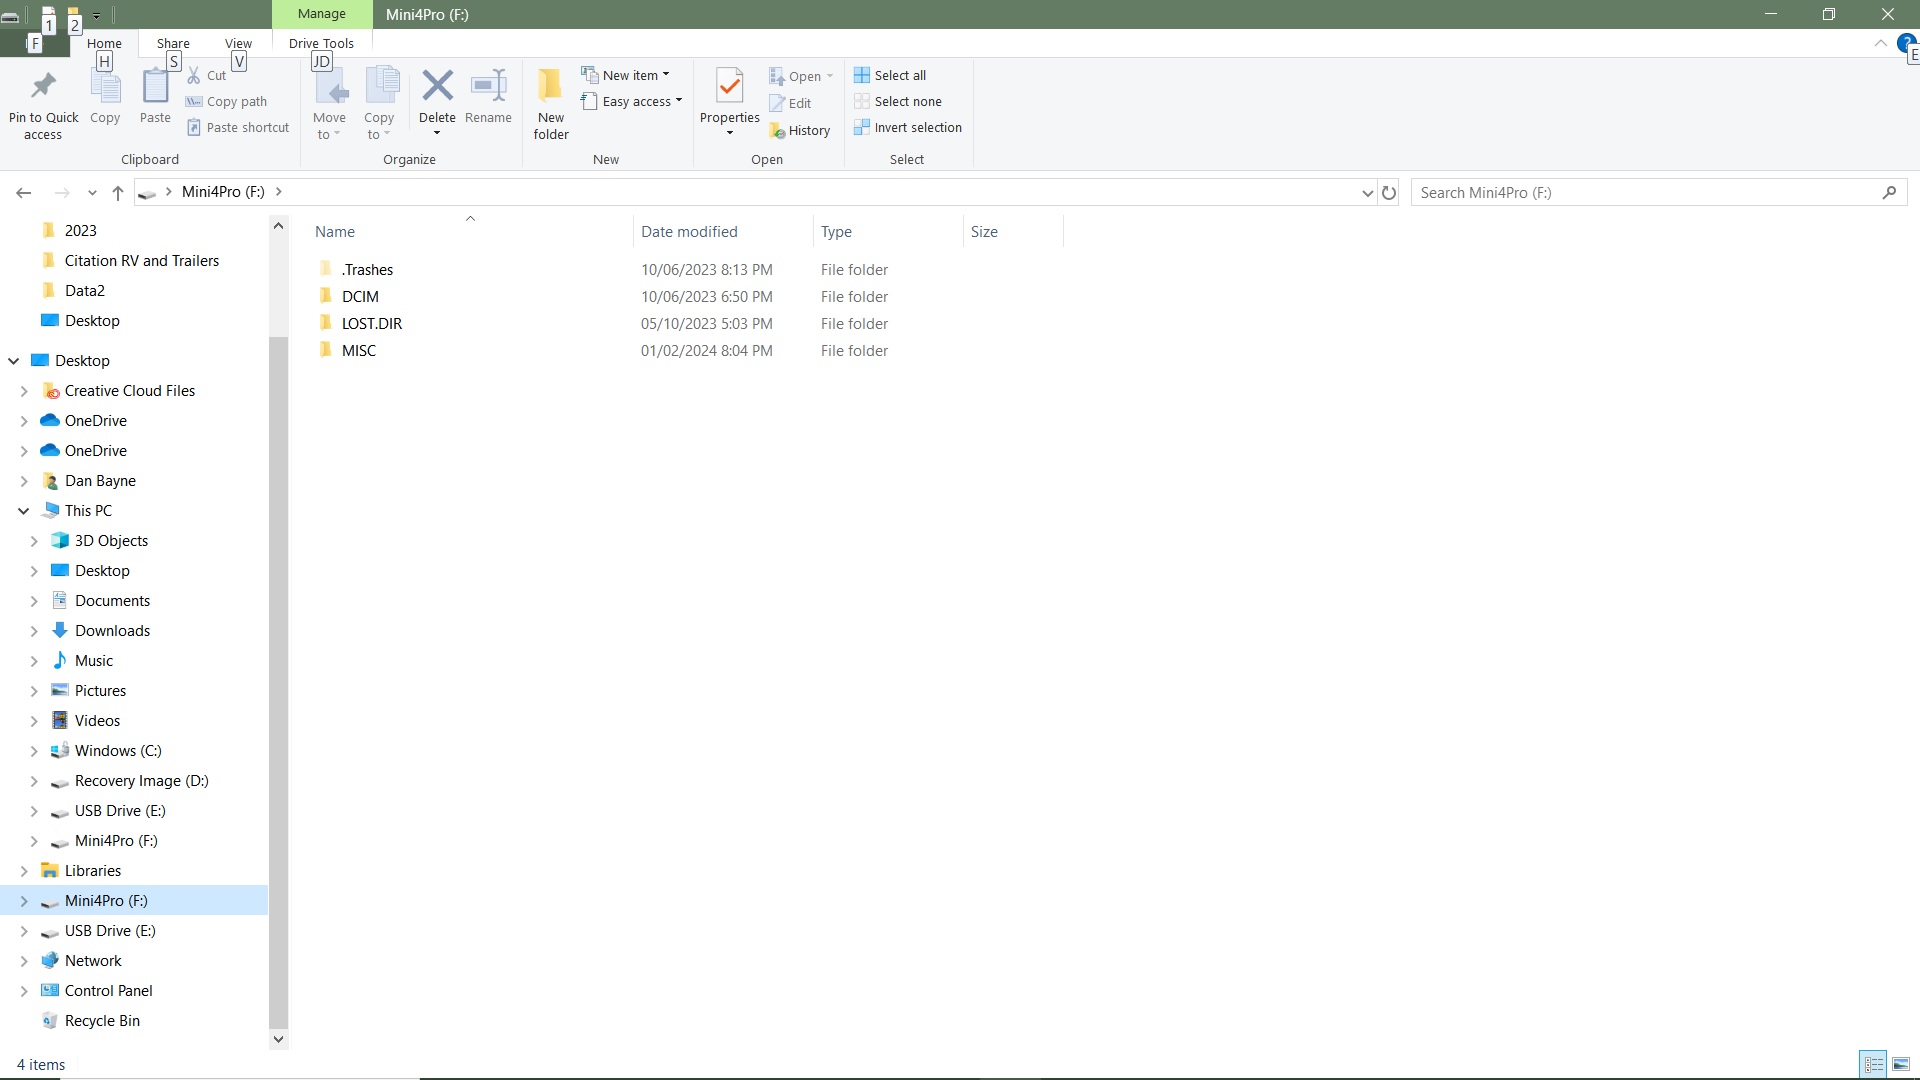
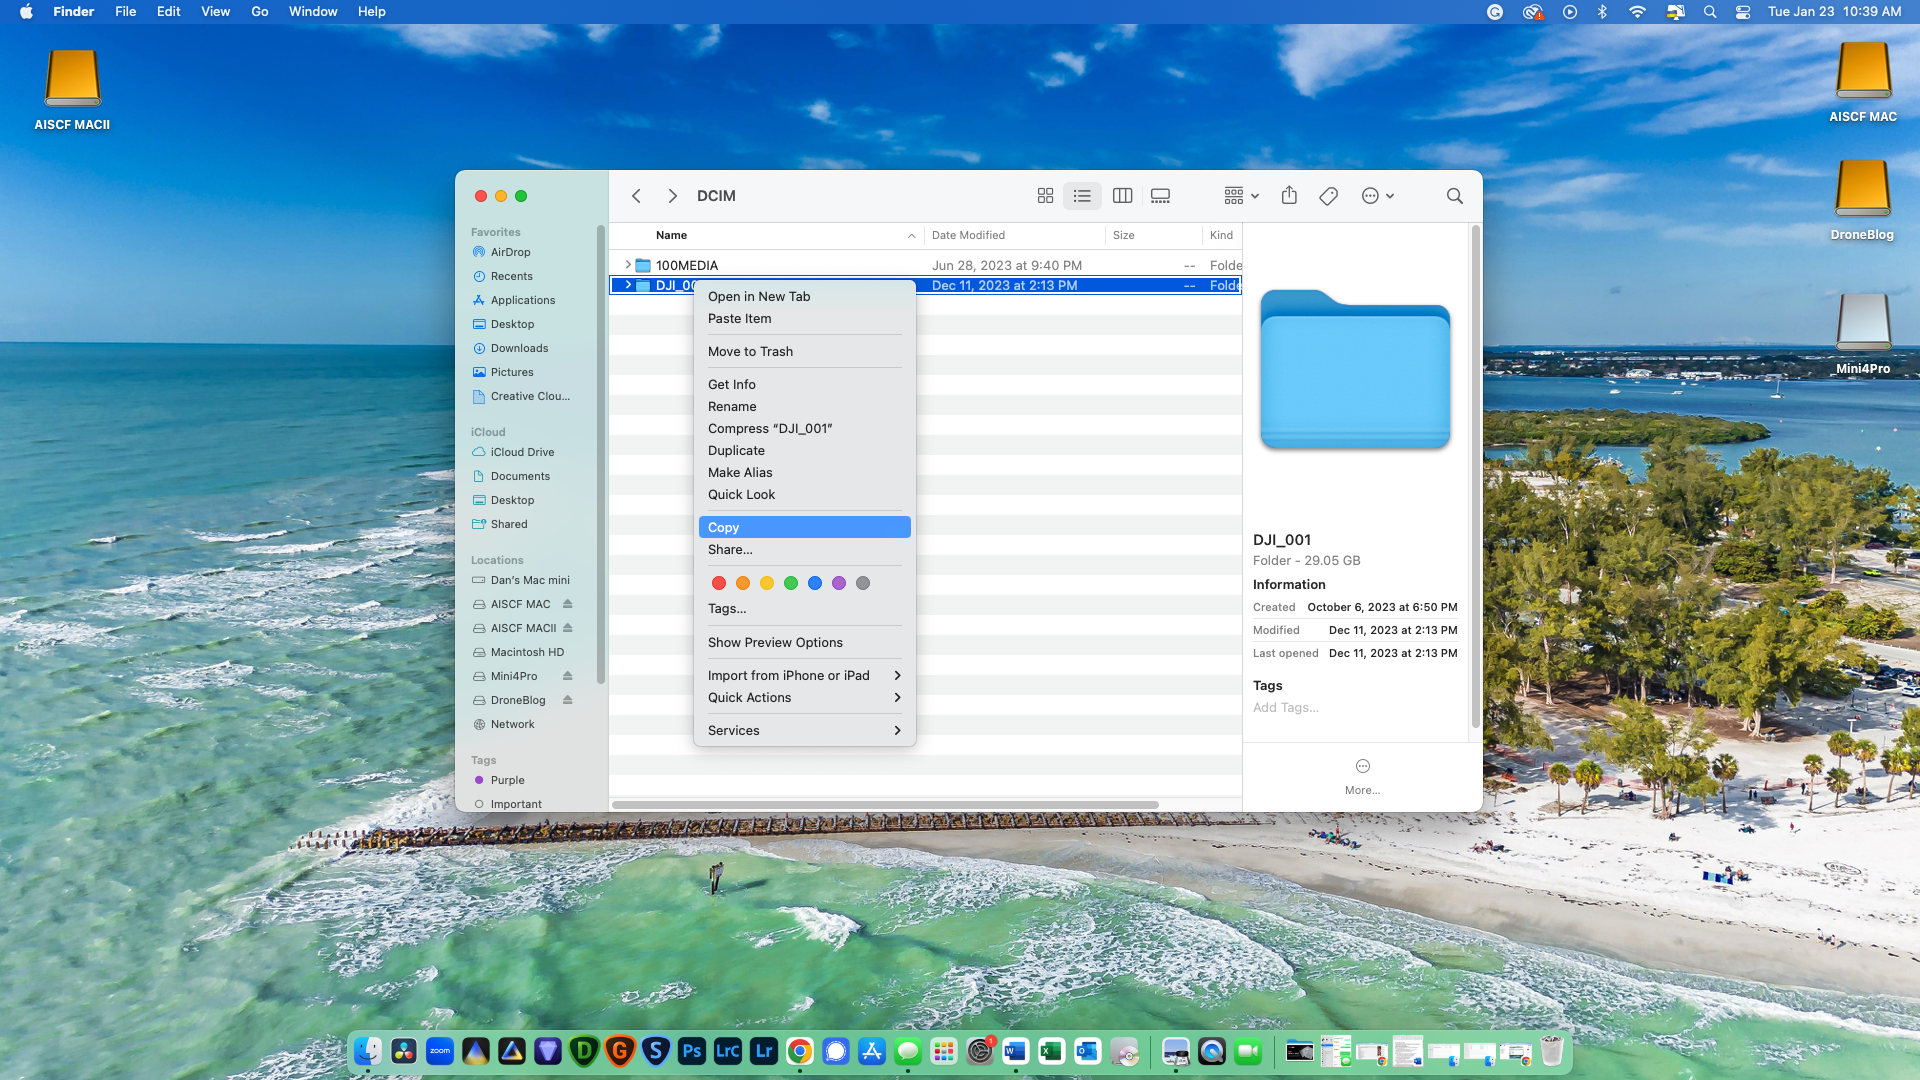
STEP 7: Selecting the DCIM folder will bring you to the directory where your media is ultimately stored. Mine is the DJI_001 directory. Yours may be different.

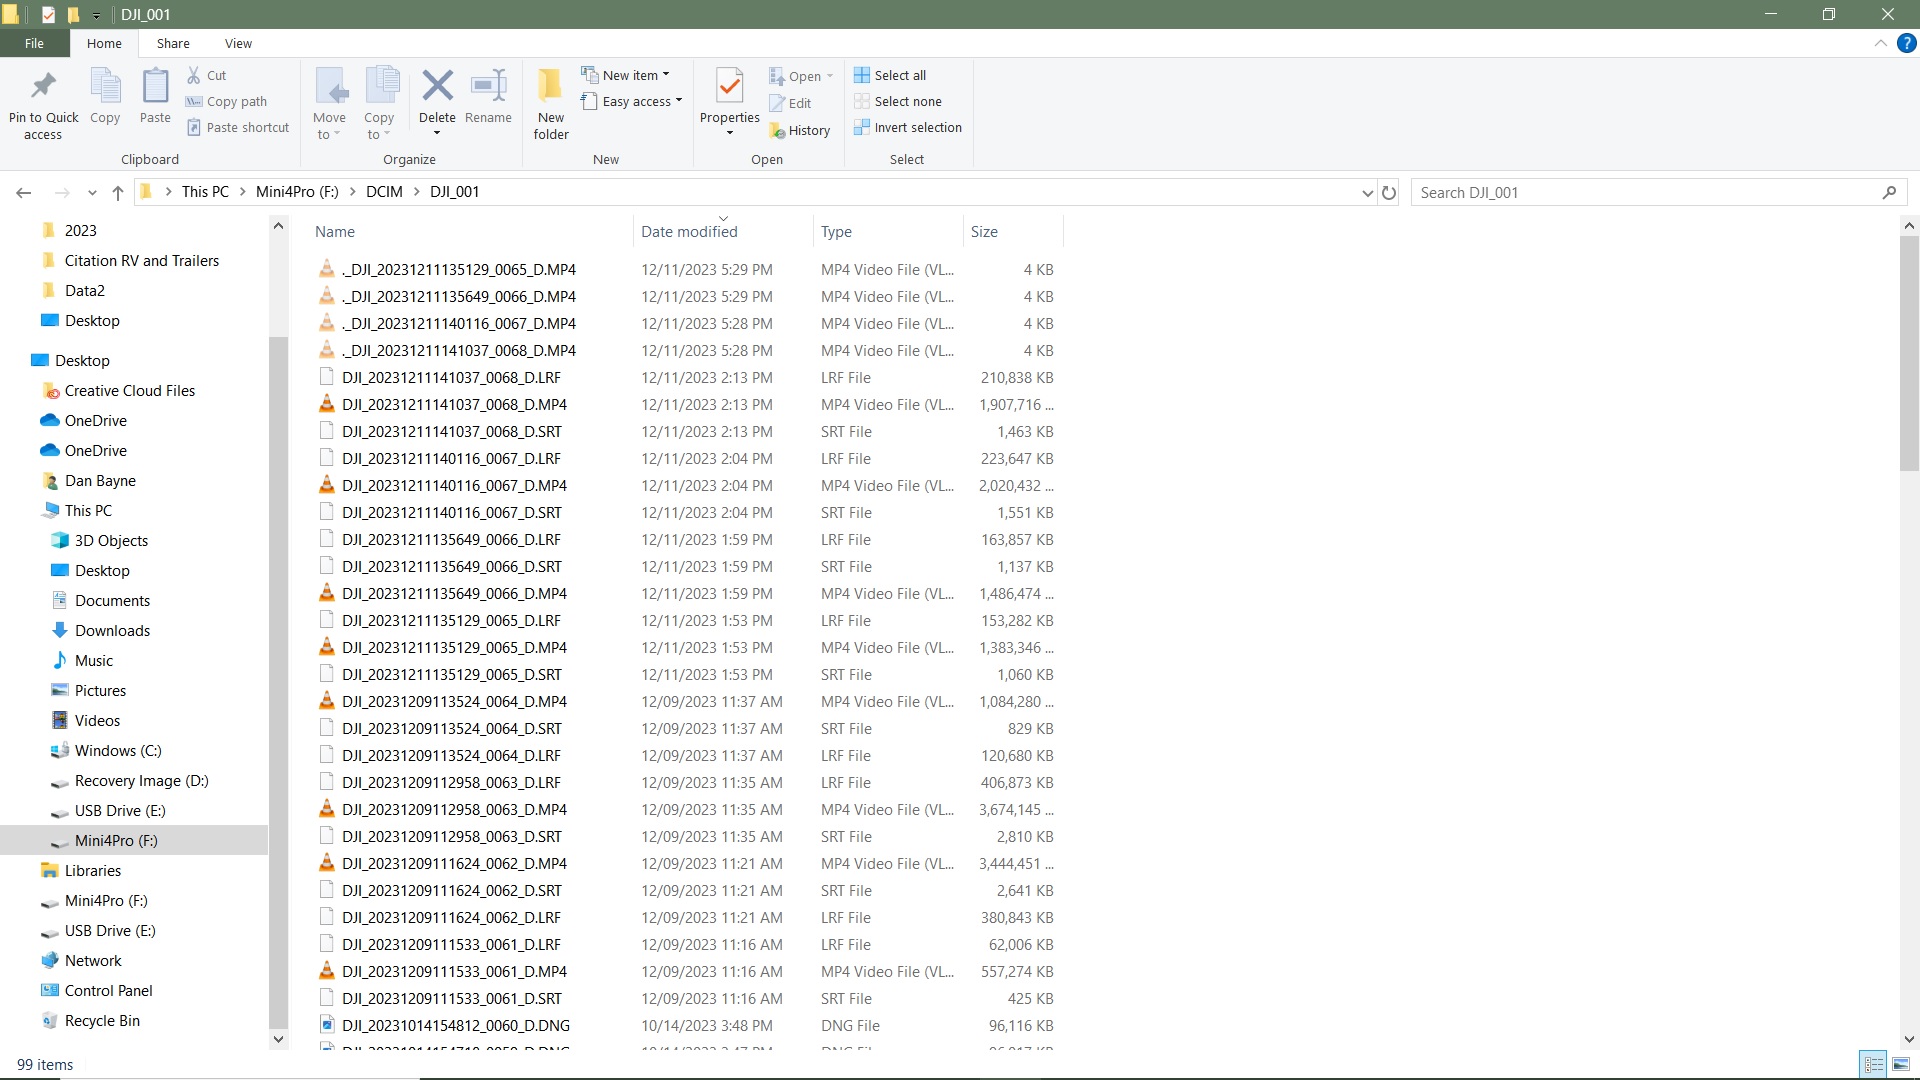
STEP 8: To copy all of the files into the directory of your choice on your PC, you can right-click the DJI_001 directory and choose COPY.
Alternatively, you can click and choose what files you’d like to copy and then move to STEP 9.
STEP 9: To paste the files or directory into your folder/directory of choice, navigate through the Explorer Window, locate the directory you’d like to copy to, open the directory, and then right-click and PASTE into said location.

» MORE: DJI Mavic 3 QuickTransfer – How to Download Files (Step-by-Step Guide)
Mac
Direct Connect Method
STEP 1: Connect the Mini 4 Pro USB to USB-C cable to your Mac, plugging the USB side into an empty USB slot on your Mac.
STEP 2: While the Mini 4 Pro is off, plug the USB-C end into the Mini 4 Pro.
STEP 3: Your Mac will automatically recognize the Mini 4 Pro storage (Internal memory and SD card).
Note: Unlike previous DJI drones, there is no need to power on the Mini 4 Pro, as when it connects to the Mac via USB-C, the internal storage and SD card are accessible.
Skip to STEP 4 in the SD Card Reader section below.
» MORE: Mavic Air 2S – How to Download Video from Mavic Air 2 & Air 2S to Mac (Step-by-Step Guide)
SD Card Reader Method
STEP 1: Eject the SD card from the Mini 4 Pro.
STEP 2: Insert the Micro SD card into the corresponding SD card slot on the reader.
STEP 3: Insert the SD card reader into your Mac.
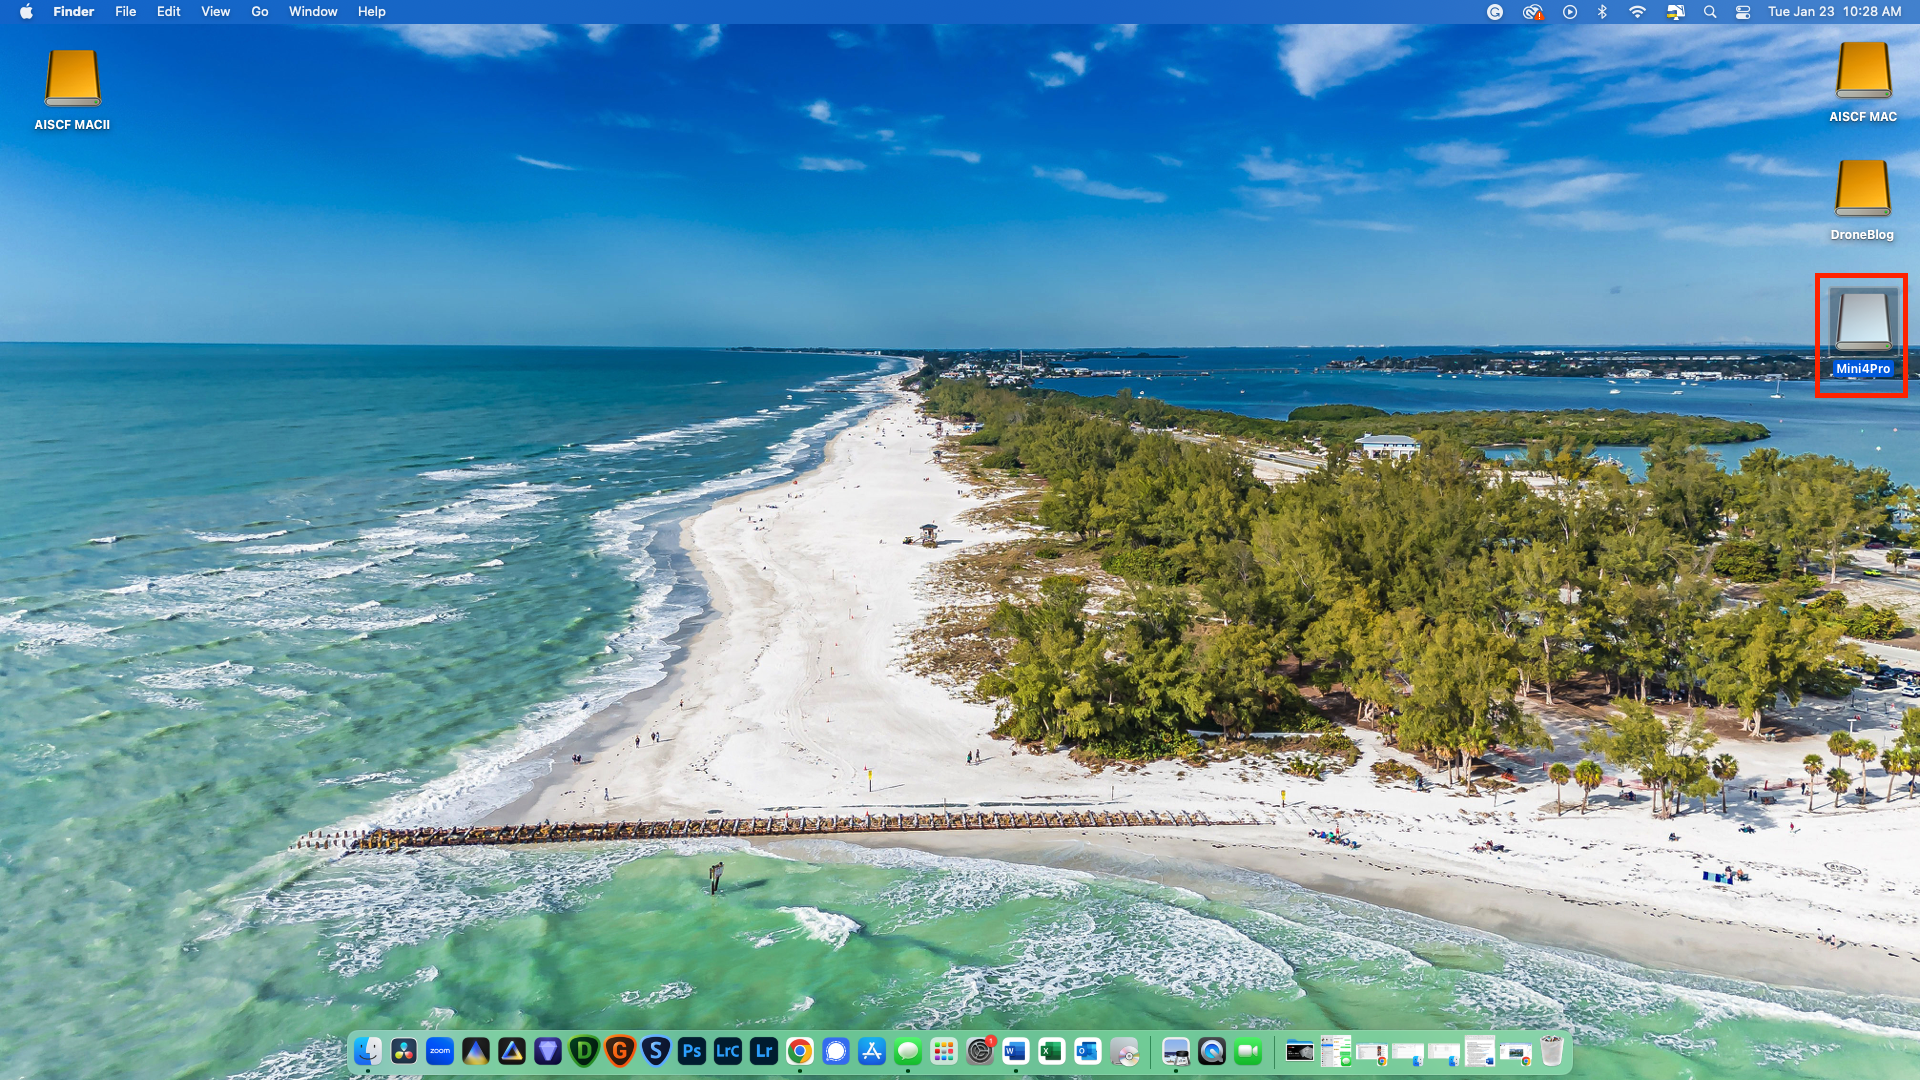
STEP 4: After the SD card reader connects to the Mac environment, you should see the SD card name appear on the desktop.
In this instance, mine is named Mini4Pro.
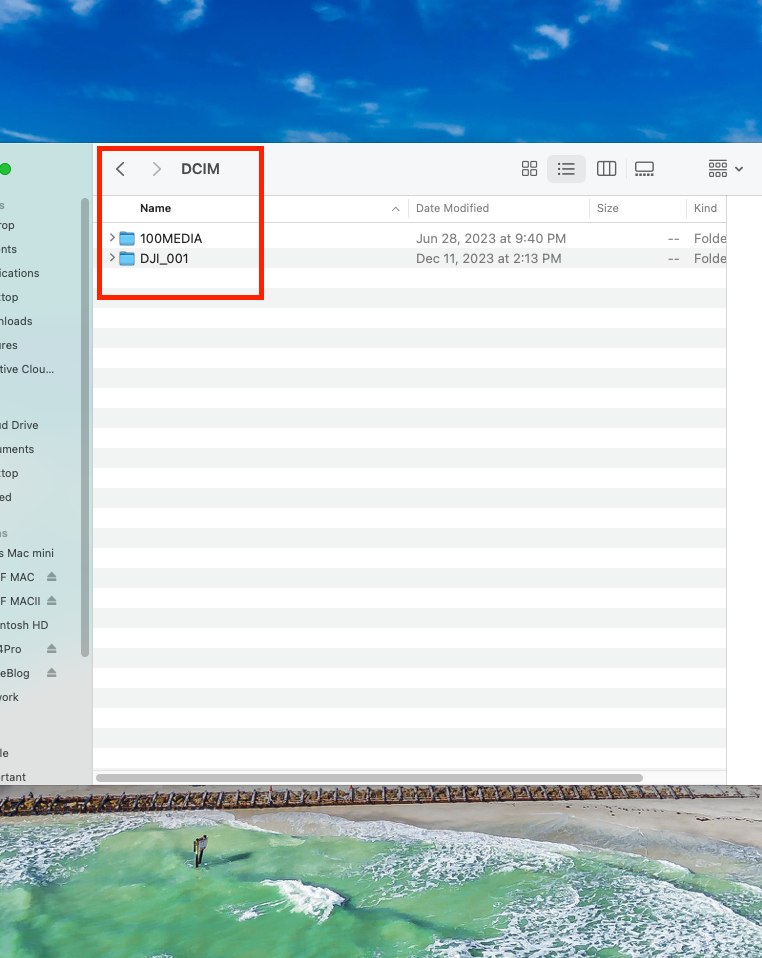
STEP 5: After you double-click the SD card icon (shown above) a Mac Finder window will open, showing you the contents of the card.

STEP 6: To access your Mini 4 Pro’s pictures or videos, double-click the DCIM folder.
STEP 7: Under the DJI_001 directory (yours may be different) you will find your DNG (RAW), JPEG, and MP4 files.
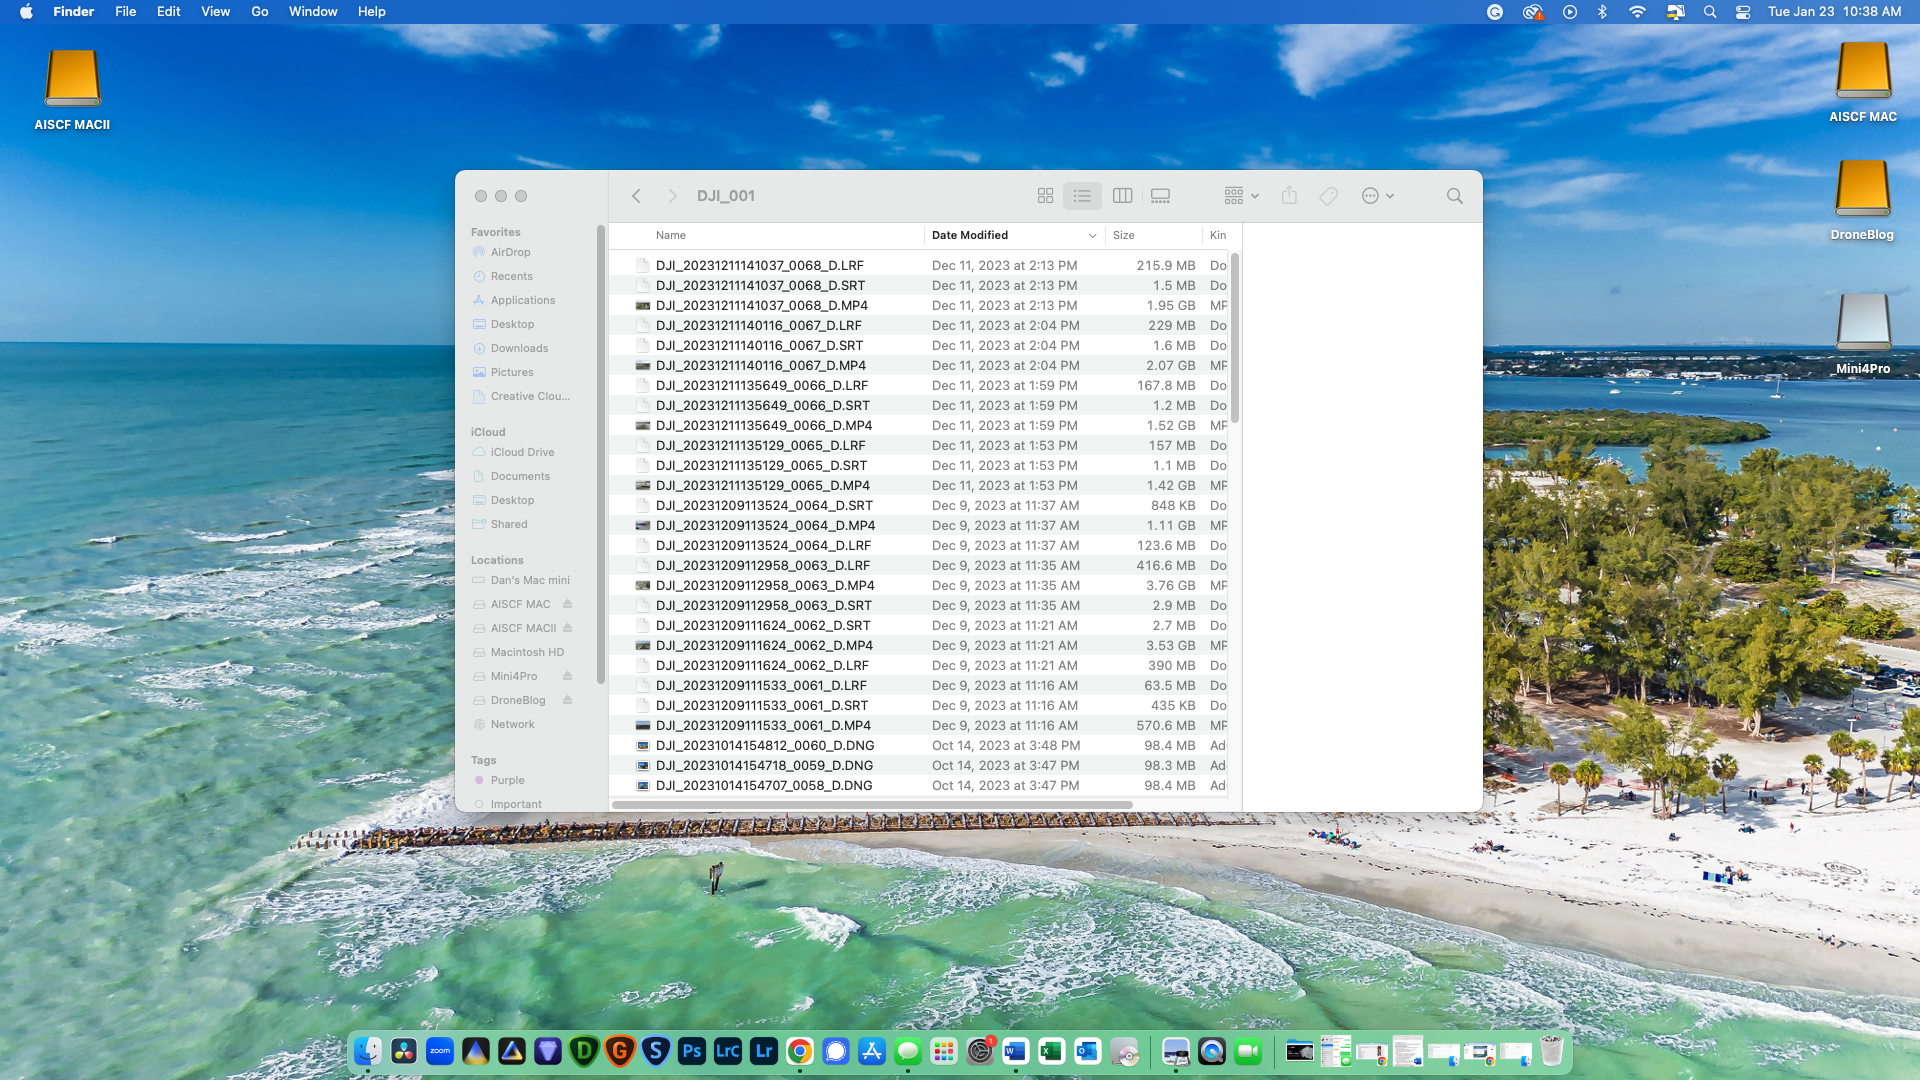
STEP 8: To copy all of the files into the directory of your choice on your Mac, you can right-click the DJI_001 directory and choose COPY.
You can also pick and choose what files you’d like to copy and then move to STEP 9.
STEP 9: To paste the files or directory into your folder/directory of choice, navigate through the Finder Window, locate the directory you’d like to copy to, open the directory, and then right-click and PASTE into said location.

» MORE: How to Format SD Cards in DJI Drones (Quick Steps with Photos)
Phone/Device
When flying with a DJI RC-N2, you can download images and videos from the Mini 4 Pro SD card directly to your smartphone, while connected to the DJI Fly app.
Downloading individual files is fairly slow, but will work for those who only need to access and edit a few files.
Those wanting to download multiple files will want to use the QuickTransfer feature at the end of this article.
We mentioned the DJI RC-N2 as being the controller you can copy Mini 4 Pro files with, as photos and videos cannot be copied to the DJI RC 2 remote controller at this time.
The files from the Mini 4 Pro are copied directly to your Android or iOS smartphone or device through the DJI Fly app.
To download files directly to your Android or iOS smartphone or device while in the DJI Fly app:
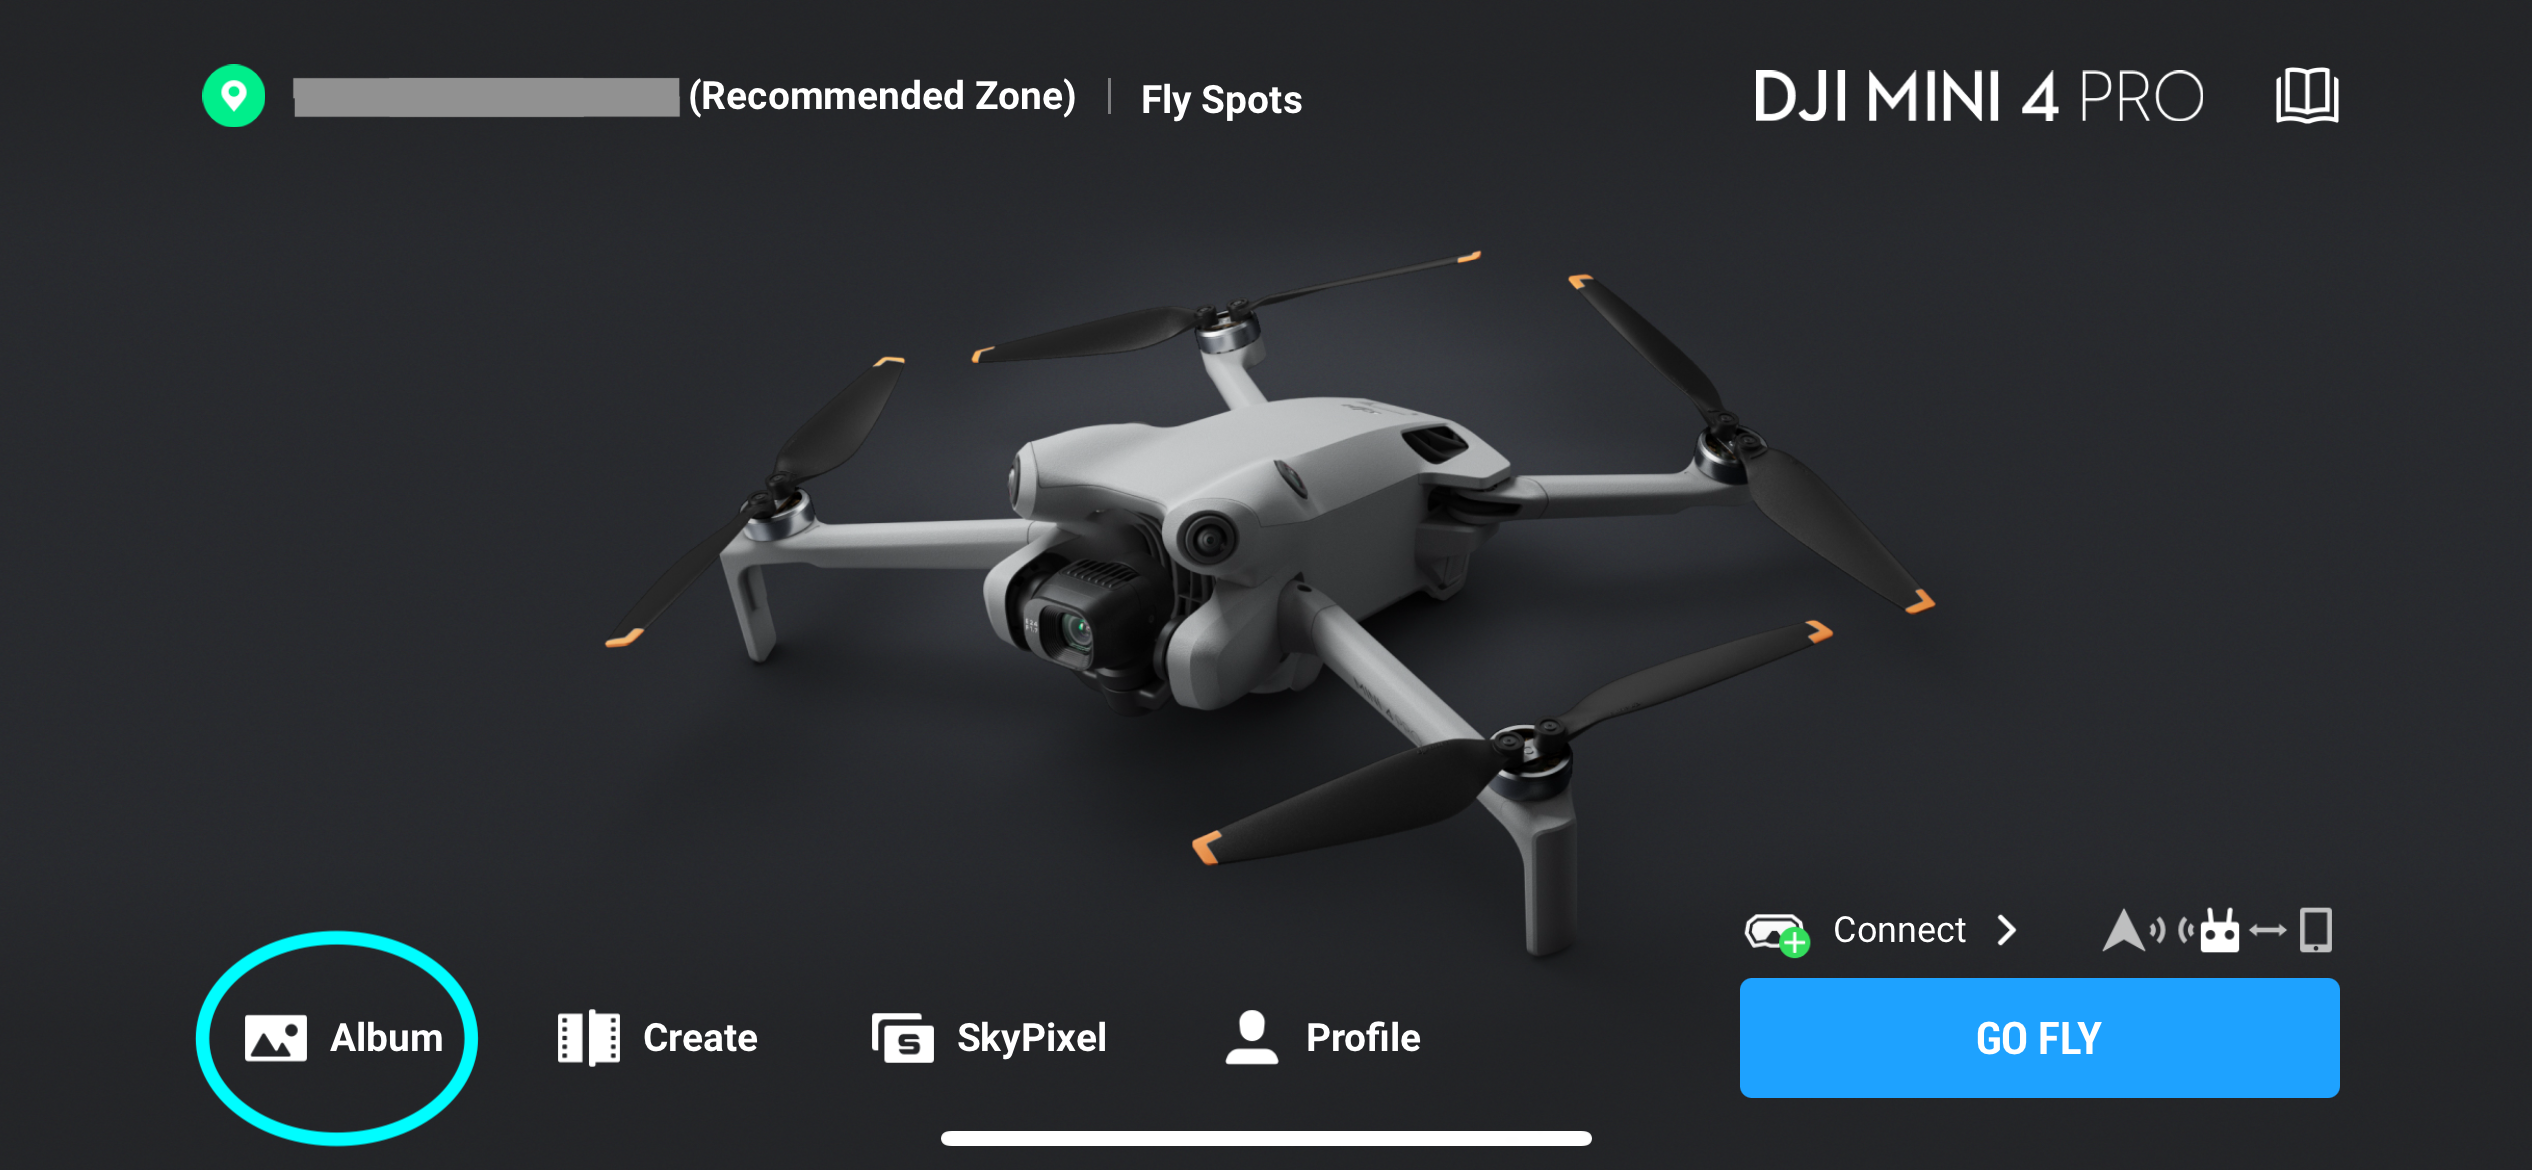
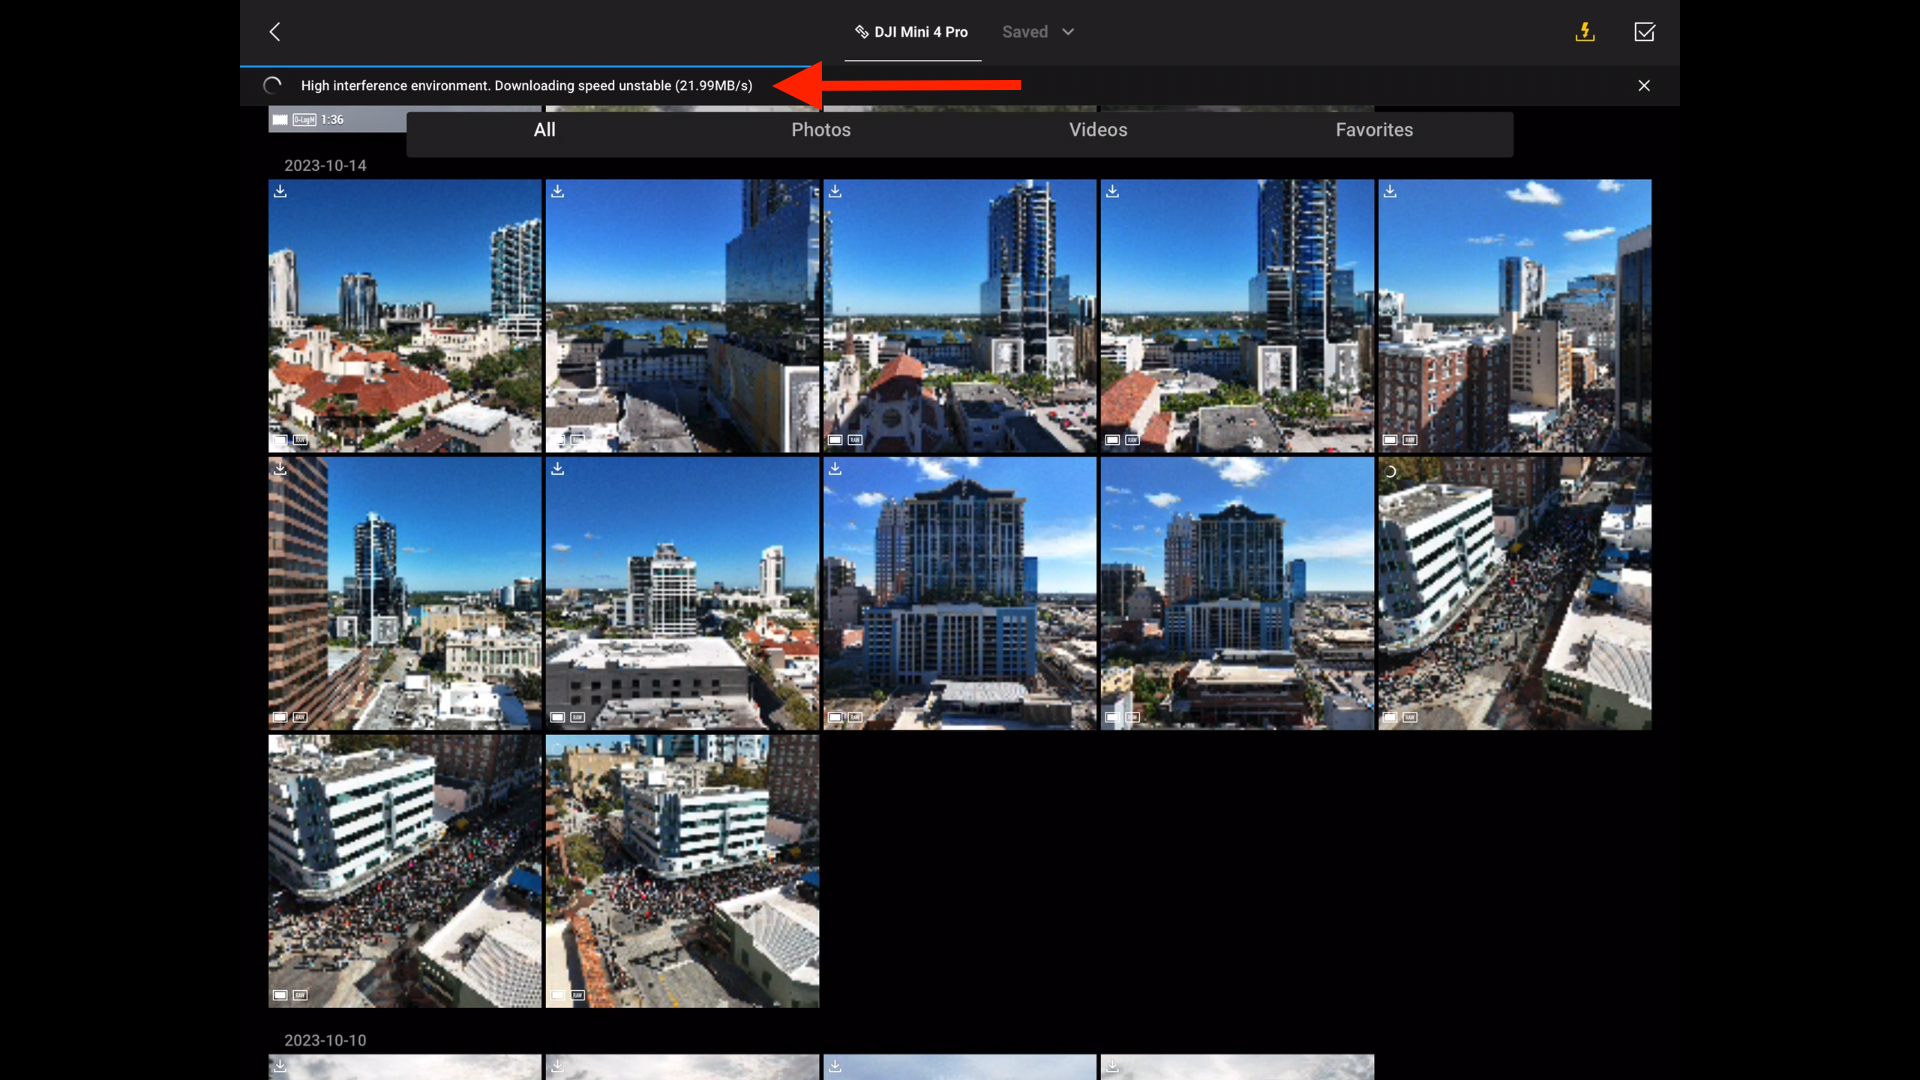
STEP 1: While connected to the powered-on Mini 4 Pro, back out to the main DJI Fly screen.
STEP 2: Select Album
You can then choose to view Photos, Videos, or all content.

STEP 3: Press the checkmark in the upper right-hand corner to enter batch select mode, where you can either individually select files to download or batch select multiple files.
STEP 4: Select the files needed, then press the download button on the bottom right-hand corner.
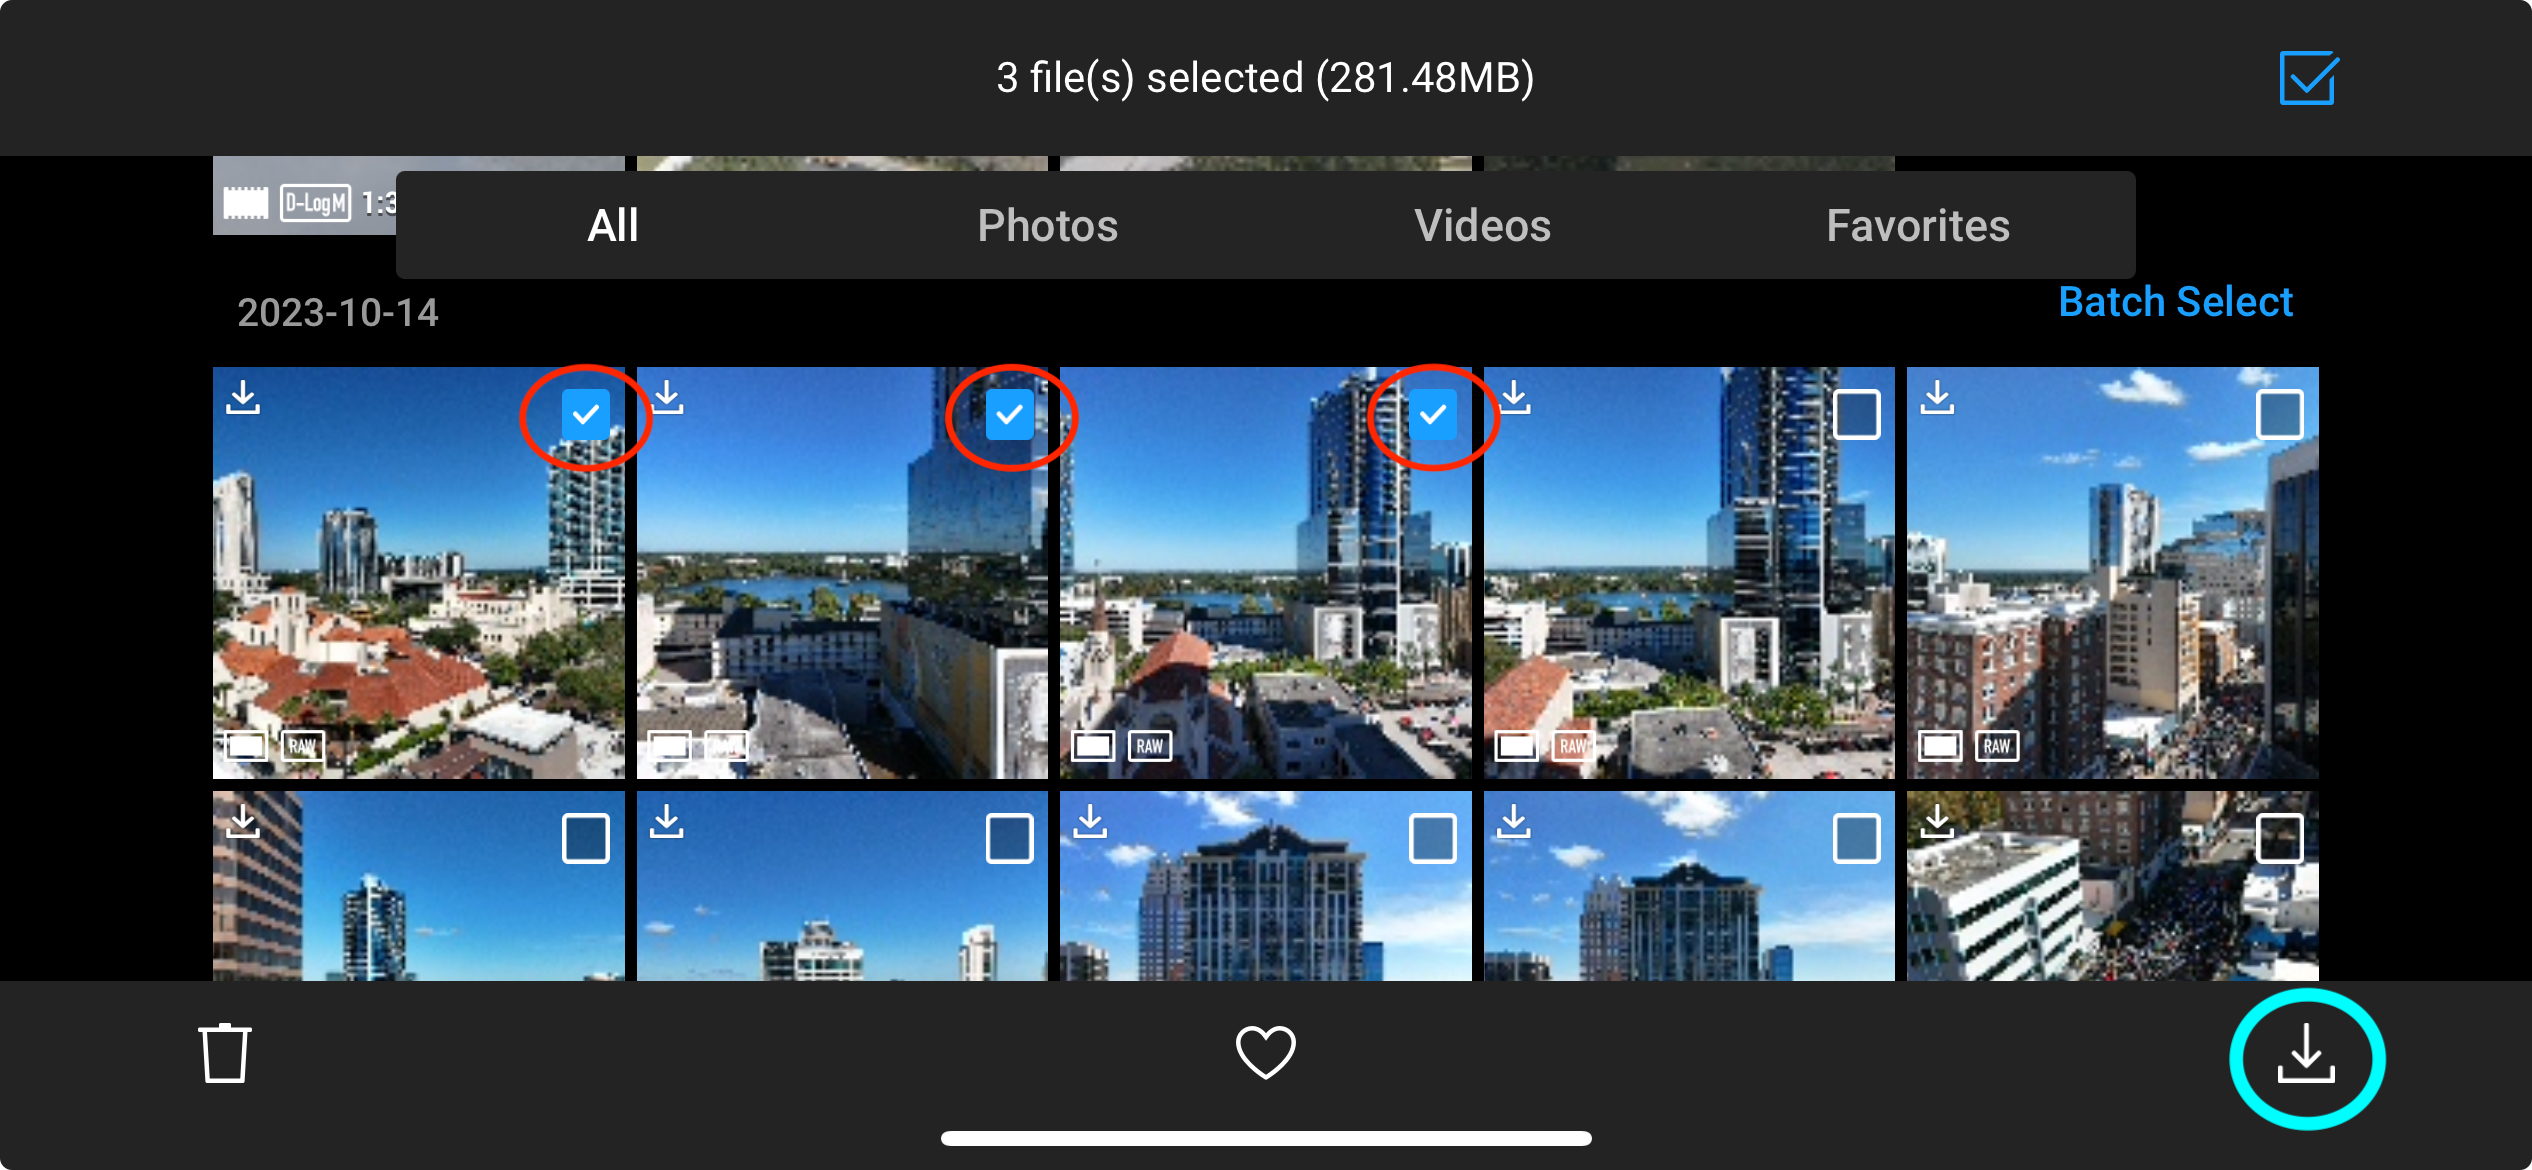
You’ll see a progress bar and indicator letting you know the file(s) are downloading.
You can then access these files from within your phone or tablet editor or photo-browsing app of your choice.
» MORE: How to Download DJI Video to iPhone (Step-by-Step Guide)
QuickTransfer Feature
The quick transfer feature allows you to wirelessly export content from your Mini 4 Pro’s SD card to an Android or iOS (Apple) smartphone or device, all without having to power on the remote controller.
This is ideal for those who would like to quickly edit their photos or videos and immediately share them with family, friends, or on social media.
The items needed for the QuickTransfer feature:
- Mini 4 Pro (remote controller not required)
- Your smart device/phone
- DJI Fly loaded on the smart device
Note: If using a DJI RC2, you cannot use the QuickTransfer feature to export photos and videos to the remote controller. The RC doesn’t have editing functions, so transferring content is not supported. Editing needs to be done on an Android or iOS smart device
To use the QuickTransfer feature:
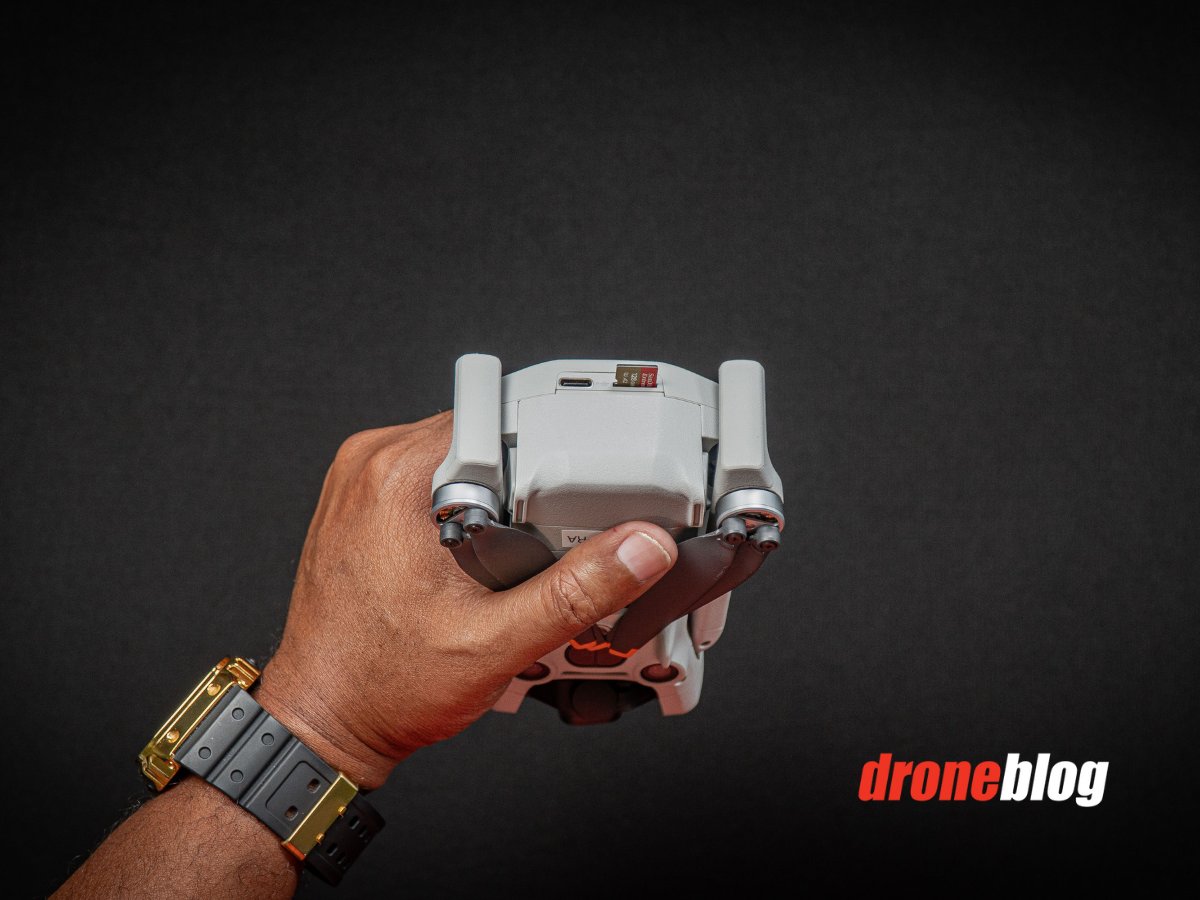
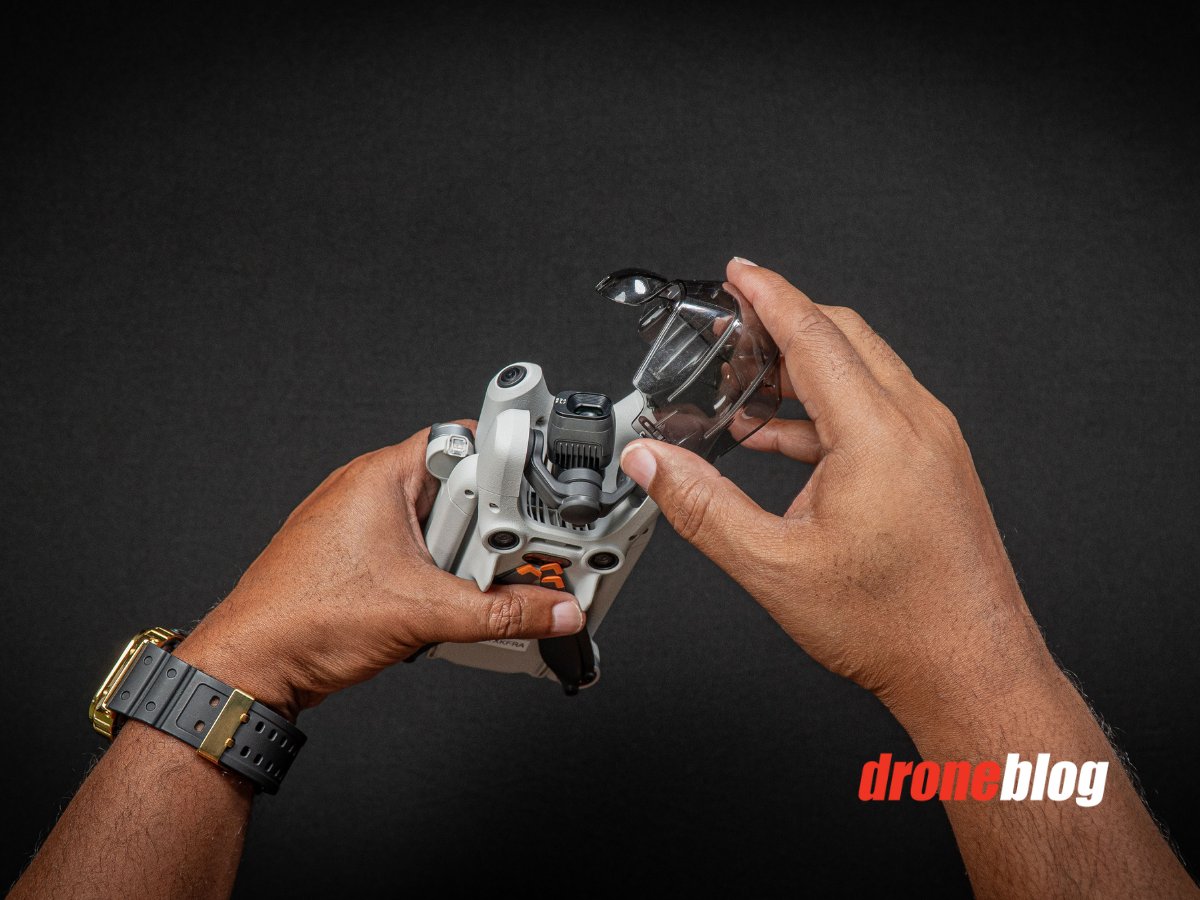
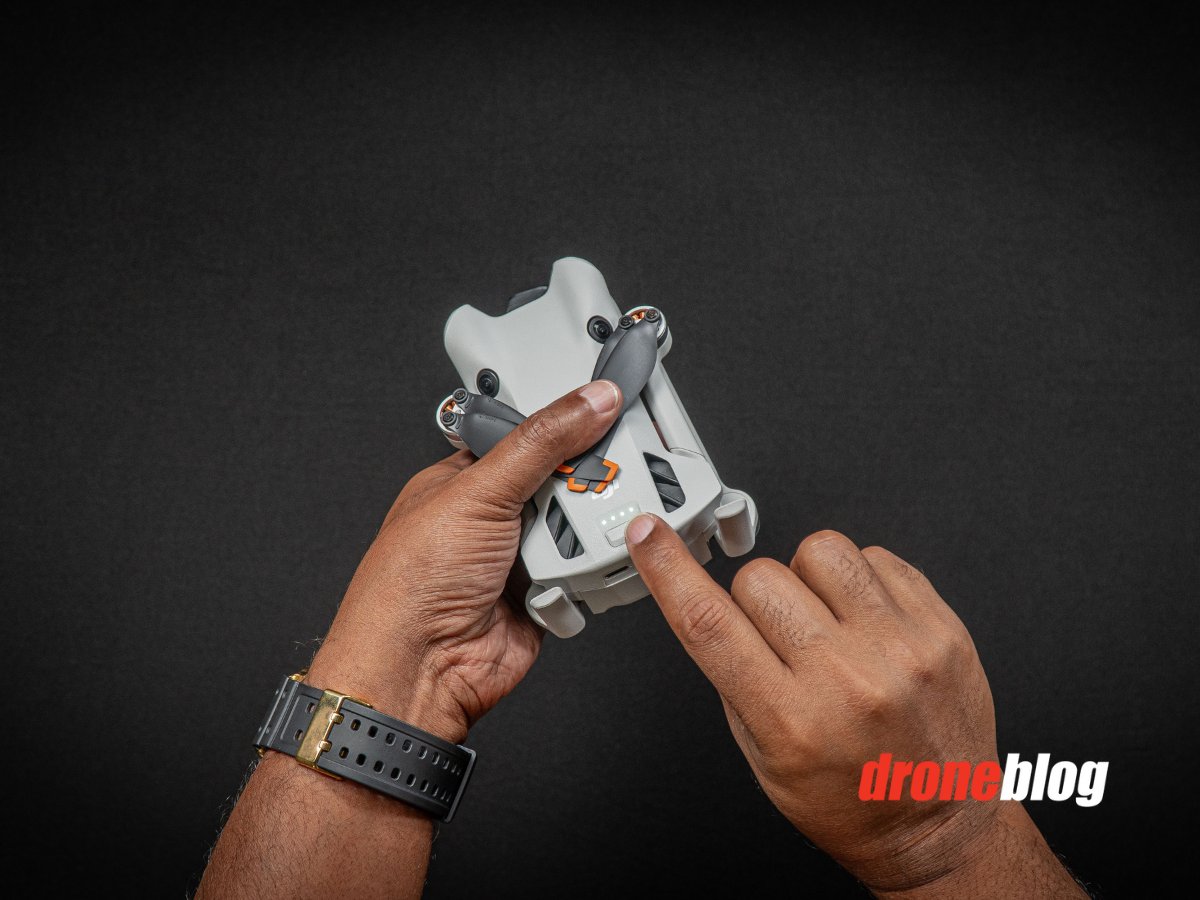
Step 1: Remove the gimbal guard and power on the Mini 4 Pro.
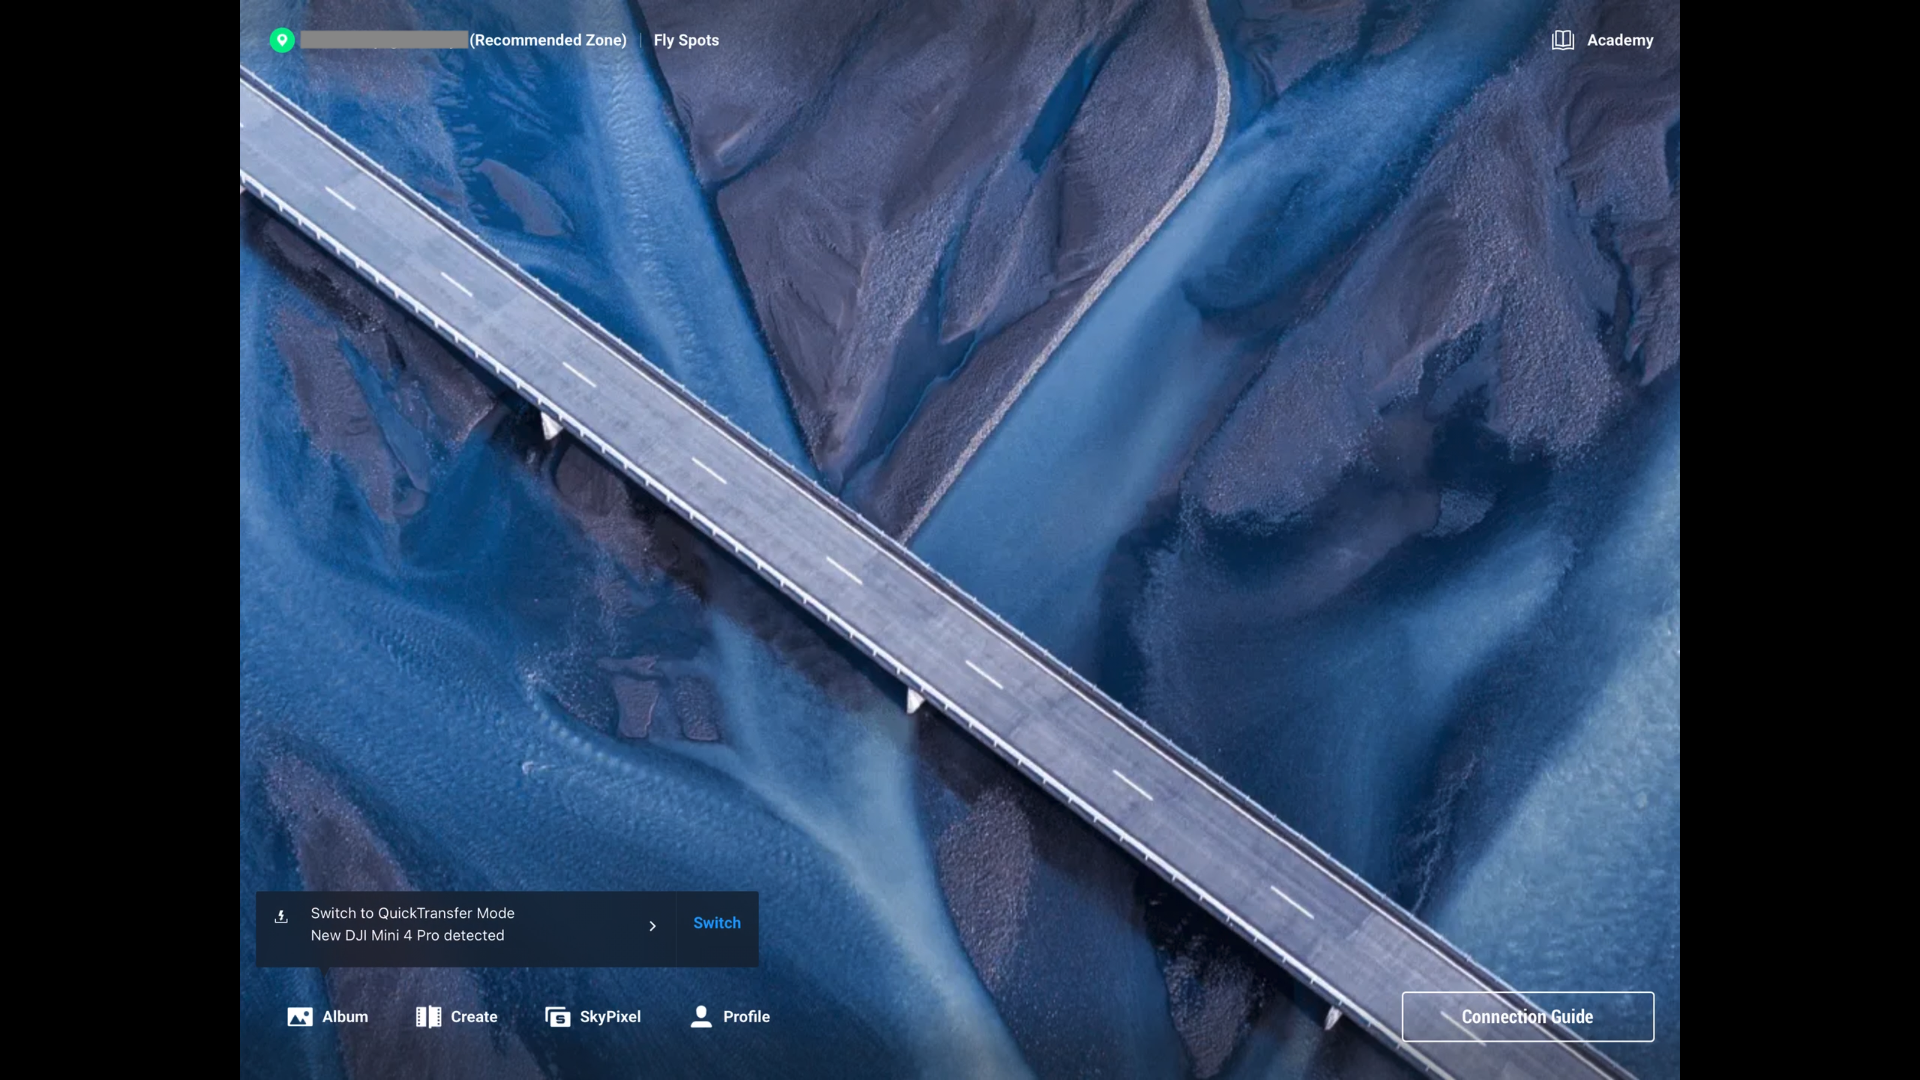
Step 2: Open the DJI Fly app
There will be a message stating Switch to QuickTransfer Mode. Select Switch.
Step 3: For those who have never done a QuickTransfer, you will be asked to Press and hold the power button for 2 seconds on the Mini 4 Pro, to connect DJI Fly to the Mini 4 Pro.
Press and hold the power button for 2 seconds.
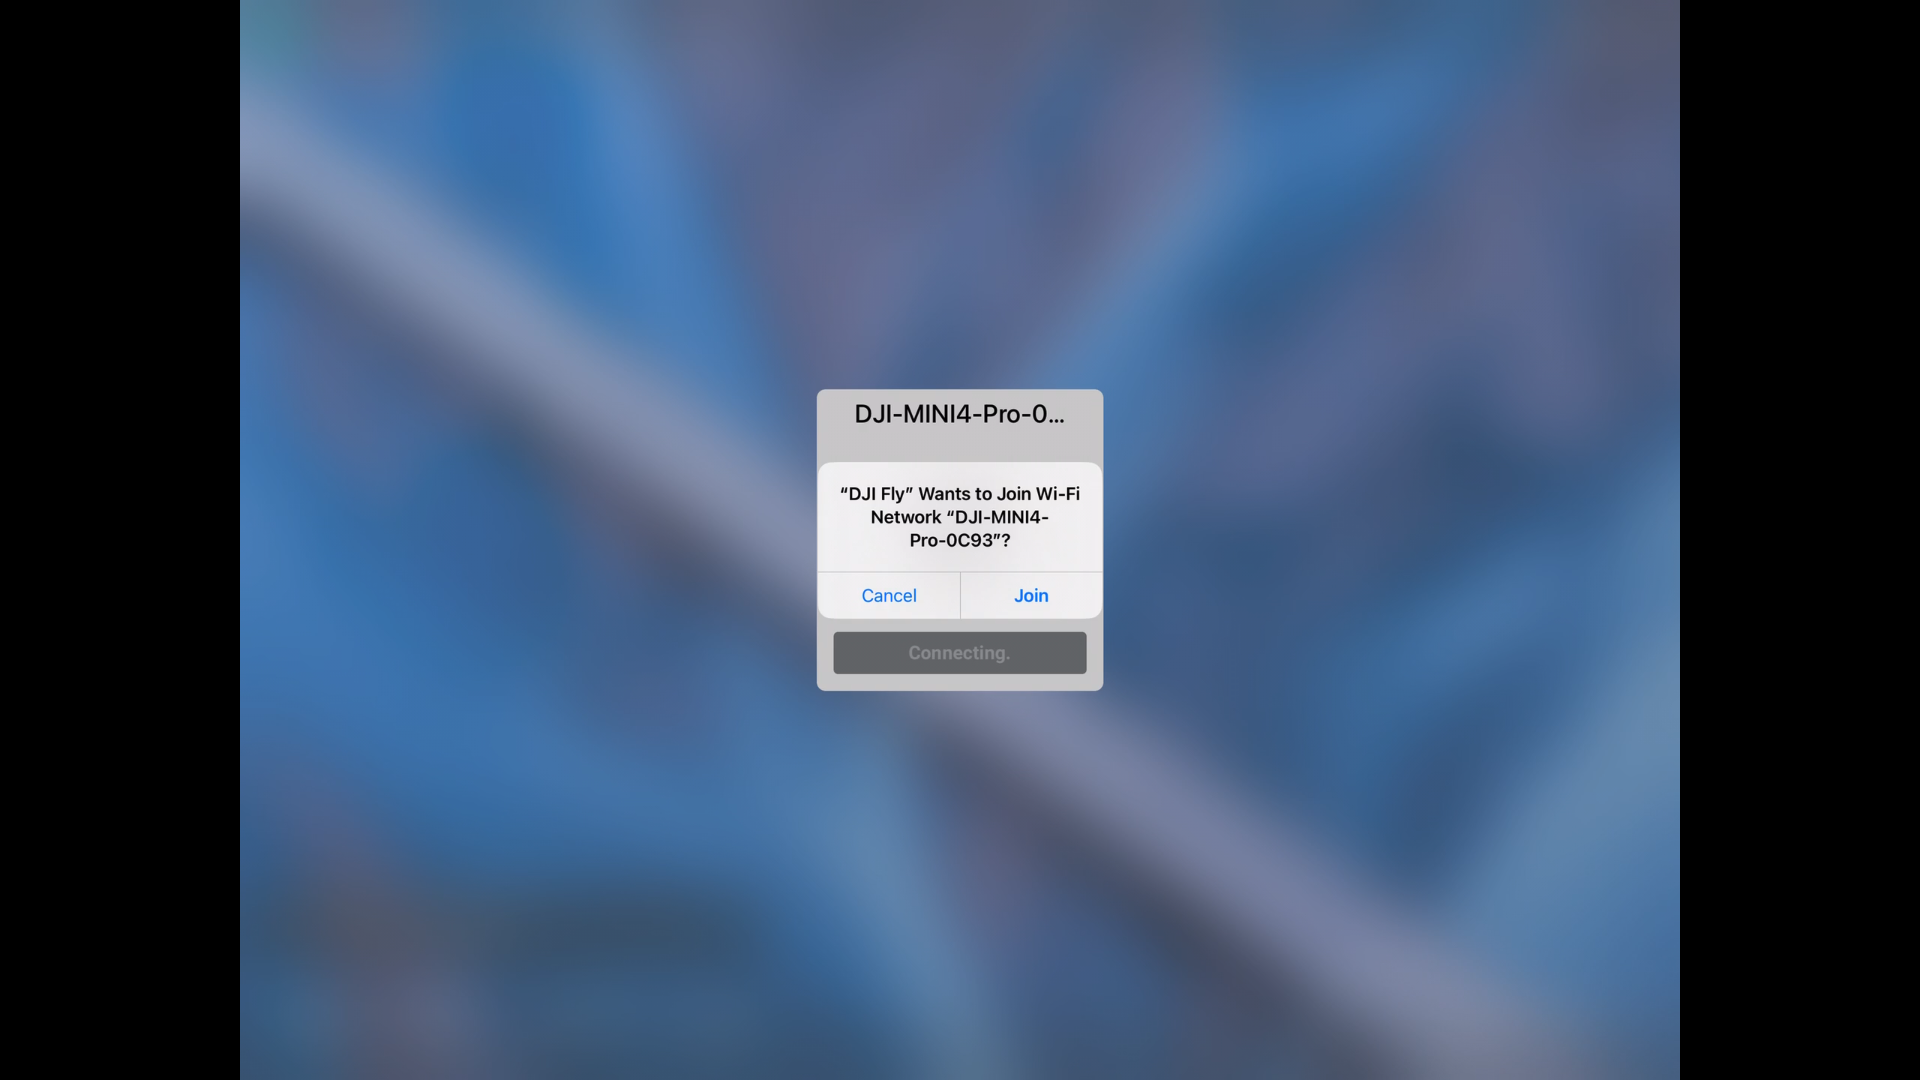
Step 4: After pressing and holding the power button for 2 seconds, you will be asked to join the DJI Mini 4 Pro network. Press Join.
Step 5: Press View Album to see the content on the Mini 4 Pro SD card.

You can then choose to view Photos, Videos, or all content.

Step 6: Press the checkmark in the upper right-hand corner to enter batch select mode, where you can either individually select files to download or batch select multiple files.
Select the files needed, then press the download button on the bottom right-hand corner.
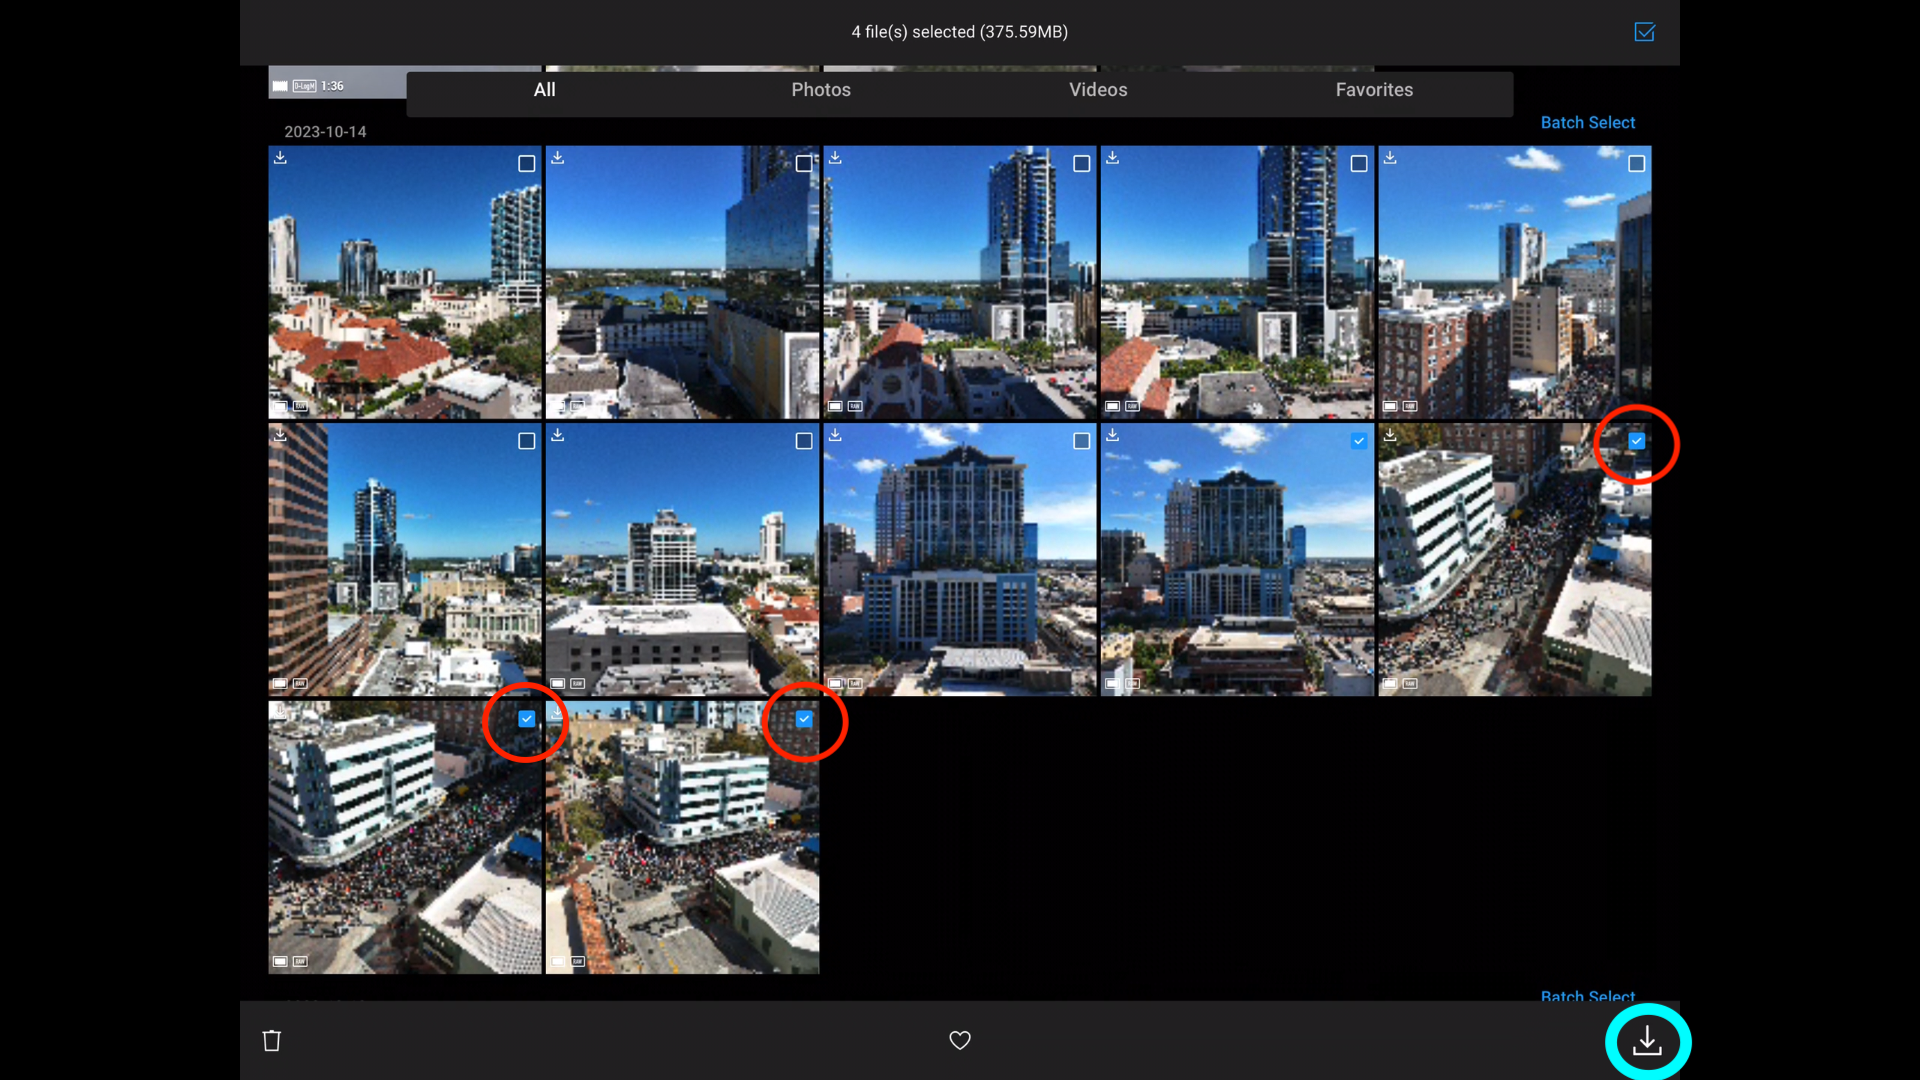
You’ll see a progress bar and indicator letting you know the file(s) are downloading.
You can then access these files from within your phone or tablet and use the video/photo editor or photo gallery of your choice.


