
I’ve tested many cinewhoops in the past few years, and the GEPRC CineBot25 is perhaps my current favorite 2.5″ cinewhoop. So much thought has gone into its design, and the attention to detail is simply amazing. While it’s not perfect and has a few annoying issues, as you’ll discover in this review, these quirks don’t detract from its impressive performance.

Learn about Cinewhoops: https://oscarliang.com/cinewhoop/
Where to Buy?
You can get the GEPRC CineBot25 from these vendors:
There are two versions: Standard (non-S) and Sport (S). The S version features larger 1505 4300KV motors, which are an upgrade from the 1404 motors in the standard version, delivering more power and stability.

Batteries are not included, my recommendations are the Lava 4S 850mAh:
Get some spare propellers if you plan to crash 🙂
Specifications

- Frame: GEP-CT25 Grey
- Wheelbase: 115mm
- Flight Controller (FC): TAKER G4 45A AIO
- MCU: STM32G473CEU6
- Gyro: ICM 42688-P
- Firmware: TAKERG4AIO
- Motor: SPEEDX2 1505 4300KV
- ESC: BLHeli 32-bit 45A
- Propellers: HQProp DT63mm x4
- Connector: XT30
- Official Weight:
- Standard PNP Version: 138g ±1g
- Sport PNP Version: 145g ±1g
- Recommended Battery: 4S 650mAh – 850mAh LiPo
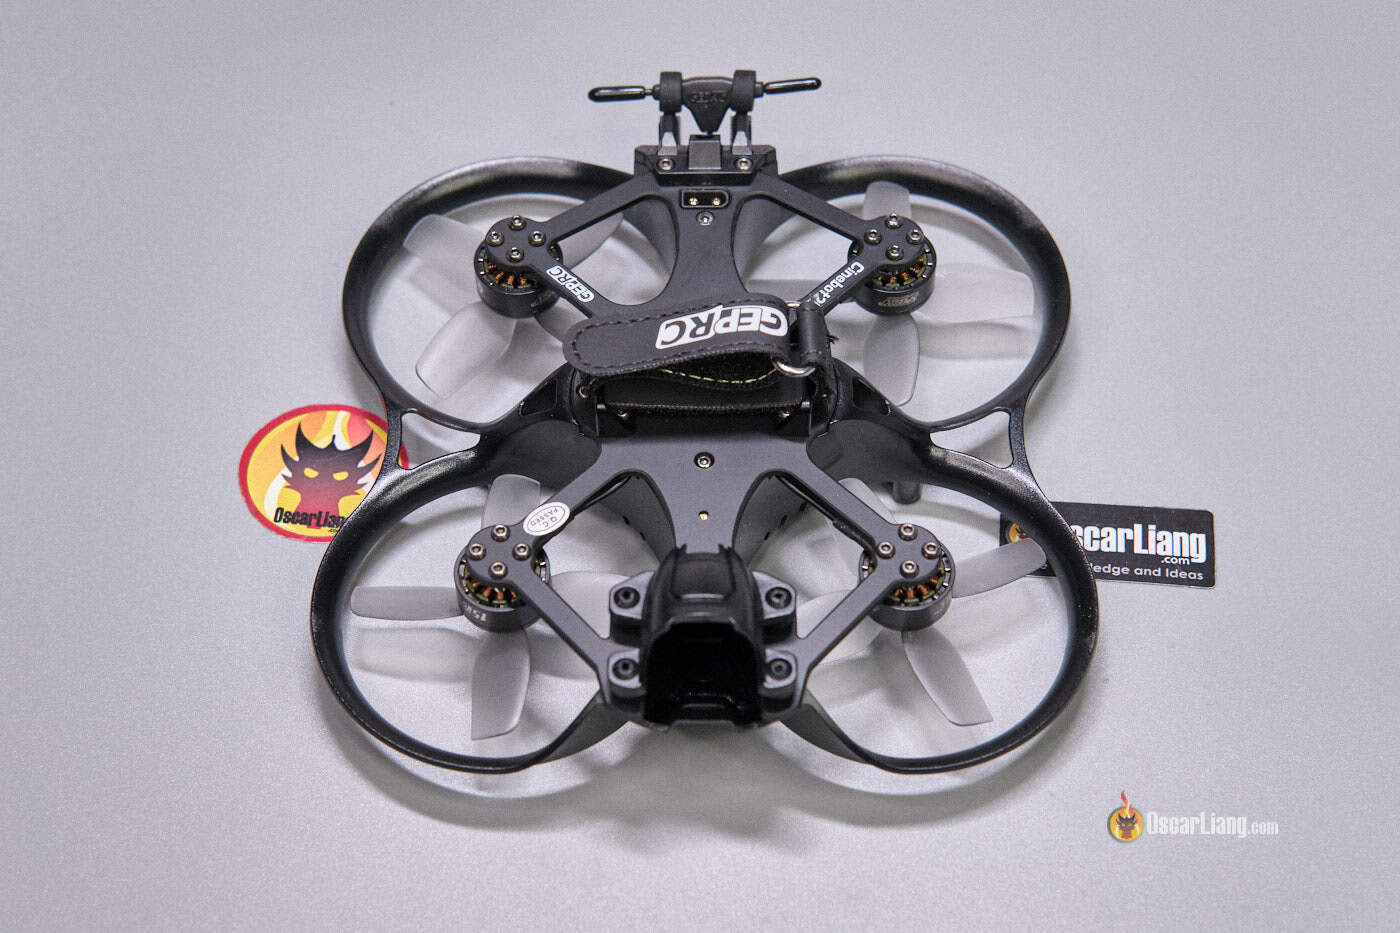
Closer Look at the Build Quality
The GEPRC CineBot25 S stands out with a robust, sleek design. The camera, motor, and flight controller are mounted on the top plate, which is made from smooth-layered carbon fiber, offering a lightweight yet durable feel.

Below the top plate is a removable plastic housing for the VTX and receiver. The electronic components are well protected, but the enclosed design might compromise cooling in hot environments.

The FPV camera is mounted within a dedicated soft-mounted canopy that limits extreme camera angles but offers adequate protection.

An external HD camera can be hard-mounted using the provided adapter, but it’s best to avoid adding extra weight like a naked GoPro. While it may work for slow and steady indoor shots, it compromises outdoor agility and speed. The DJI O3 system already provides excellent image quality anyway.

Two battery straps of different lengths are included: a longer one for 4S 750mAh and 850mAh batteries, and a shorter one for smaller 4S 650mAh batteries. The drone weighs around 153 grams without the battery, camera, and VTX, which is almost 10 grams heavier than the BetaFPV Pavo25 V2. However, this added weight is understandable given the extra plastic used for protection.
With the DJI O3 system installed and a 4S 850mAh LiPo, the total weight is around 290 grams.

Here are some side by side comparisons to the BetaFPV Pavo25 V2:


DJI O3 Setup
Although the CineBot25 supports various FPV systems, including analog and Runcam Link/Wasp, the soft-mounted camera platform is a clear indication that it’s specifically designed for the DJI O3 system. Other FPV cameras aren’t as susceptible to jello and vibration as the O3, making additional soft mounting necessary. I really like GEPRC’s implementation using silicone balls as it works exceptionally well.

However, the camera canopy can easily pop off during crashes, and it’s challenging to reattach due to how tiny and soft those silicone balls are. They are also quite fragile, metal tools can easily pierce through them. While GEPRC provides some tools to help with this, it’s a hassle remembering to bring them along. Zip ties can secure them but will reduce the effectiveness of the soft mounting.

User Friendly Design
One of the best design aspects of the CineBot25 is how easy it is to access the flight controller and DJI O3 USB port. There’s a USB-C port at the rear of the drone, connected to the flight controller via an extension board.

You can access the DJI O3’s SD card slot and USB-C port through a cutout in the plastic housing, and when not in use, you can put the rubber cover back on to protect it from dirt and water.


There’s no need to disassemble the drone or use an adapter to access these USB ports, making it incredibly convenient. You can tell how much thought has gone into the design.
However, one small issue is that I couldn’t connect or flash the ESC via the USB port at the FC extension board. I had to use the actual USB port on the FC, which requires disassembling the drone. They could have used a USB-C extension cable like Speedybee did in the Bee35 to maintain compatibility. But it’s not a big deal since you don’t typically need to flash your ESC.
Dissembling the drone for repair is easy too.

Here’s a close up shot of the flight controller.

Flight Performance
The CineBot25 S is simply one of the best flying 2.5-inch cinewhoops I’ve tested—very stable, well-tuned, and with plenty of power for freestyle.
It’s also very efficient. I tested mine with LAVA 4S 850mAh LiHV batteries from BetaFPV and got around 5 to 6 minutes of flight time (a mix of aggressive flying and cruising), which is very impressive.
The DJI O3 VTX system, paired with a soft-mounted camera, provides crisp FPV footage without any jello.
How to Setup
Although initially I was impressed by the CineBot25’s design, the setup process took a bit more effort and time than expected.
O3 Installation
First thing is to install the DJI O3 system inside the plastic housing. Unfortunately, there’s no instruction provided, so you’ll need to use your imagination. I must admit it wasn’t easy at all as I spent over almost an hour trying to find the best way to mount the O3. Eventually I decided not to use the provided heatsink and just mounted the O3 directly inside the plastic housing.


Also, unlike BetaFPV’s cinewhoops, GEPRC doesn’t provide any cable for the O3, but you can use the original cable, so it’s not a huge issue if you still have it. Also there’s no screws provided for mounting the camera in the canopy – you will need M2 3mm.
Finally, make sure to tape the UFL extension to avoid electrical shorts! It they touches the exposed battery solder pads could fry your O3!
Binding Receiver
Here I encountered another issue – the receiver does not get power from the USB port, you must plug in a battery.
I was going to flash the latest ExpressLRS firmware to the receiver along with my binding phrase, so I needed to find out what target it uses. That was accomplished by going into WiFi mode (by plugging in battery and wait 60 seconds) and checking on the Web UI .
Receiver target is: Generic ESP8285 PA 2.4Ghz RX, it comes with 3.3.1 firmware.
However, I couldn’t find this target in the latest ExpressLRS Configurator, so I didn’t update the firmware but set the binding phrase in the Web UI.
Betaflight Configuration
Setting up Betaflight for maiden flight was straightforward.
The CineBot25 comes with Betaflight 4.5.0. The flight controller target is TAKERG4AIO. You can find the original CLI diff here (link to be added).
- In Preset tab, apply ExpressLRS Preset based on the packet rate of your choice.
- In PID Tuning tab, set your own rates.
- In Modes tab, assign switch for arming.
- In OSD tab, configure OSD elements. Although HD was selected, the canvas was stuck in analog size. I had to de-select and select HD again to get the larger HD OSD canvas.
Conclusion
I am blown away by the GEPRC CineBot25 S—it has one of the best design on the market, and the flight performance is excellent! While there are a few hurdles to overcome during setup, these are not deal breakers. If you’re looking for a 2.5-inch cinewhoop for the DJI O3 system, this is the one I’d recommend right now.
Get the GepRC Cinebot25 from these vendors:
Get some Lava 4S 850mAh batteries:
Get some spare propellers:
However, this drone isn’t designed for sub-250 grams in mind. You could probably push it under 250 grams by going analog or using a smaller battery, but you’d be better off with a 2-inch quad instead (check out the Pavo20). I also don’t recommend using a GoPro on the CineBot25; it kills its flight performance and flight time. If you want to use a GoPro, opt for a 3-inch or 3.5-inch quad.
For cinematic FPV flying and dynamic shots using the O3, the CineBot25 S offers fantastic design and performance at a fair price point. With its powerful motors and DJI O3 compatibility, it stands out as a strong contender in the cinewhoop market.


